We worked on the shed / meat chickens coop over the weekend. Moved it to a new location and sprucing it up for the 🐔 ♡


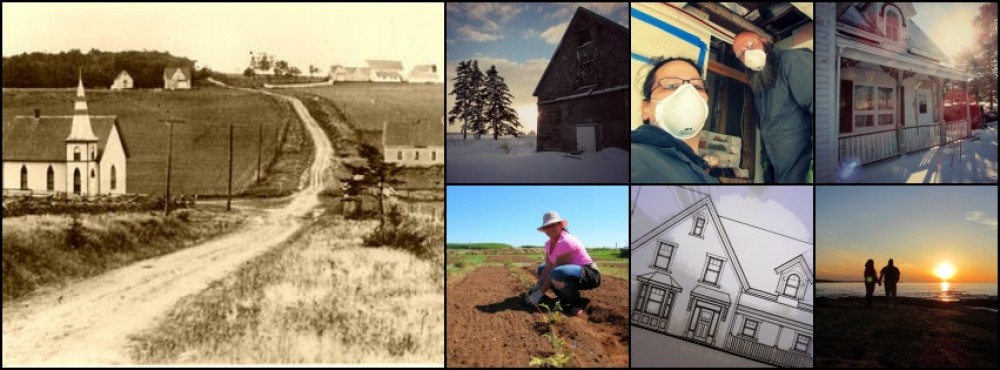
We worked on the shed / meat chickens coop over the weekend. Moved it to a new location and sprucing it up for the 🐔 ♡
….makes for a dull blog?
For what it’s worth, I’ve written several updates since my last post. Unfortunately they’re tucked away in the recesses of my brain waiting patiently for someone to shine a flashlight into the void, guiding their way out the darkness and onto your computer screen.
Until then, I humbly offer the following review of our summer.
My last post was full of anticipation for the upcoming growing season. Now we’re enjoying the early fruits of our labor and impending harvest.

For weeks now, the zucchini have been growing to mammoth proportions (which we’re processing into zucchini relish) and the zucchini we rescue from that fate end up on the grill with a little olive oil, sea salt and cracked pepper. Mmmm.
We harvested all of our garlic a few weeks ago, pulling them from their beds and hanging them to cure.
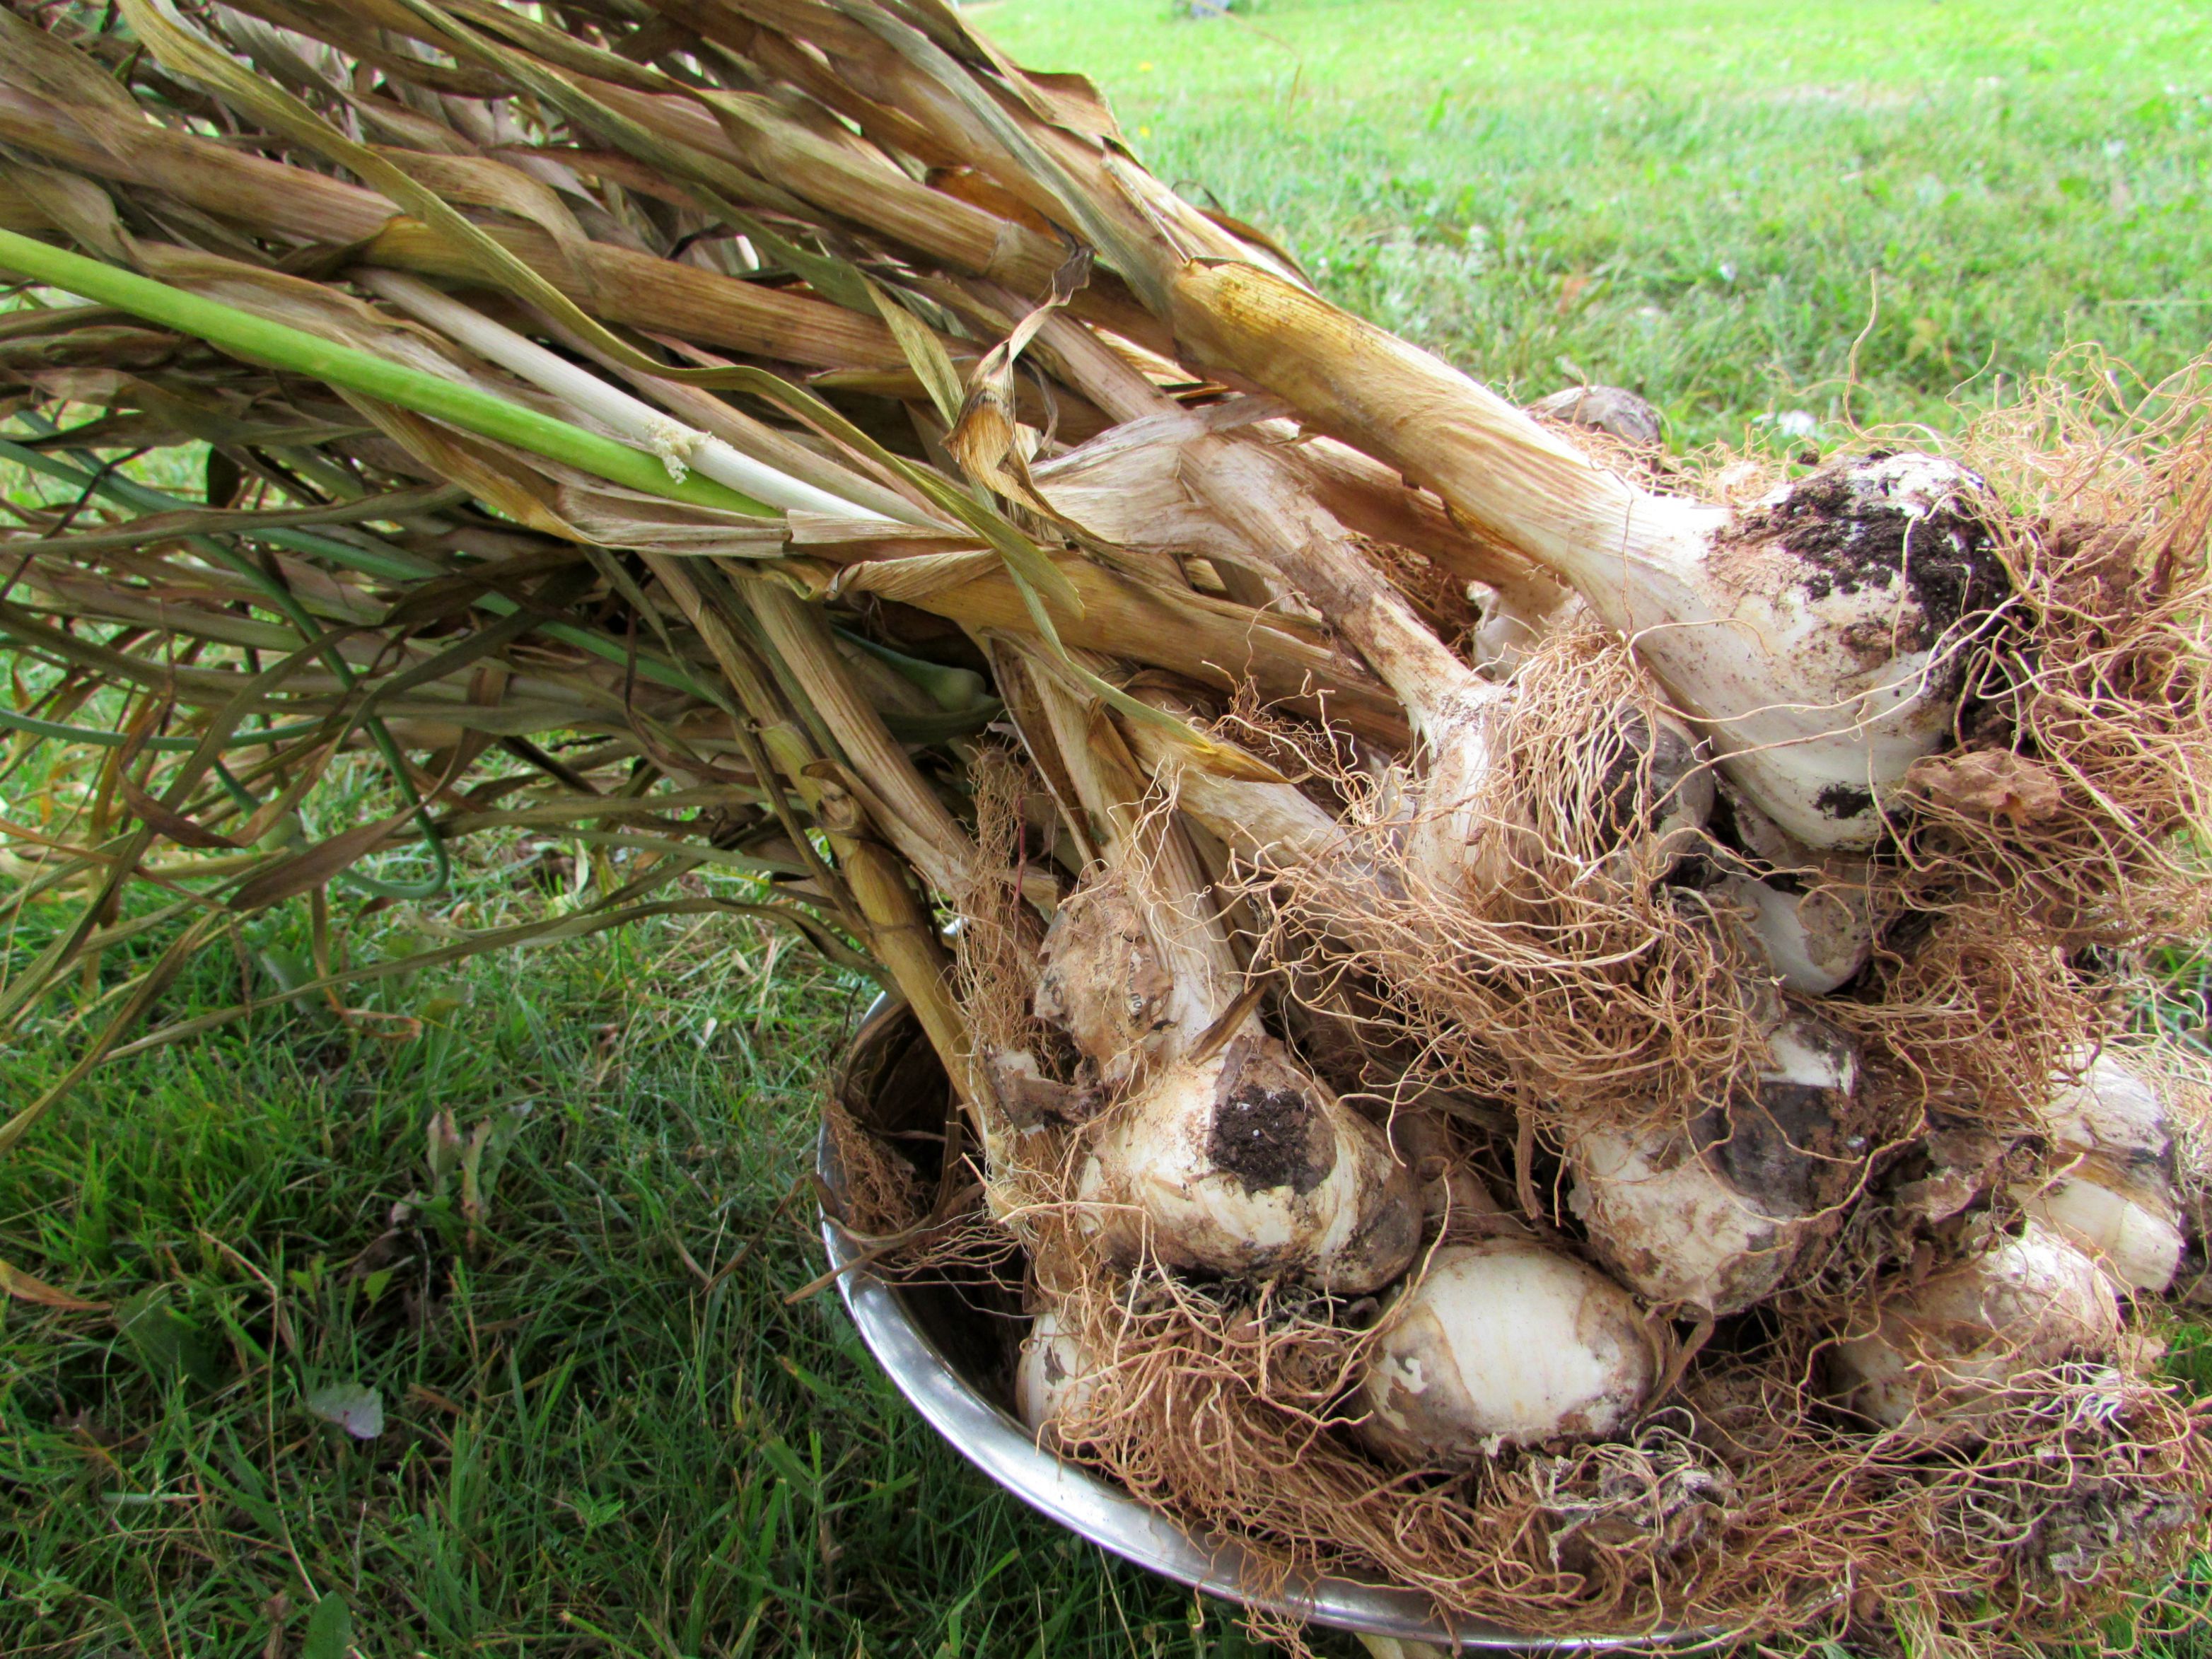
Each “leaf” of the garlic represents a layer of the paper surrounding the cloves. While the garlic is ready to use after harvesting, it’s important to dry the heads in order to store them for an extended period.
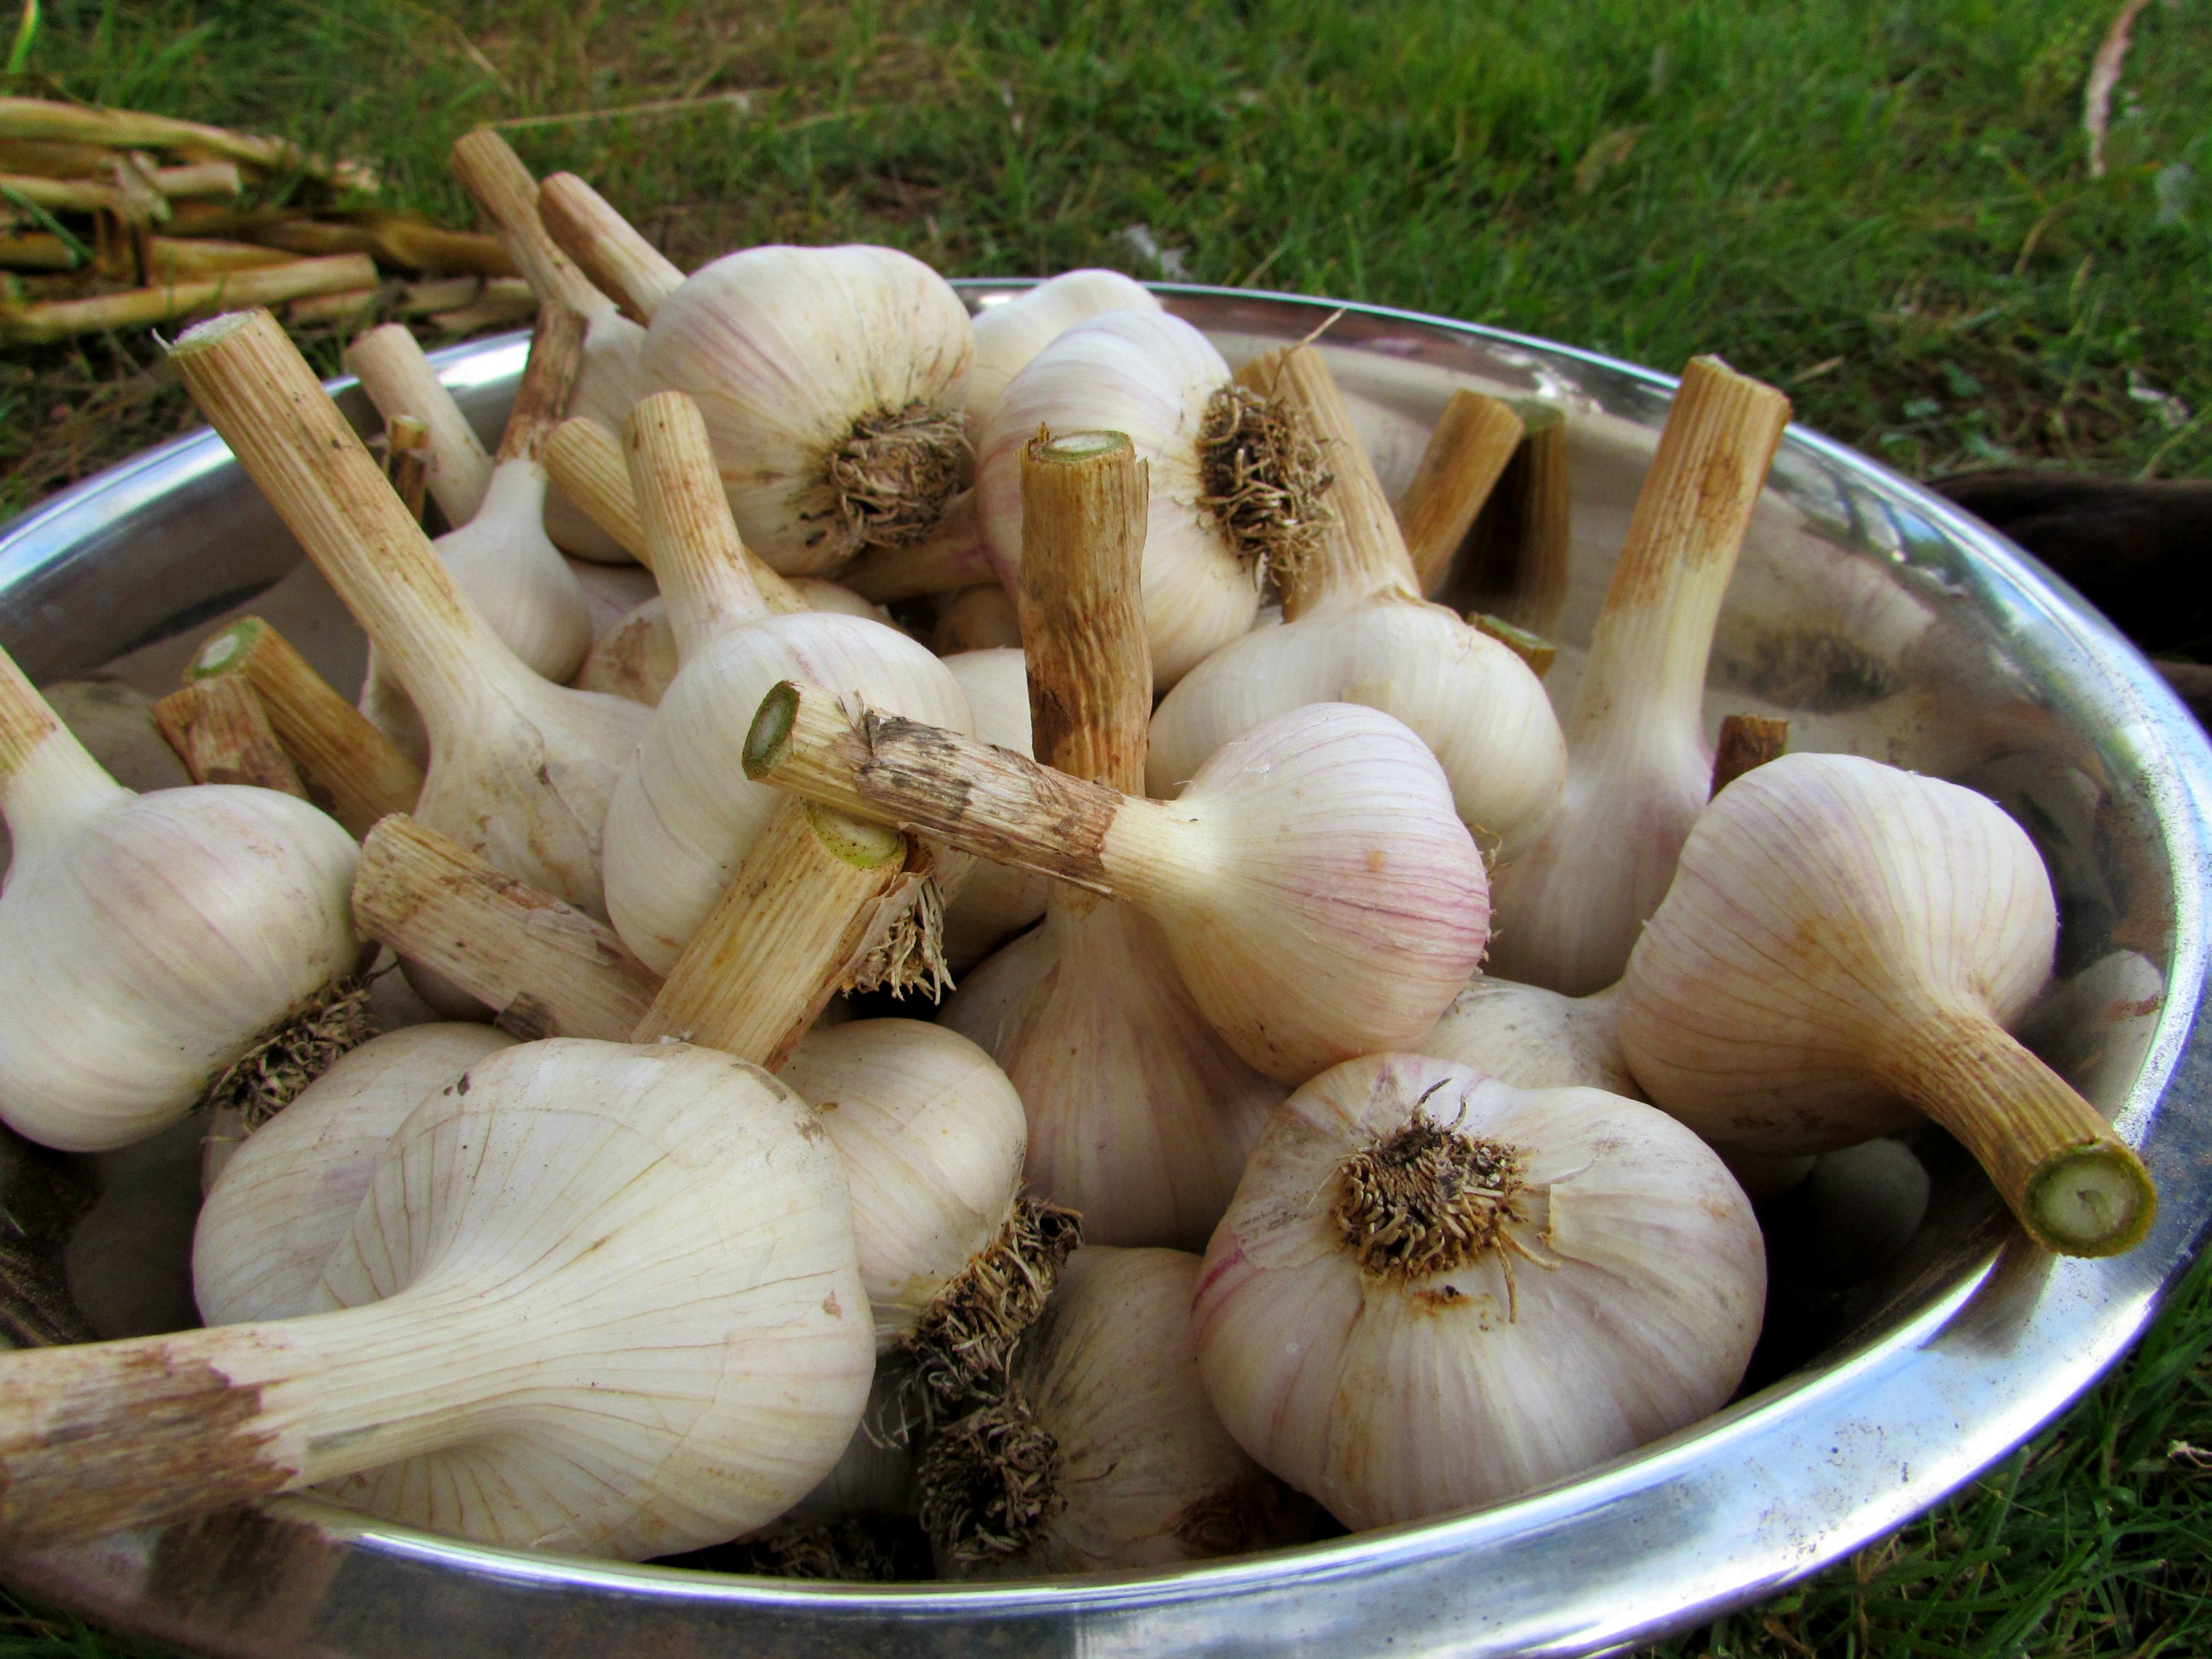
We let them cure for a couple of weeks in the warm, unfinished second floor bathroom of our home. Once sufficiently dry, we clipped the leaves and roots and have them ready to use for the next few months.

The beauty of growing our own garlic (aside from, you know, eating it) is that we have all we need to plant and grow next years’ supply. We’ll set aside the largest and best garlic heads and plant those cloves this fall for next summers’ harvest. Fresh food is awesome. FREE, fresh food is awesomer.
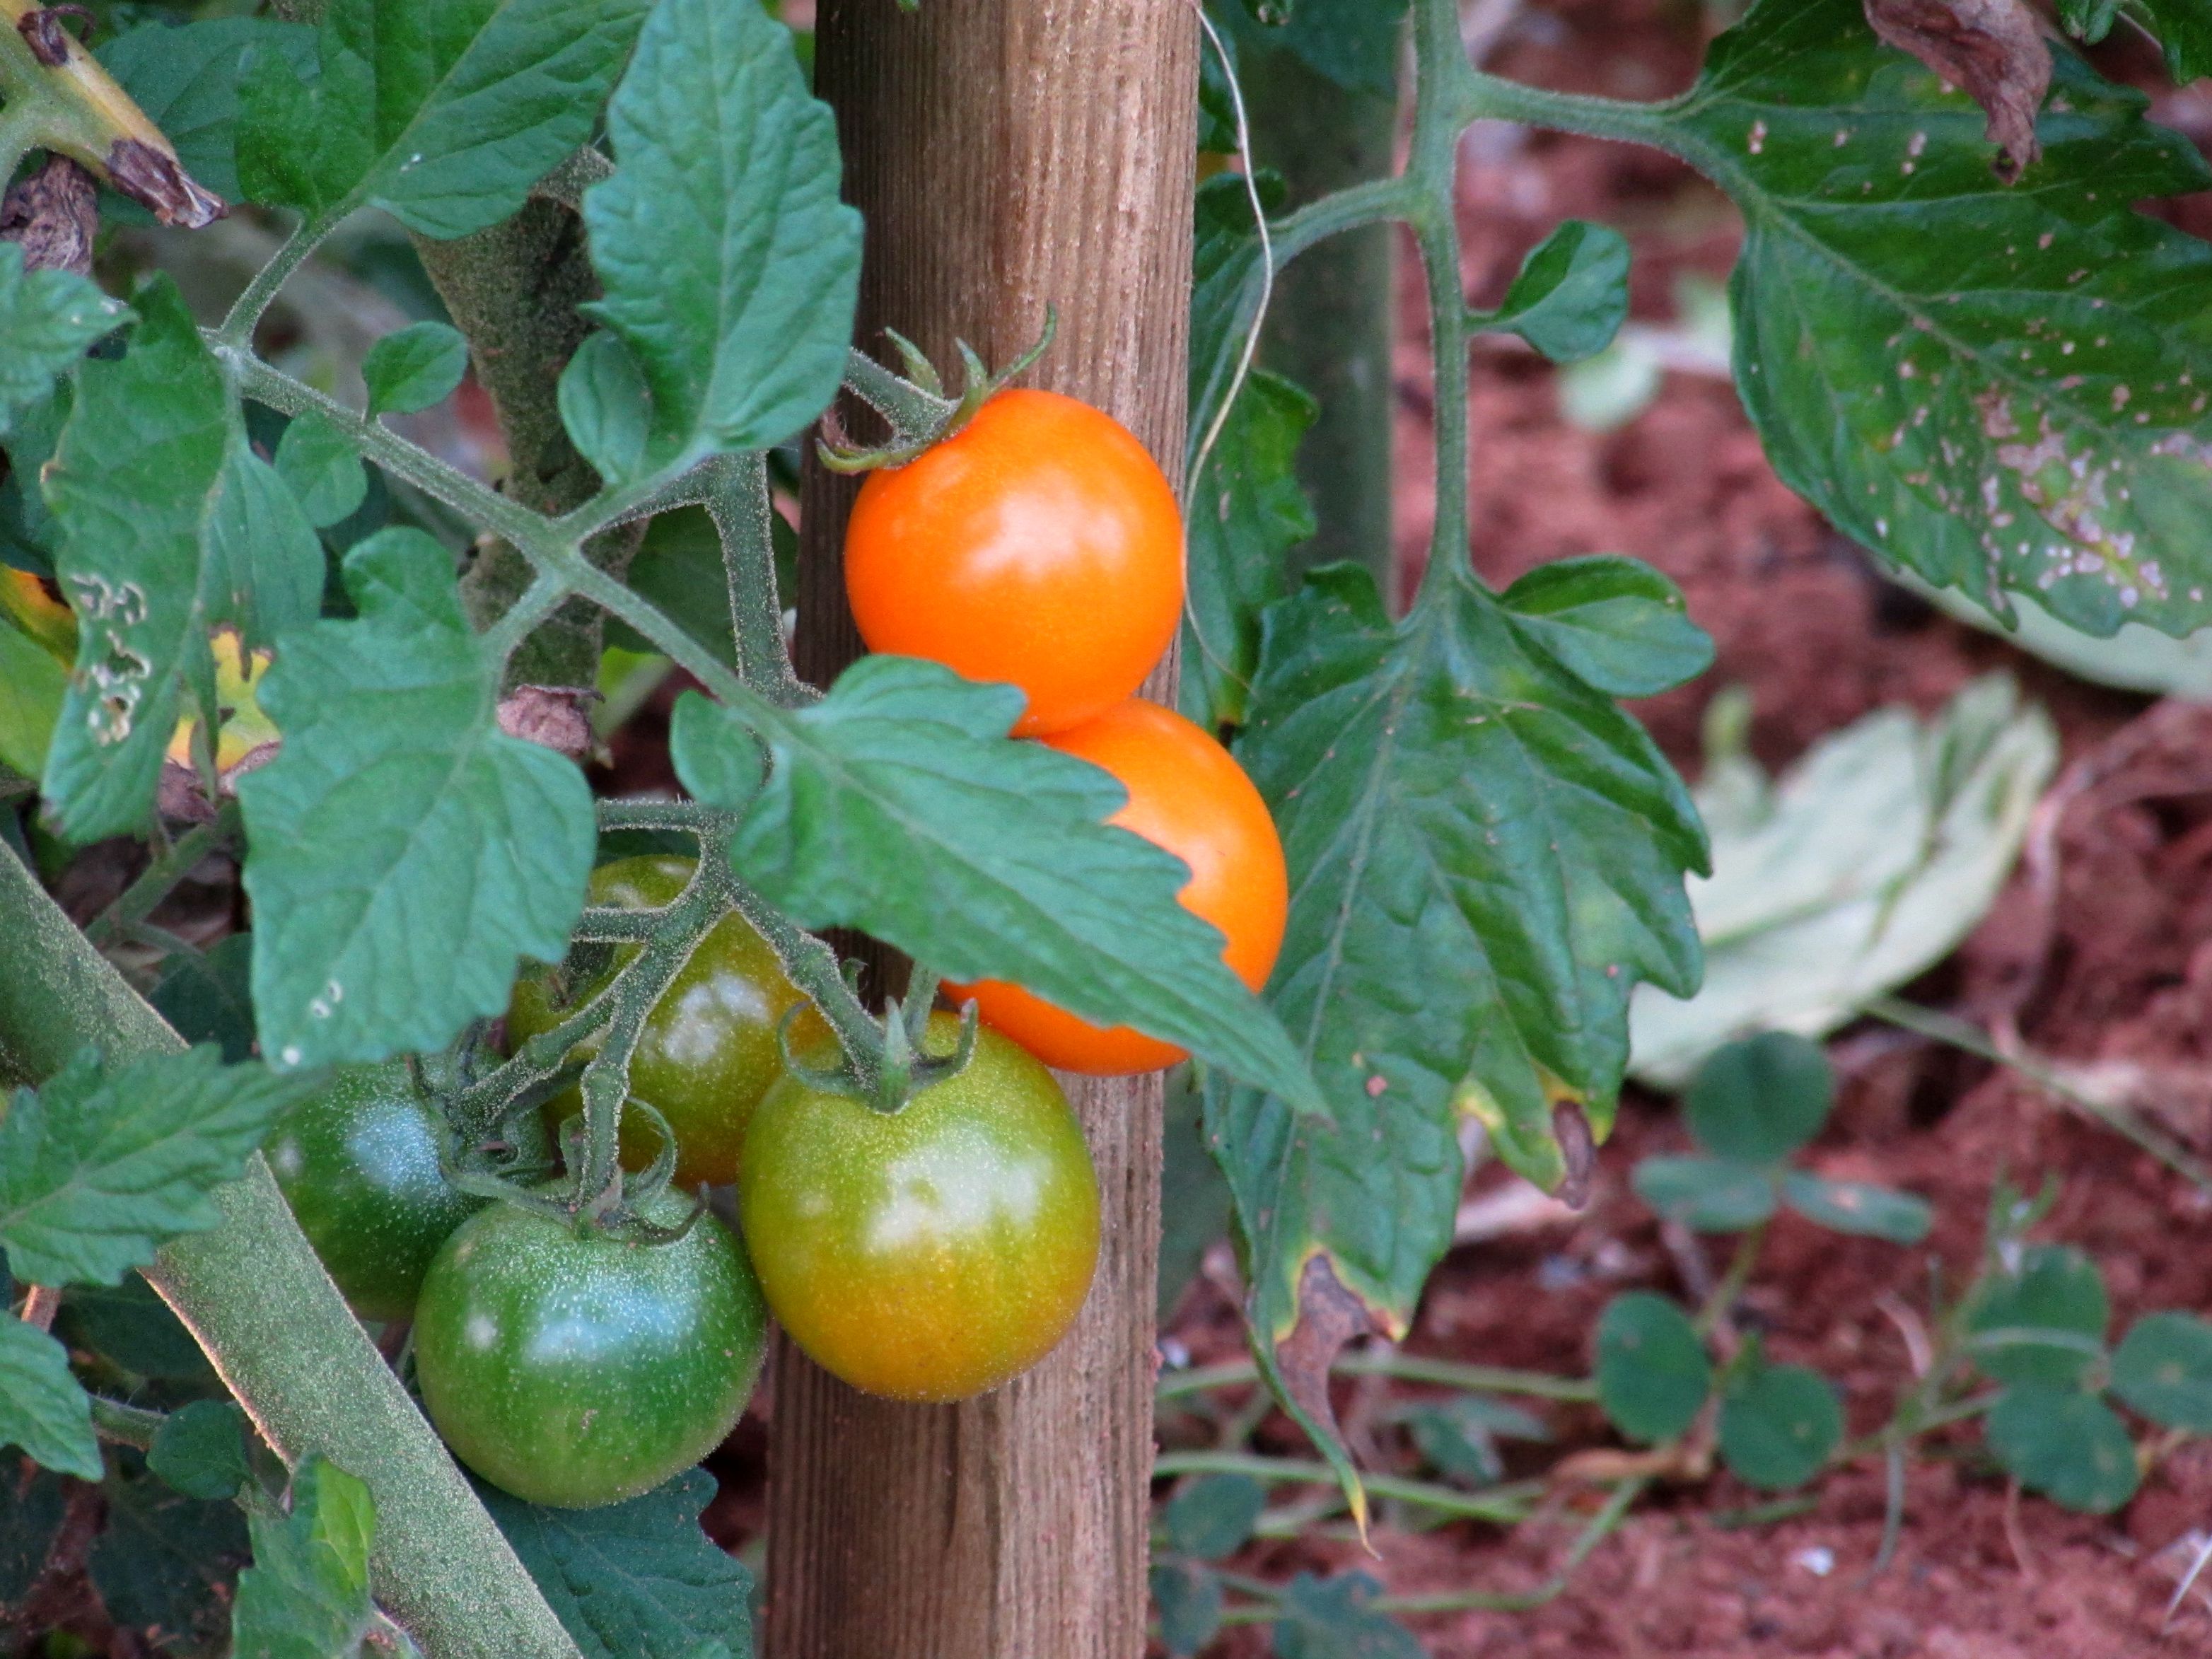
We’ve had a beautiful summer. Although dry, it’s been downright hot for weeks. The tomatoes are thriving and just starting to show signs of their maturity.
The peppers are plumping and the potatoes are nearing their harvest time. We’ve had one crop of peas already picked, another almost ready and a third crop growing for a fall harvest. Likewise with the carrots, beans and beets. Squash and pumpkins are flourishing in our lasagna beds and our second planting of cauliflower, broccoli, kale, collards and kholrabi will be ready in a few weeks.

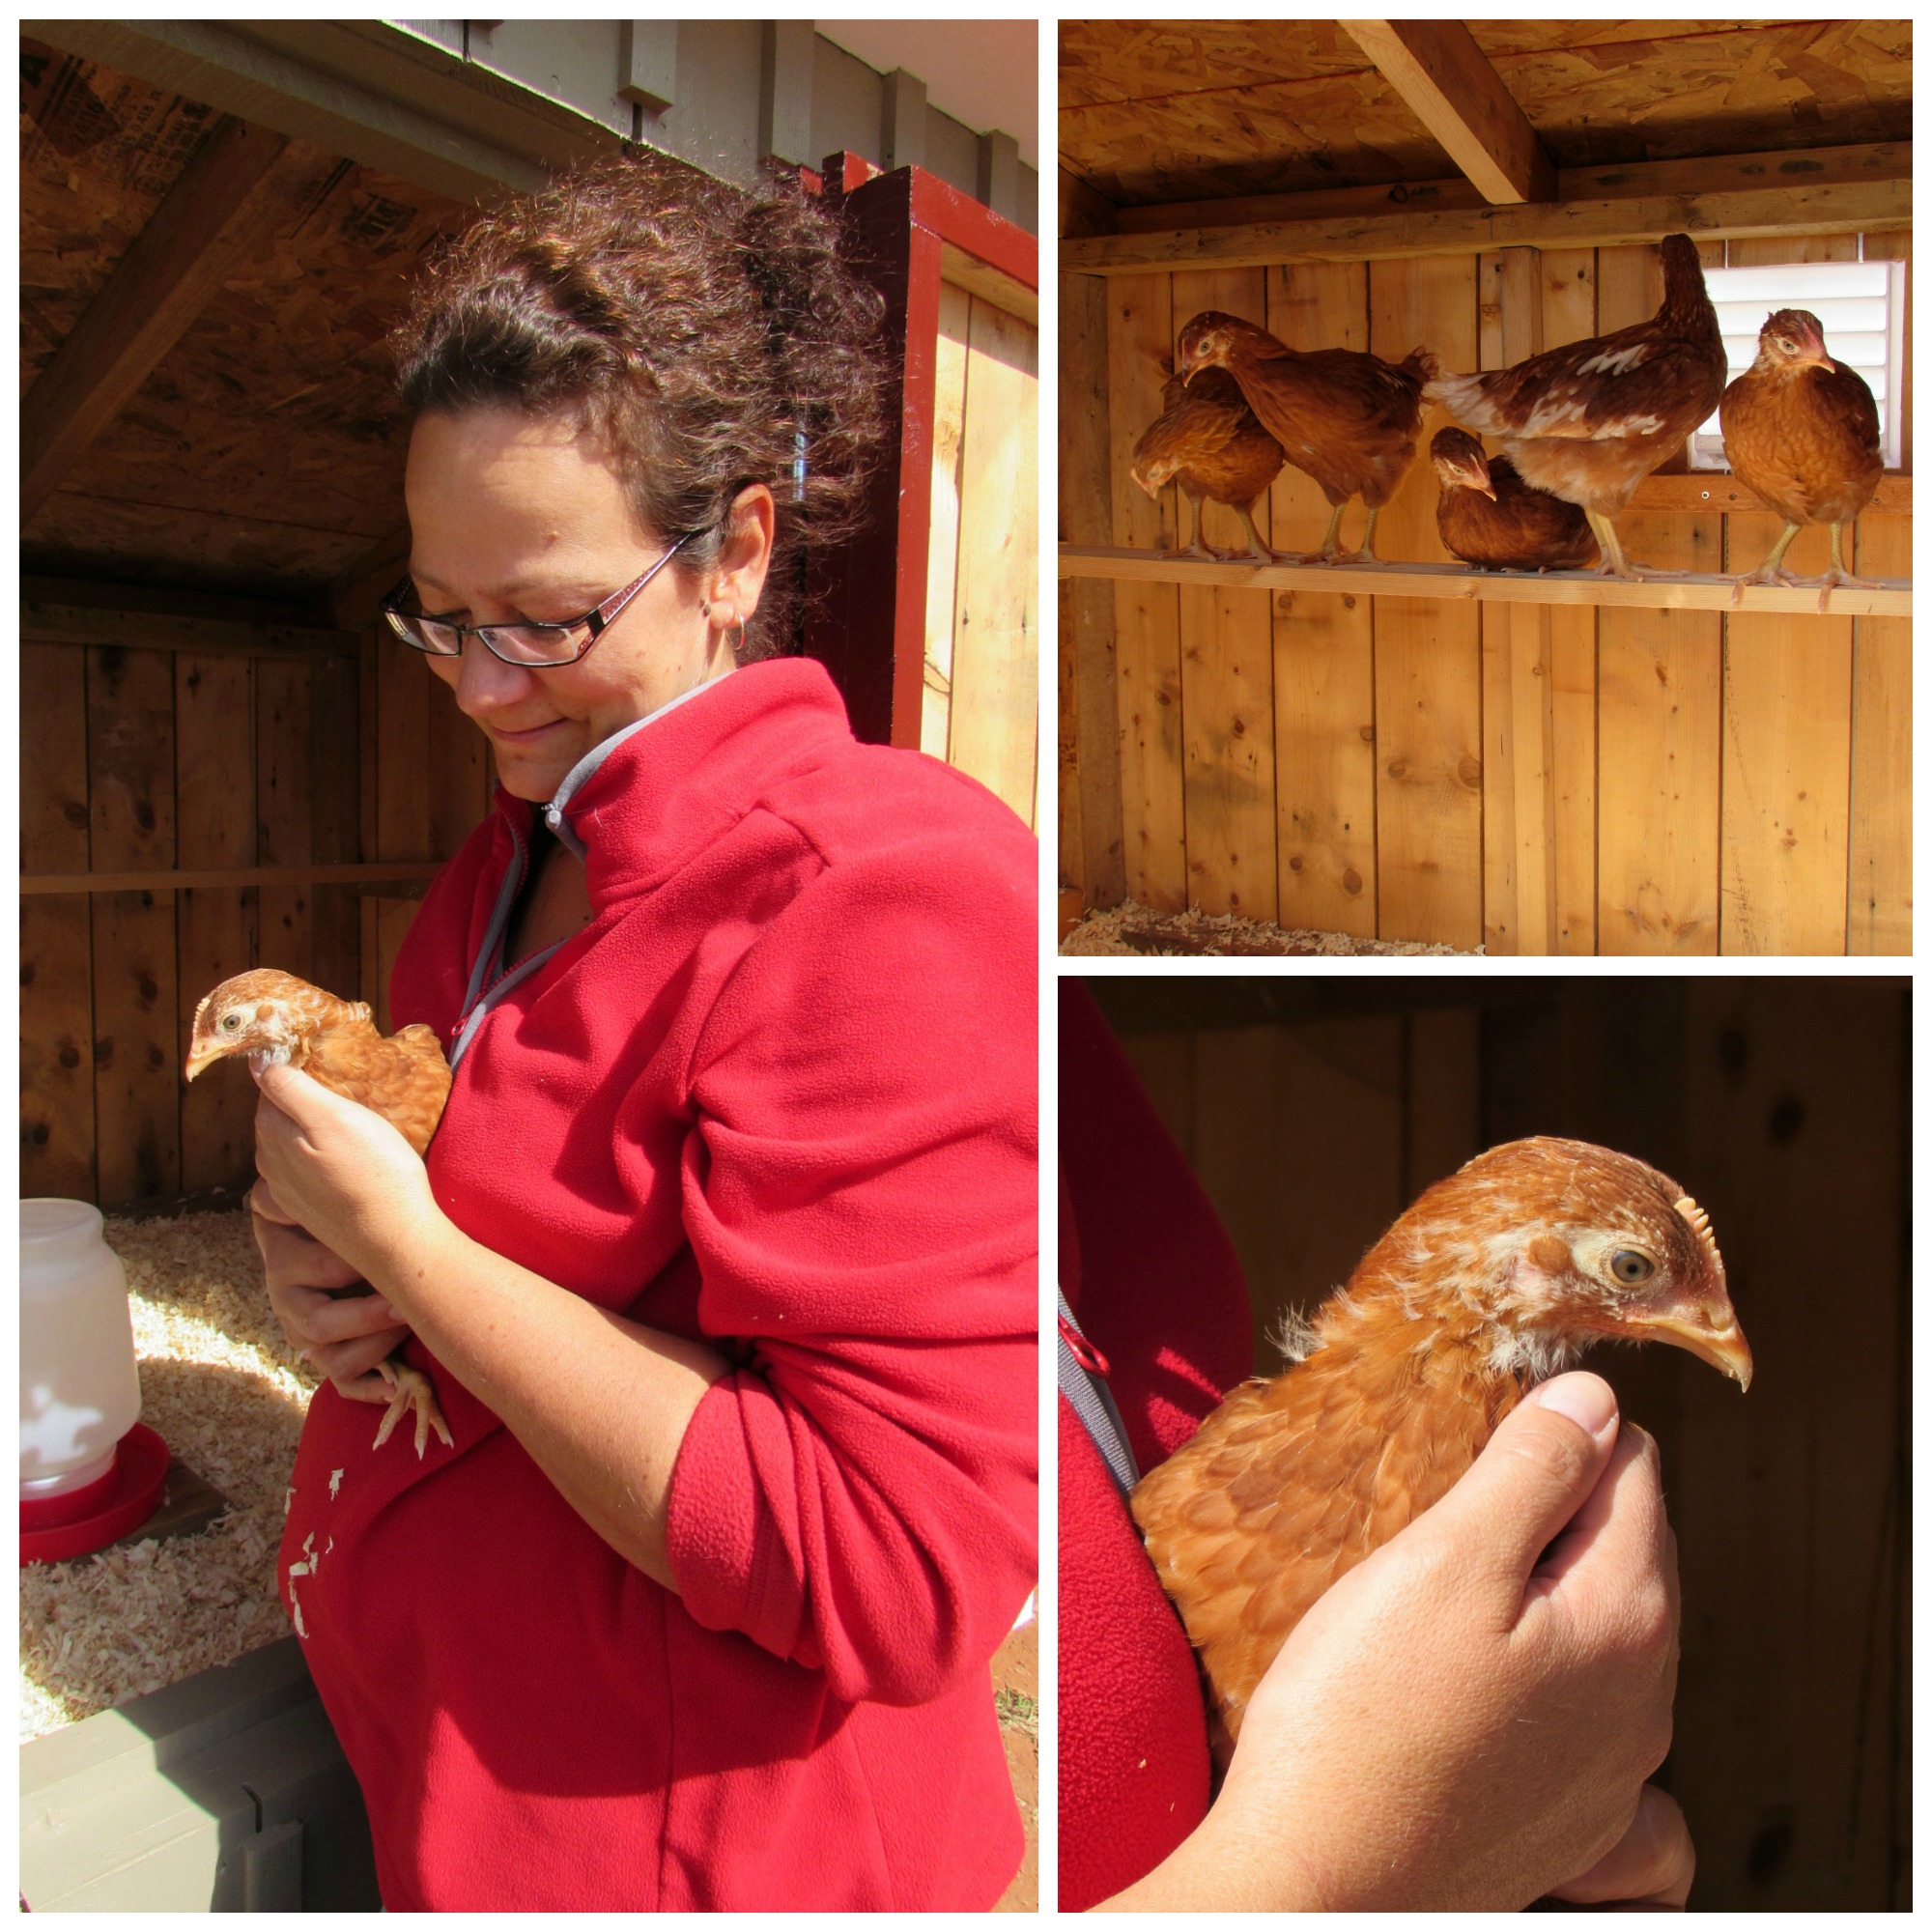
Aside from the gardens, our flock of hens grew by six this summer.

Violet, Pansy, Dahlia, Sunflower, Petunia and Lily have joined the Golden Girls – and at 18 weeks of age, they should start fulfilling their end of the bargain and begin to give us a daily egg each.
We had the pleasure of having my Mom visit for the majority of July. As much as she was looking forward to a visit, I think we enjoyed it as much or more.

Well, we certainly enjoyed exploring and discovering new restaurants and shops that Vanessa and I intended to (but never have) tried. But more than that, we just enjoyed the company.

Vanessa and I both are working full-time at new jobs. I’ve been working for a disaster restoration contractor for the past several months. Although I have to admit, after a long day (or week) of working on other people’s homes and properties, it’s hard to find the motivation to do the same for ourselves. Vanessa is now at Cavendish Farms processing one of PEI’s most famous commodities: potatoes! It’s actually working out very well for us. I work a fairly typical work-week: Monday to Friday with occasional evening or weekend projects. Vanessa works two day shifts, two night shifts and then has four days off. Those four days have proven invaluable to us as she’s able to tend to things around the homestead (like curing garlic and raising chicks).
So. There you have it. Sort of. Its hard to wrap up three (four?) months in 600-or-so words, but I think I managed to empty out a few things rattling around in my head. I’ll do all I can to right-this-ship and resume my regular updates. It’s looking like an exciting fall around our old island home. Just do me a favor and let me know you’re still out there. I get a lot of my motivation and inspiration after hearing from you.

Thanks – and blessings from our home to yours!
Exodus 23:25 – “Worship the Lord and his blessing will be on your food and water.”

The best place to greet spring is in the garden and like every year, as soon as winter’s grip is loosened, Vanessa and I grab a shovel and pitchfork and head outside.
Spring marks winter’s (long overdue) departure and the awakening of – well, everything. The birds are back, the frogs are “peeping” from the creek down the hill from our home and plant life is bursting in anticipation of another growing season. All of this makes spring my favorite time of year.
Back in March, we started our onion and leek seeds. As soon as the ground is workable, these frost-hardy plants can be transplanted into the garden. If we were able, we probably would have planted these out a couple of weeks ago – even the end of April isn’t too soon – although the weather wasn’t as agreeable.

This year we planted about 100 plugs – and each plug has at least two or three seedlings. We’ve learned the onions can be planted in small groups, given enough space between groupings, and the onion bulbs will form without any problem. This saves a tremendous amount of time in planting – and eventually harvesting, as it takes the same time to plant a one-seedling plug as it does a three-seeding plug.

We adjust the spacing between the plants to accommodate the groupings. Individual onions would be planted about 3-4″ apart. We keep our groupings spaced about 8″ to allow for the plants to bulb when they mature.
Our leeks are planted similarly – with two seedlings in a pot. With the leeks, though, we dig a deep hole about 6-8″ deep and drop the whole newspaper pot in it.

As the plant grows up and out of the hole, the soil will be gradually filled in, thereby keeling the lower part of the leek white: a process called blanching.
And it’s just amazing to watch the garlic grow – seemingly right before your eyes.

So while Vanessa was planting the onions, garlic and leeks in one bed, I started preparing another bed for a different crop.

Last year, we ran out of space for our broccoli, cauliflower, kale, collards and cabbage. This year, we’ve dedicated two beds for these cruciferous veggies. This weekend we planted our cauliflower, broccoli, kholrabi, kale (two types), collards, turnips, rutabagas and cabbages.

In the other bed, we’ll plant additional broccoli and cauliflower every couple of weeks for a continuous supply of fresh vegetables, along with brussels sprouts, cabbage and whatever else we’d like more of.
In addition to planting out some of the seedlings we started inside to get a jump-start on the season, we directly seeded our peas (snow peas, sugar snap peas and a shelling pea), carrots, beets, radishes, spinach and swiss chard.
All these plants can be started a few weeks ahead of the last expected frost date without any concern. Other vegetables like tomatoes, peppers, squash, corn and cucumbers are heat-loving and wont tolerate even a light frost, so we’ll wait until June before introducing these to the garden.
The chickens are happy and doing their thing. 
Murdoch is just content to be a part of whatever we’re doing. 
Even Jill and James come over to see what we’re up to.
Yes, it’s been a while. A few of my loyal readers (there are a few) have been asking what’s going on. Well, I’m here to tell you.
Winter. That’s what’s been going on. And I believe this winter has been going on for almost 42 months.

But as predicted in my last post, the inevitable has happened. Spring.

I’ve never been happier to have muddy boots. Snow Mountain is eroding and the gardens are almost bare. We’ve been trenching some waterways for the melting snow to run. It’s been helping keep water away from the house and our walkways somewhat clean. Until we grade the property and seed our lawn later this year, the mud will be an ever-present companion.

Having said that, the ground is slowly firming up – at least where we need it to be. And more importantly, the food gardens are clearing up, too. Hopefully, if the weather stays nice, the ground will dry out sufficiently for us to plant a few things.

As soon as the ground is workable, we can plant out the onions and leeks we started a few weeks ago. They’re coming along nicely under our grow lights – as are the broccoli, cauliflower, peppers, tomatoes, cabbage, kale and kohlrabi. Soon we’ll be starting the squash and cucumber seeds as the risk of frost will have to be completely passed before they can be planted out.


The chickens have been enjoying some new-found-freedom since they’ve been confined in their coop for the duration of the winter. Our effort to catch the resident weasel has been fruitless. For the chickens protection, we kept them inside the coop until the past couple of weeks.

With the weather warming and other food opportunities present, we’re taking our chances that the weasel will leave them alone. While there was snow on the ground, we could see his tracks throughout the barn. I’m sure he’s been keeping the mouse population in check and with the arrival of the migratory birds, hopefully it will have it’s choice of sparrows, starlings and pigeons – all of which have taken residence in our barn loft.


So that’s what’s happening around the homestead. On another note, we’re in the midst of the second work-layoff this winter. Earlier the year, the mussel harvesters couldn’t get onto the ice because of the copious amount of snow . Now the issue is the deteriorating ice conditions. Ice harvesting isn’t an option now so the fishermen are just waiting for the ice to clear enough to launch the boats.
That put a halt to some of our plans this spring. We were to visit Ontario for a friend’s wedding but had to cancel with the unexpected income interruption. But on the other hand, it has freed up some time to do a little work around the house.


We lifted the underlayment in the bathroom and repaired the subfloor. Soon, I’ll be roughing in the plumbing for the fixtures and hanging some drywall. Of course, we’ll need to get back to work soon to afford the next few steps.
But for now, we’re enjoying the time off and the milder weather. Soon, spring will turn to summer and this record-breaking winter will be a distant memory.
I don’t know if it was divine intervention or lucky timing on our part, but we narrowly escaped disaster with our chickens last week. After coming home from church, we discovered a set of small tracks throughout the chicken run – and even up the ladder leading into the coop!
It turns out, a weasel had paid the chickens a visit, but I think we happened upon the scene before any carnage could start. Needless to say, the chickens have since been confined in the safety of their coop for the last week as we try to rid ourselves of the varmint.
I know a lot of chicken-raisers say you can live-trap and relocate weasels, but considering their voracity and the damage they’ll do to the flock, I’m not fooling around. We found a couple of big rat-traps in the barn when we first moved here – still in their packaging. That was our starting point. Rather than setting the traps and hoping for the best, I made a couple of modifications to (hopefully) increase our odds.


With some of the scrap wood left around from the renovations, I made two boxes – as wide and slightly longer than the rat-traps. I drilled a large hole in one end of the box and several small holes on the other.

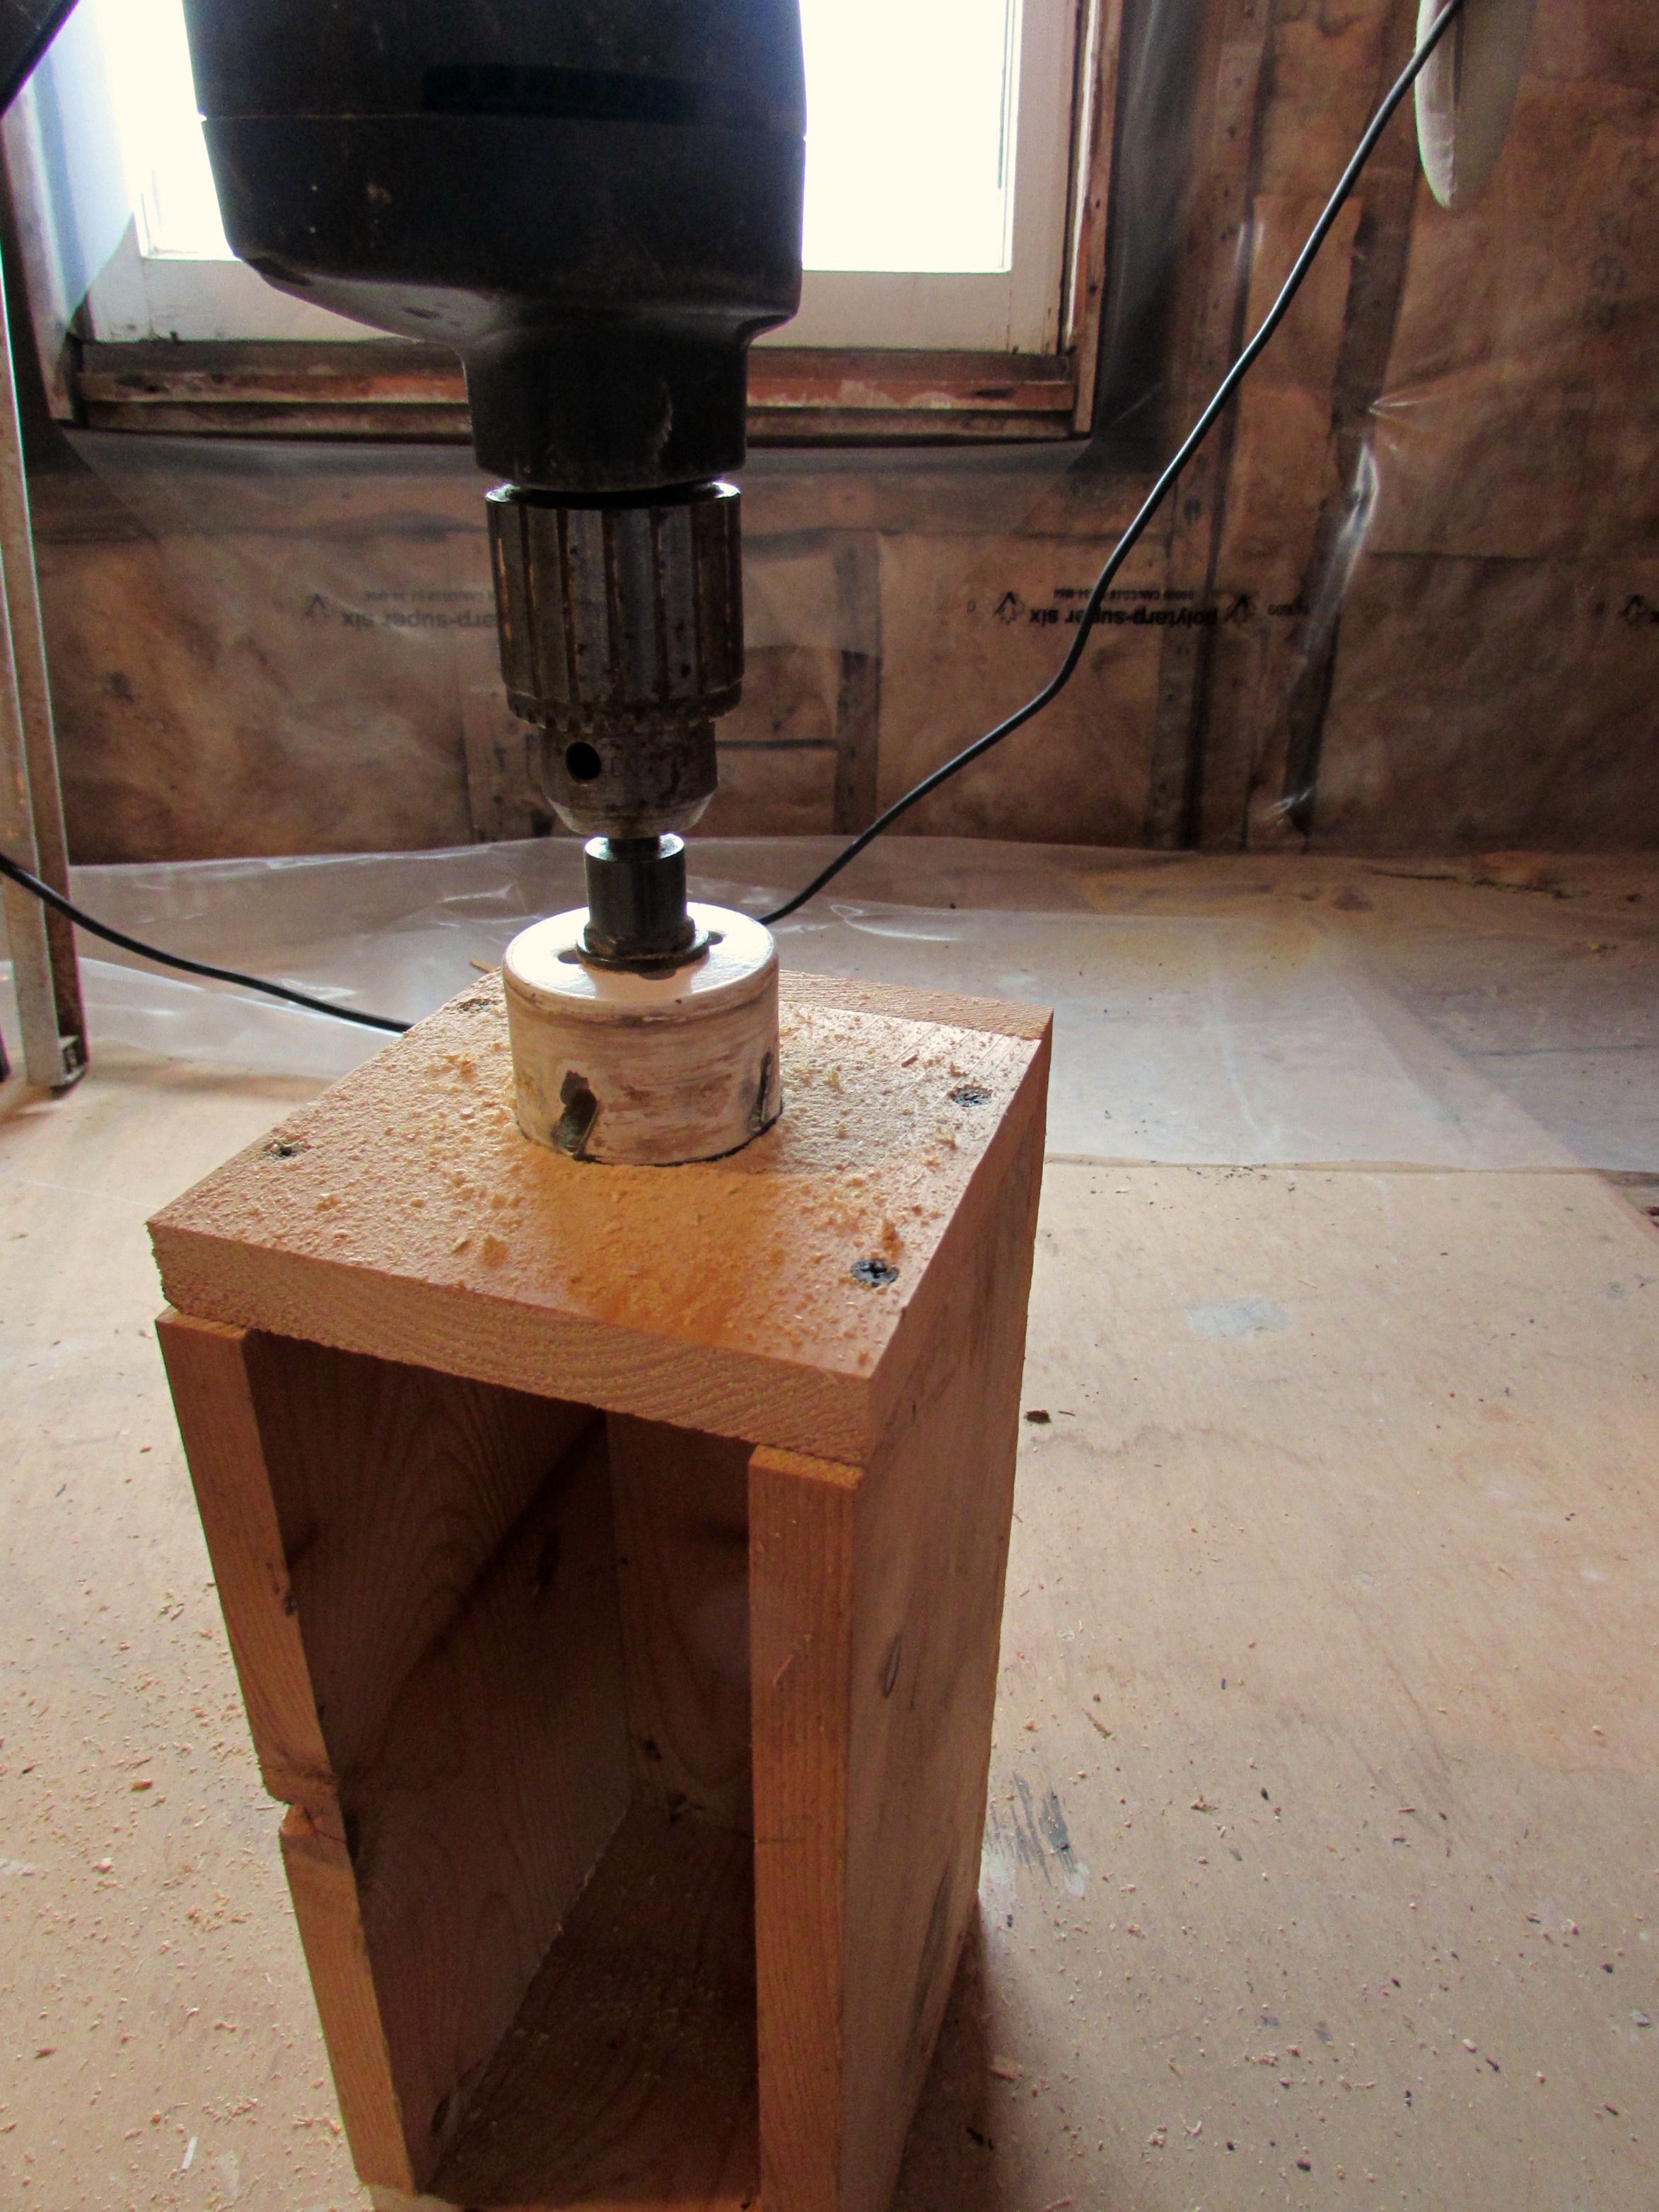

I also made a small change to the rat-trap itself. I cut the lid off a tin can and pop-riveted it to the trigger of the trap. This makes the trigger almost as big as the business-end of the trap itself.


The idea is to direct the weasel directly onto the trigger of the trap via the large hole. The other end is baited with a raw chicken liver. If (and when) the weasel investigates the bait, there’s nowhere for him to step but on the modified trigger of the trap.
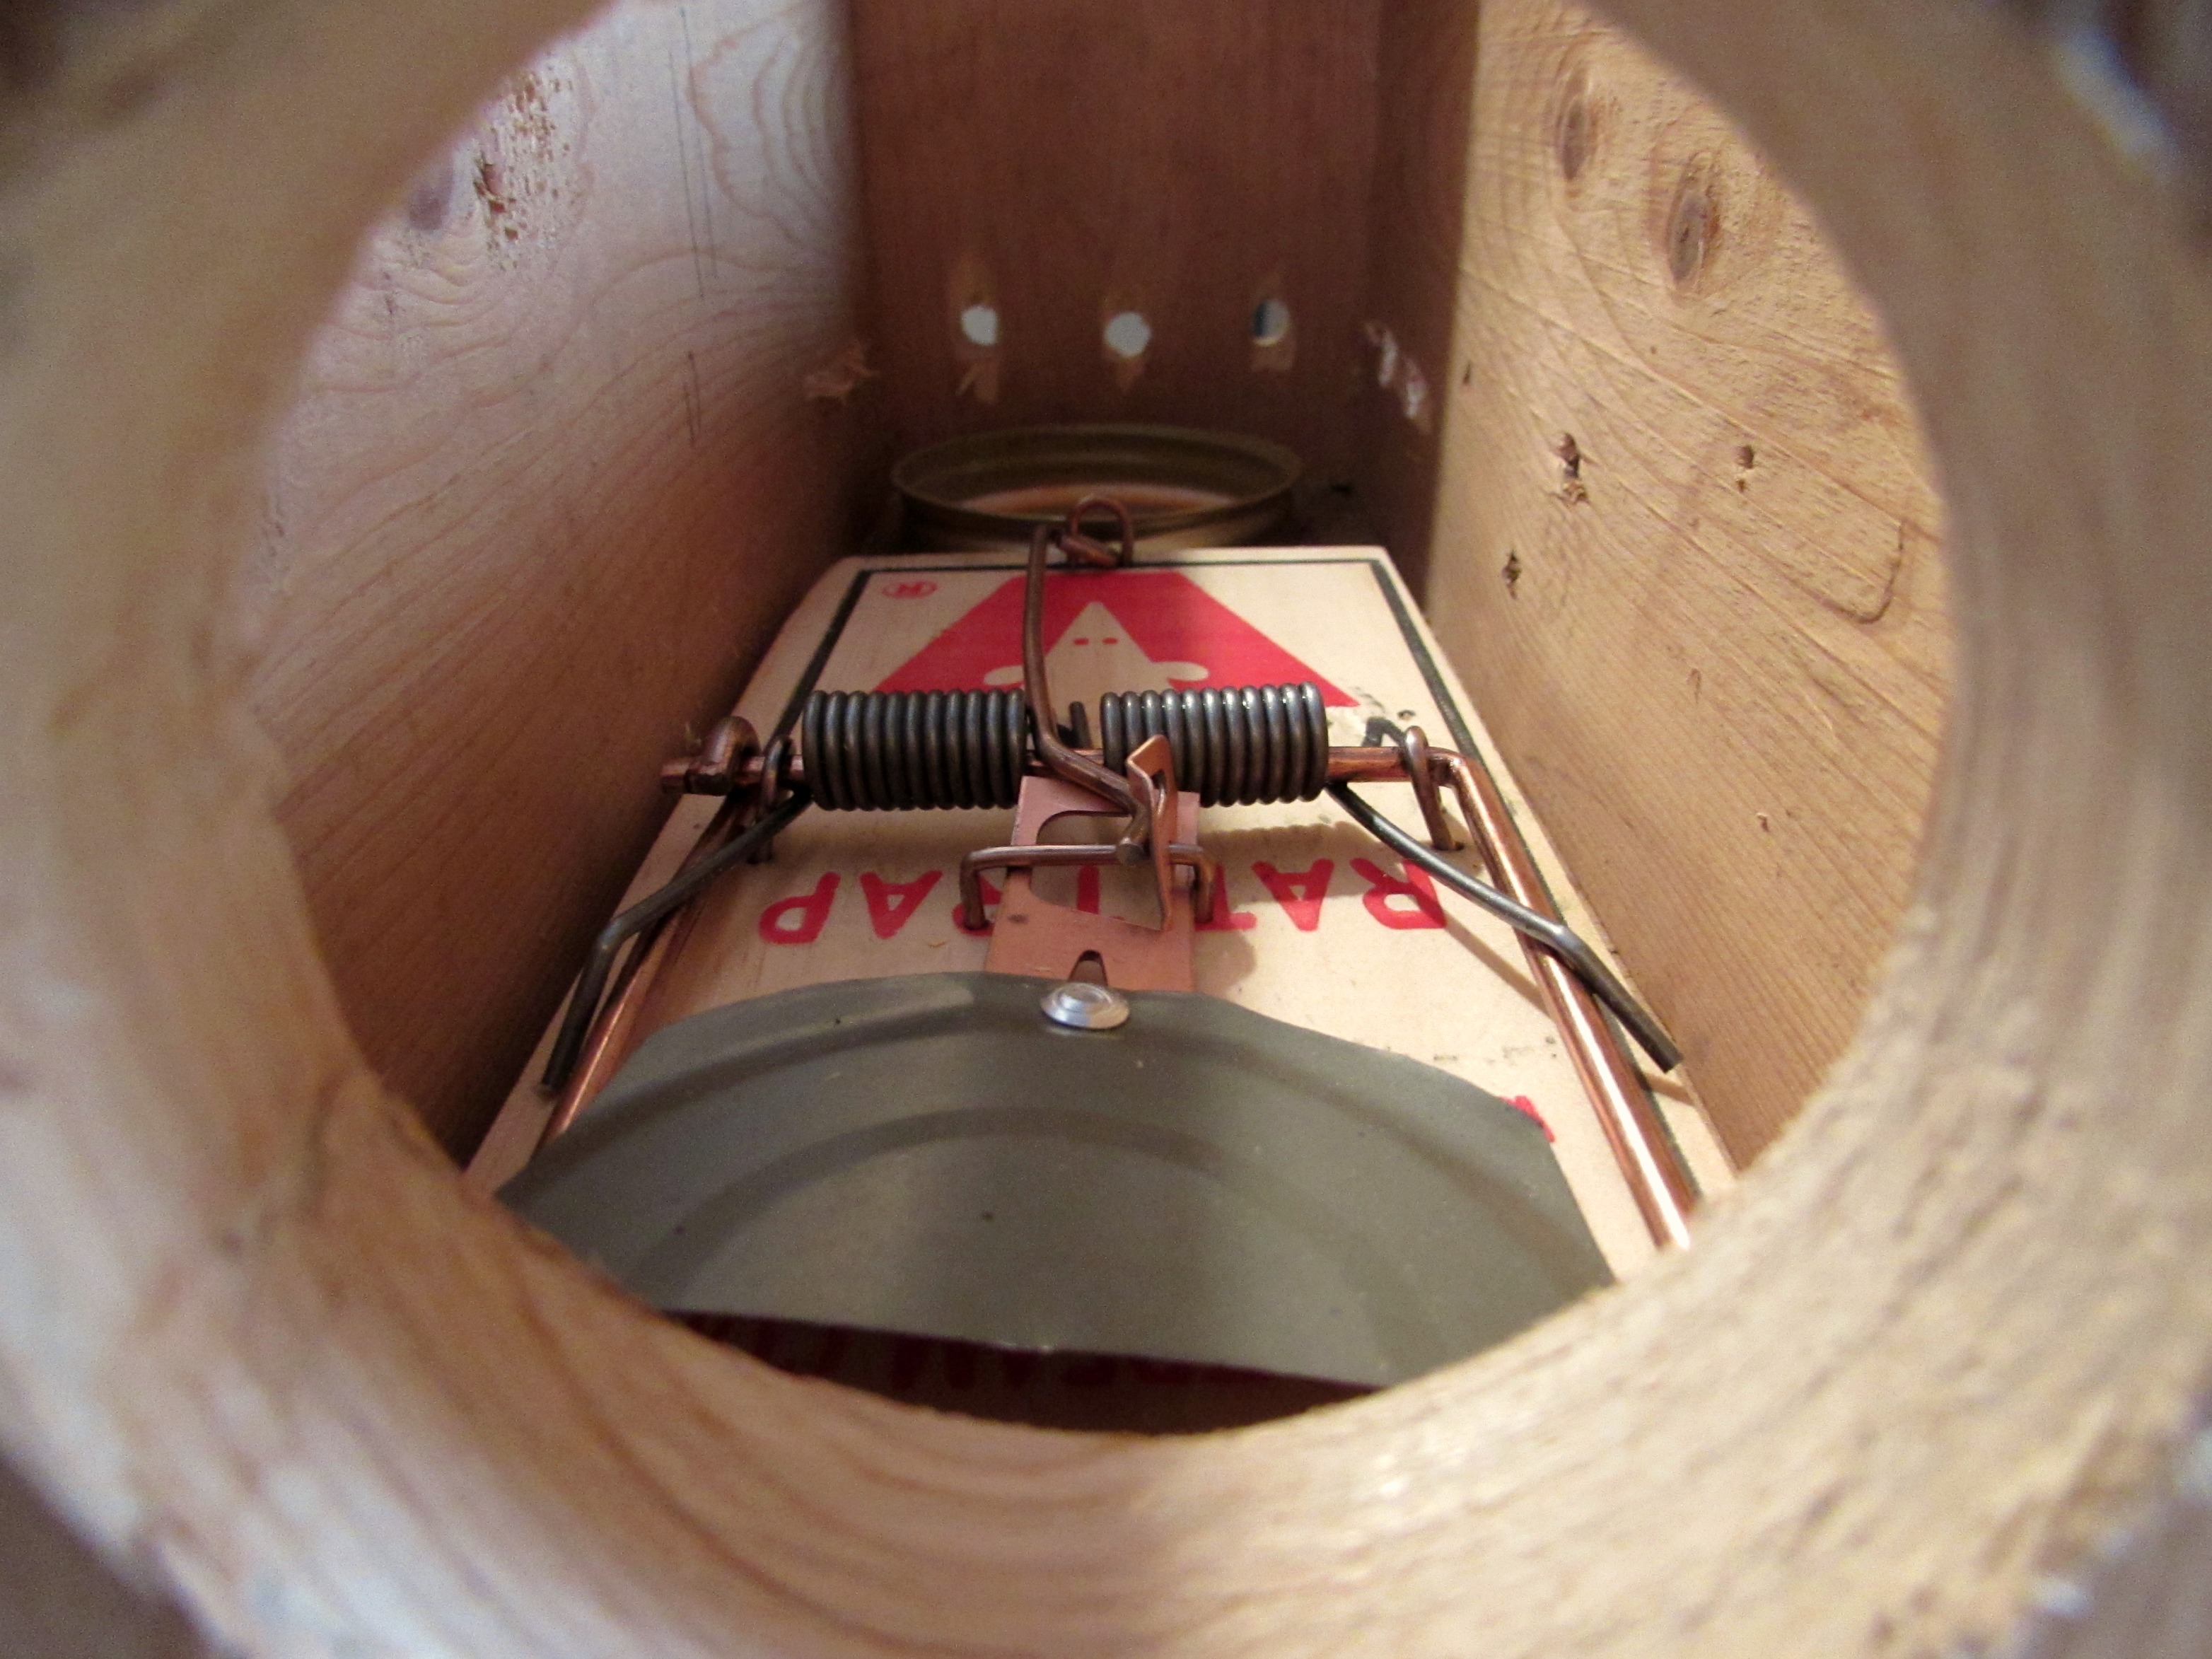
Pop-goes-the-weasel.
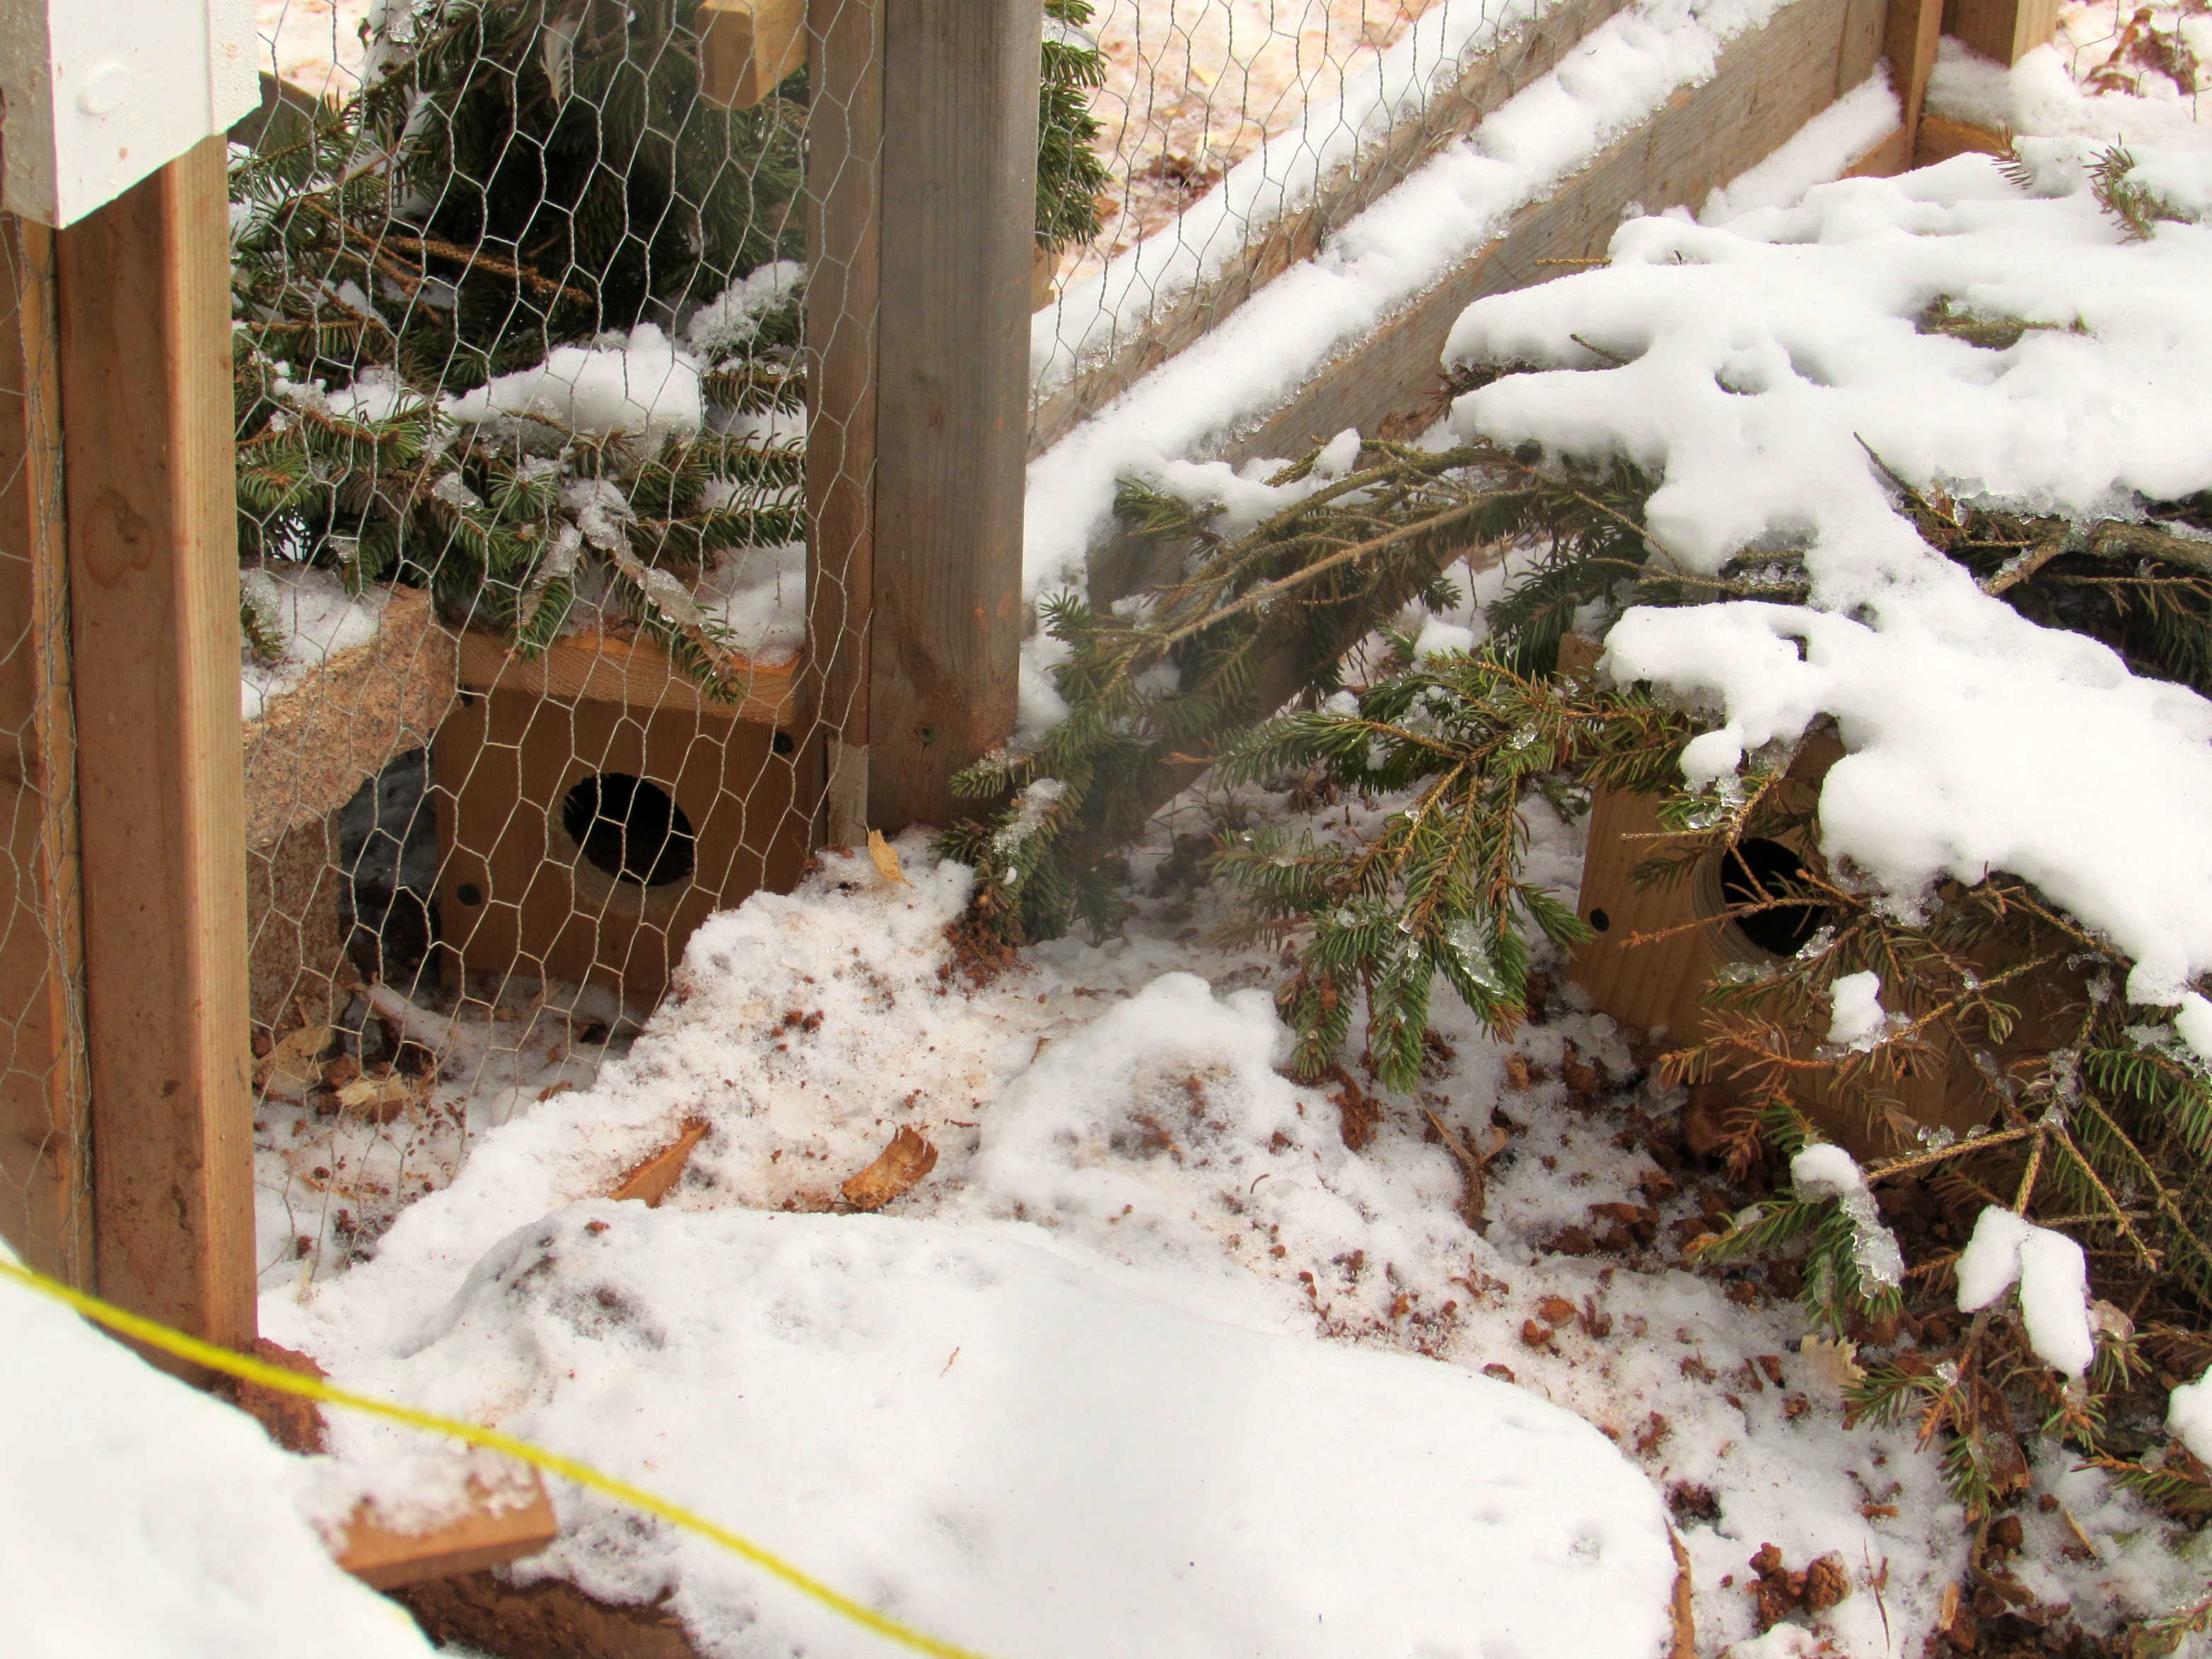
We set the two traps around the coop where it’s tracks are concentrated. After a light snow, we can see that it also visits our barn with some frequency. For the chicken’s sake, I hope we get it soon.
Speaking of which – the girls surprised us with an early Christmas gift yesterday: our first egg!


Not sure who was responsible, but considering the cool temperatures and being cooped up for the last week, we didn’t expect this at all. Now we just wait for Egg No. 2 so Vanessa and I don’t have to split the first one.
News flash: Chickens grow fast.
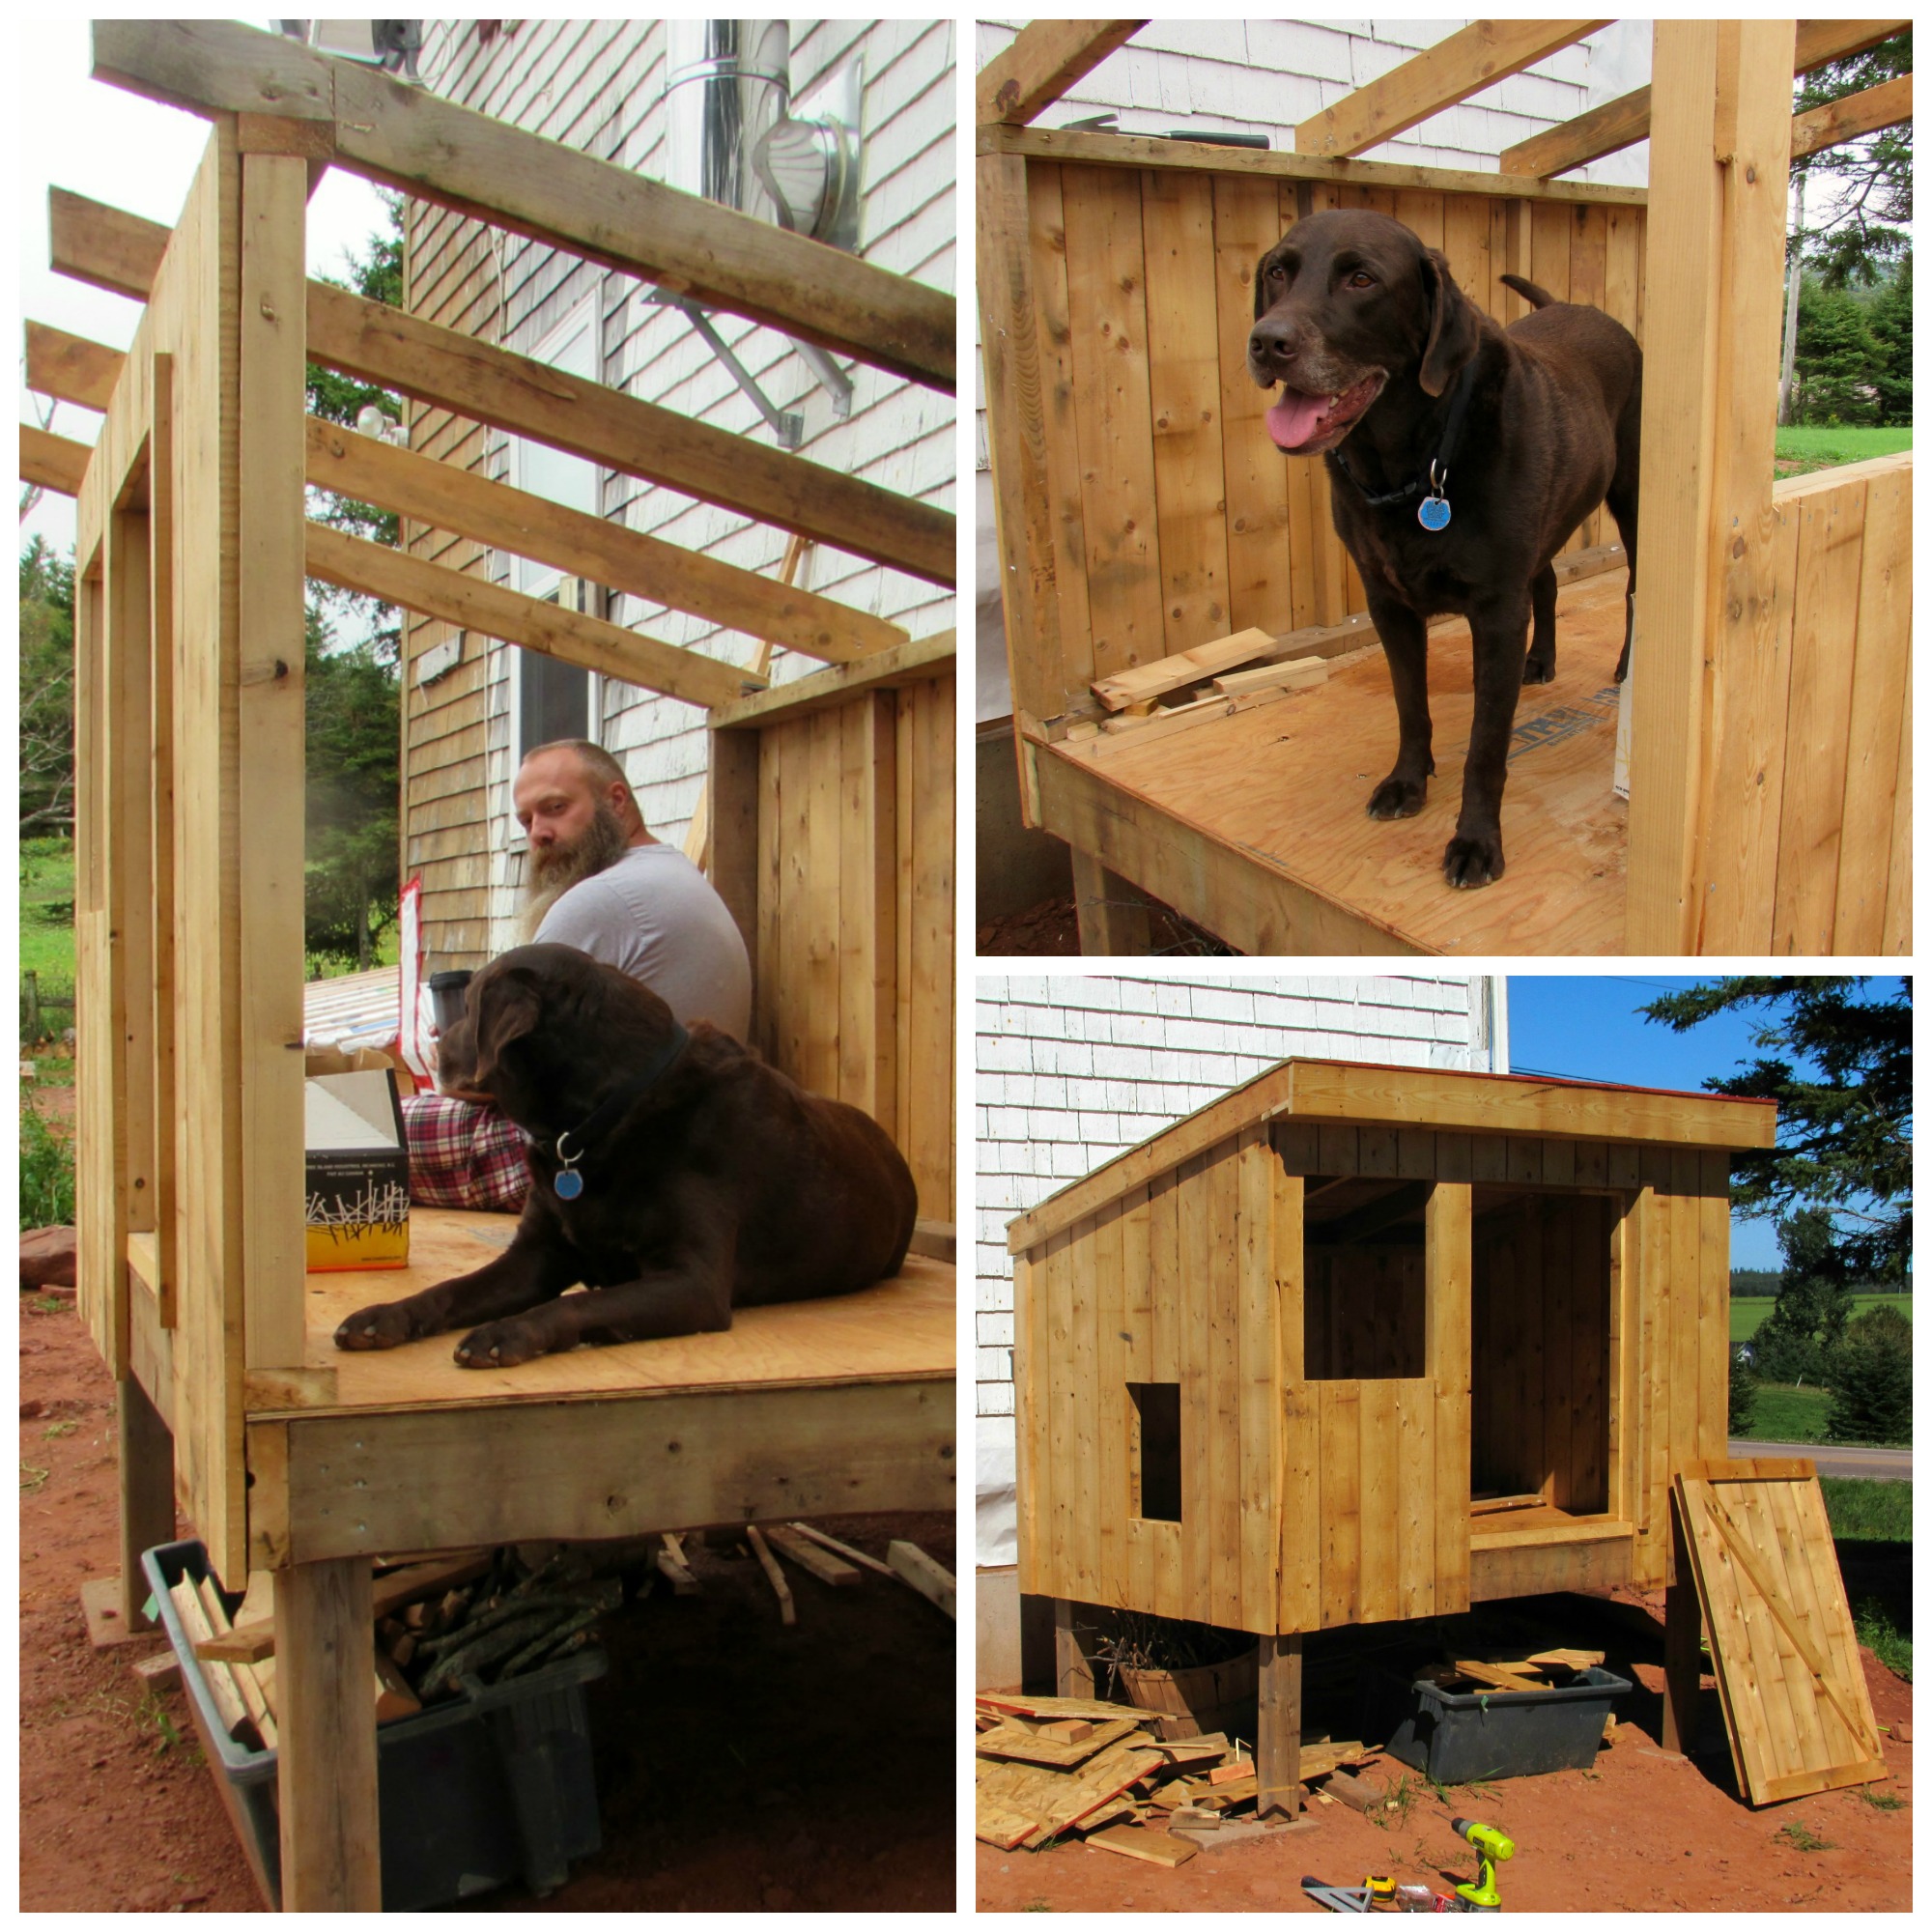
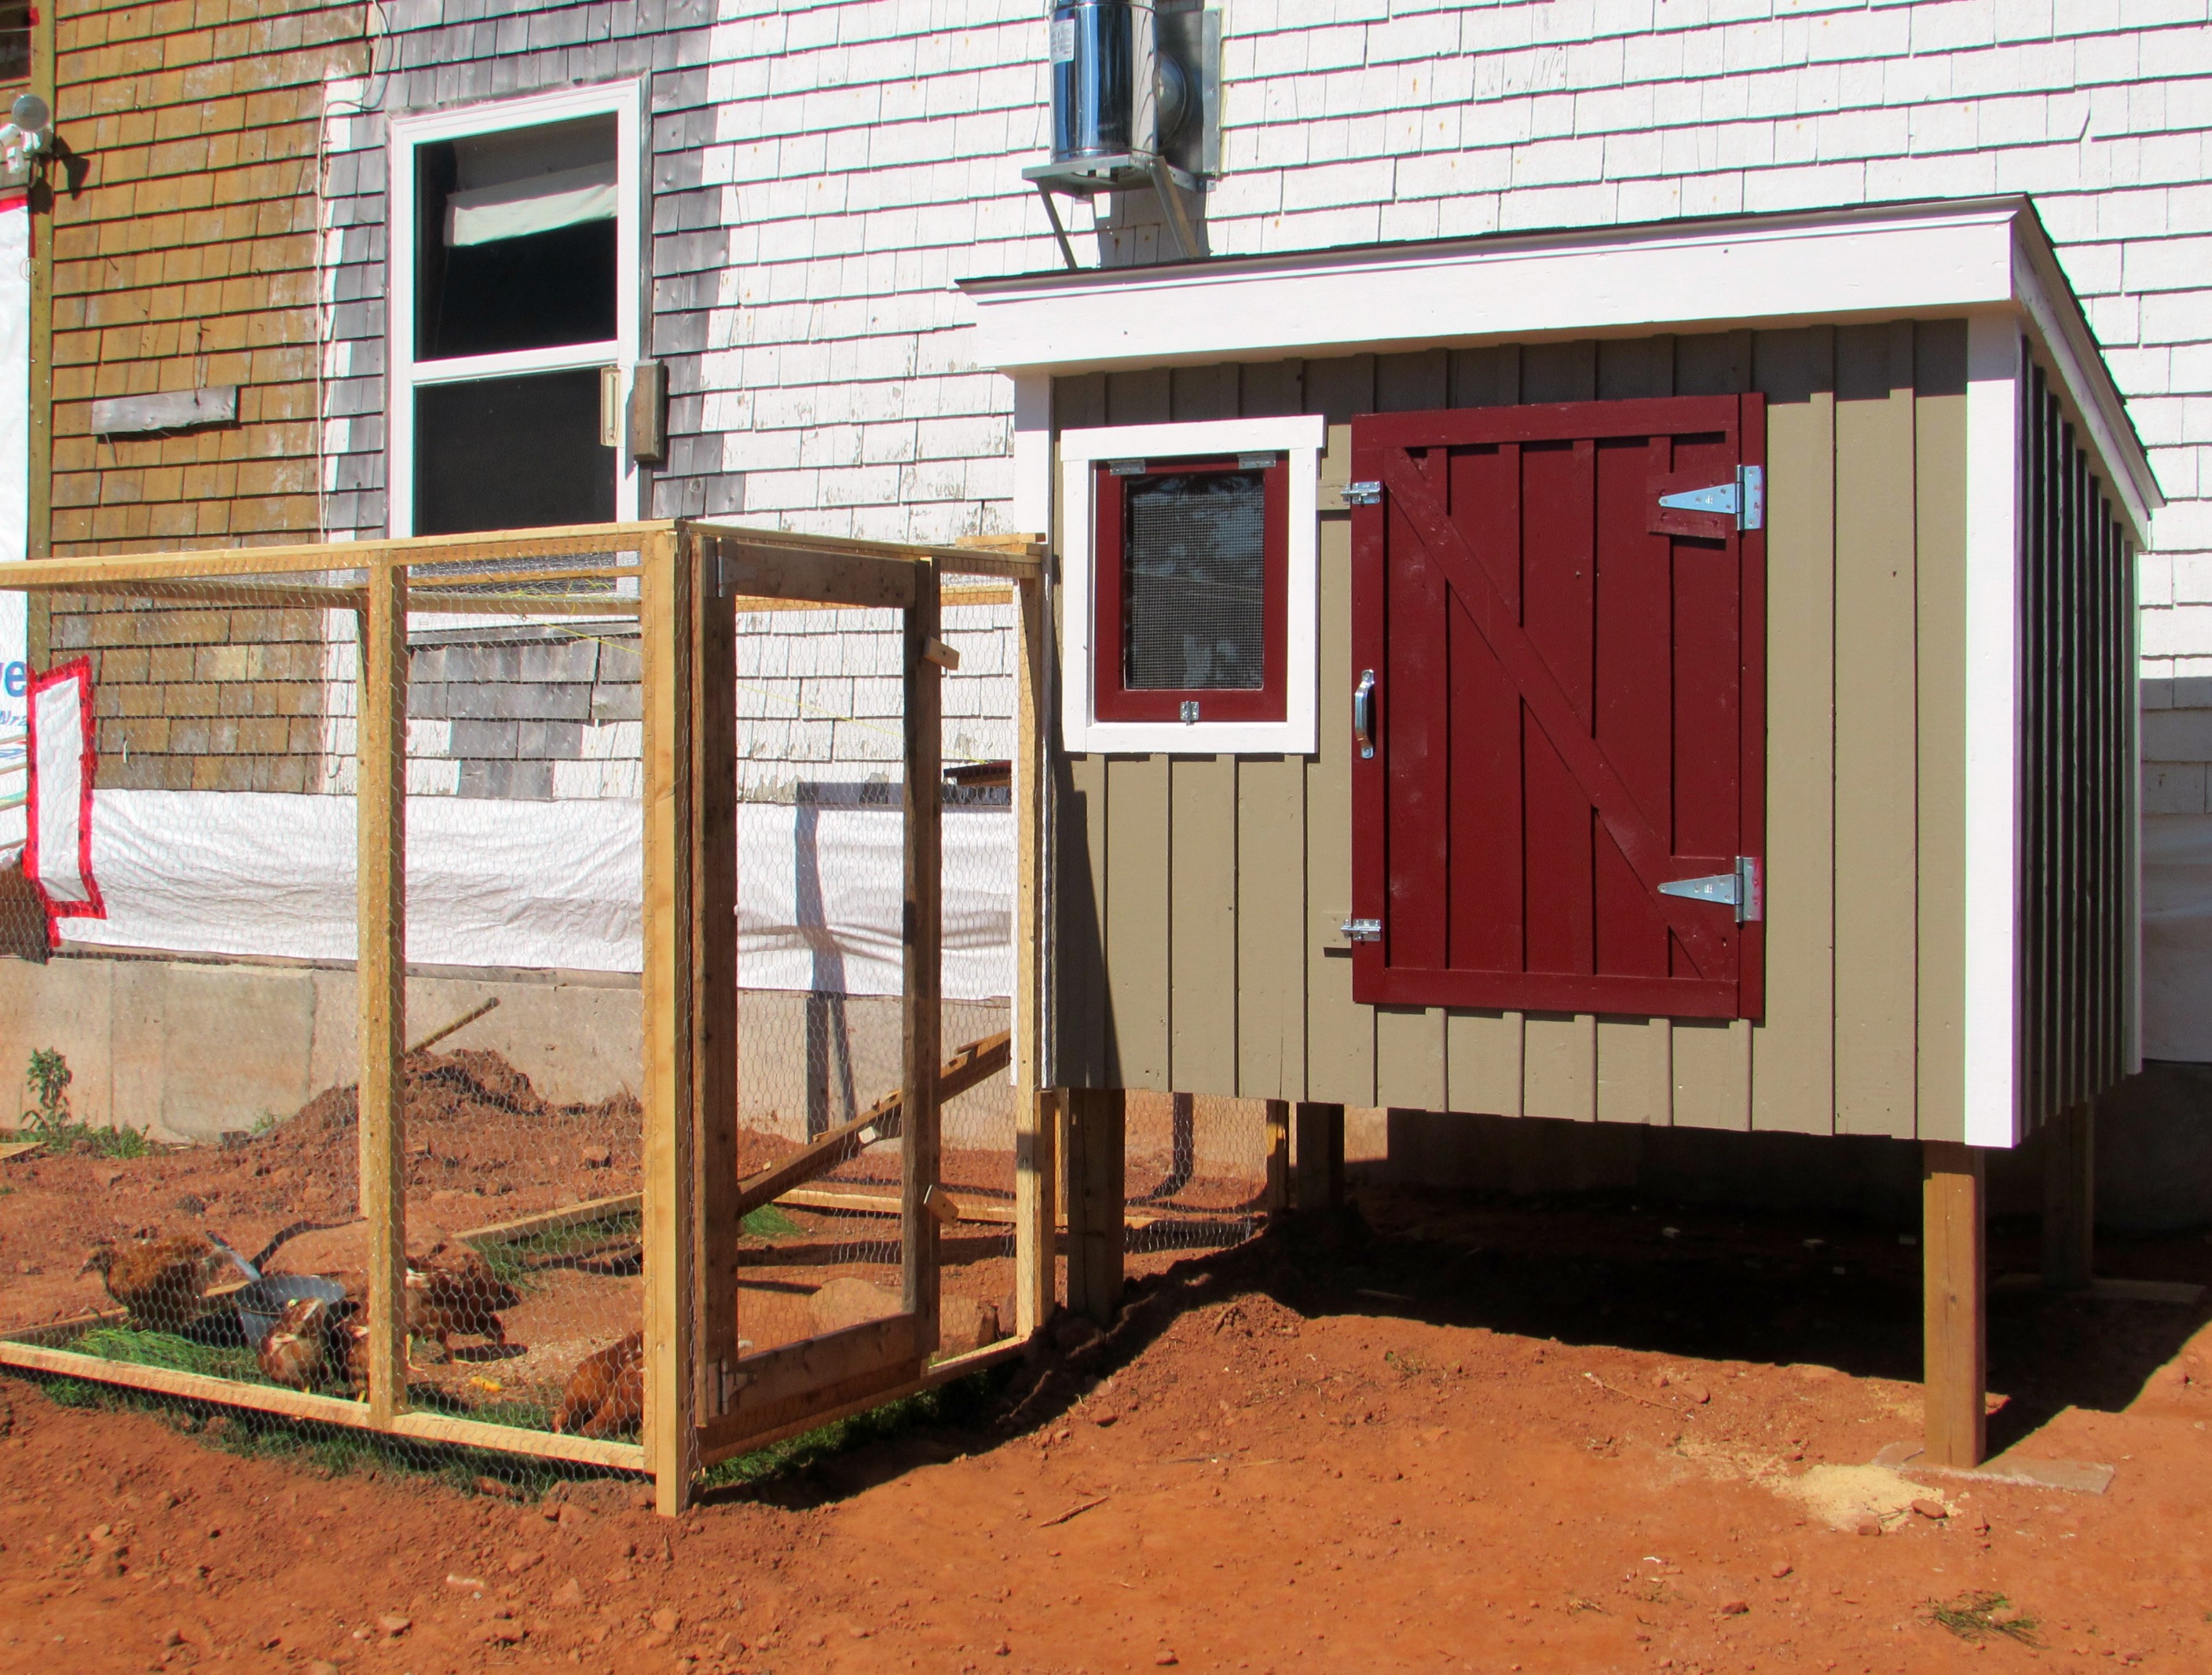
With that realization, we stepped up our game last week and built the coop for our six “Golden Girls”. We’ve been holding out on building it in hopes we would be able to have our new garden shed built at the same time. The plan was to have the coop attached to and shared with the shed – making the care for the chickens and egg collecting easy and efficient.
Unfortunately with fall approaching, we find ourselves short on funds to build the luxury shed. While we will be using the majority of the salvaged material for the shed, it will still cost more than we have to get it the way we want it – so for now, a quick and easy coop is the way to go. And because it’s “temporary”, inexpensive as well.
Before we go further, we’ll take a little walk back in time. Remember the original addition attached to the back of our house that we removed in the spring?

We carefully dismantled everything and stored the material in the barn and yard for future use.

That’s where we began.
A quick look through the pile and I found a couple of pressure treated 4″x4″ posts and some 2″x8″ joists taken from the back porch and deck. I had a sheet of plywood left over from building our garbage chute that we used when we were gutting the second floor of the house – we’ll use that for the floor. The concrete blocks were left behind from a previous owner and taken out of the old crawlspace prior to our foundation getting done.

So far no cost to us.
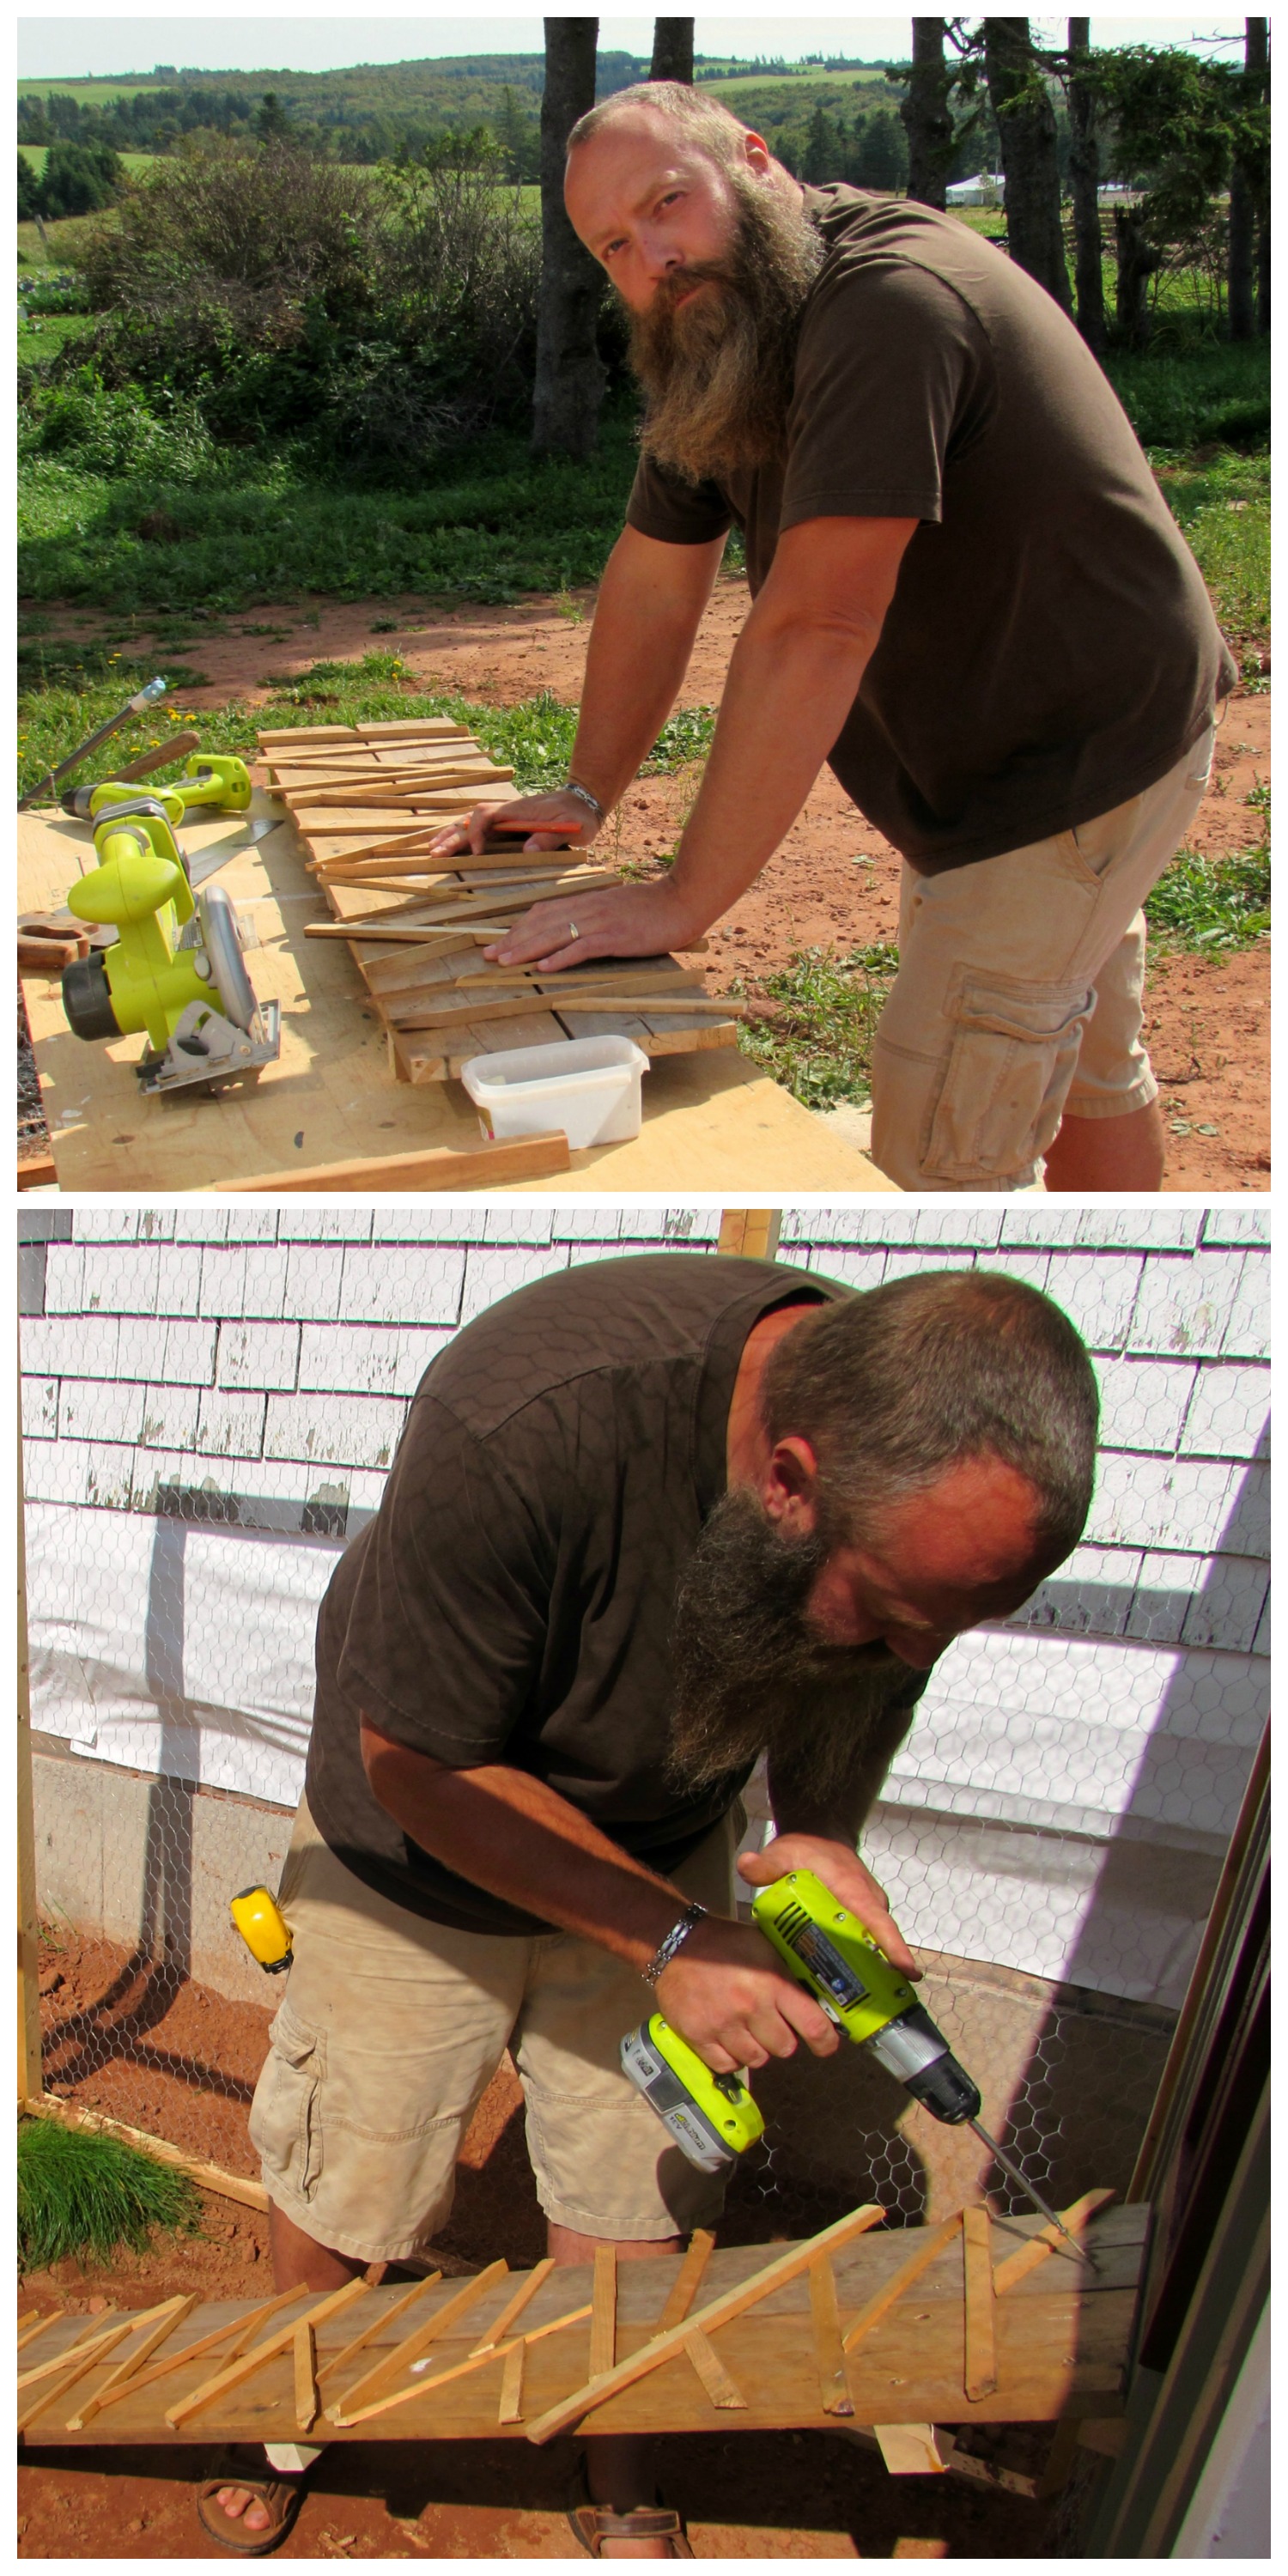
Once the deck and floor was built, we scavenged some 2″x4″s and framed the walls and roof. Rather then sheathing the coop with plywood and applying some sort of siding, we elected to use the pine boards taken from the old addition ceiling and made board and batten siding applied directly to the frame – no plywood.
We debated the exterior finish for the coop. Would we leave it natural? stain the wood? paint? Given our location and climate, leaving it unfinished wouldn’t be an option. It wouldn’t take long for the exposed pine and spruce to deteriorate and although it’s a temporary home for the girls, I want it to last. We’ve been trying to decide what colors to paint our house next year and thought we’d test our choices on the coop. But then again, paint’s not cheap either. That’s when I remembered that somewhere in the house is a box with some of the paint we brought with us from Ontario. The taupe was from our garage door and trim, the red from our front door.
The window was one of several we found in the barn from who-knows-where, but it was perfect for our needs. I just had to build the frame for it. We also built the door for the coop with the pine boards. From there, we finished the framing and and sheathed the roof with a sheet of OSB sheathing we used inside for the baffle vents in our attic. When we cleaned out the barn shortly after moving to PEI, we found part of a bundle of shingles the previous owner used for some roof repairs.

We bought three lengths of shingle/fascia flashing, a quart of white paint and the door and window hardware.
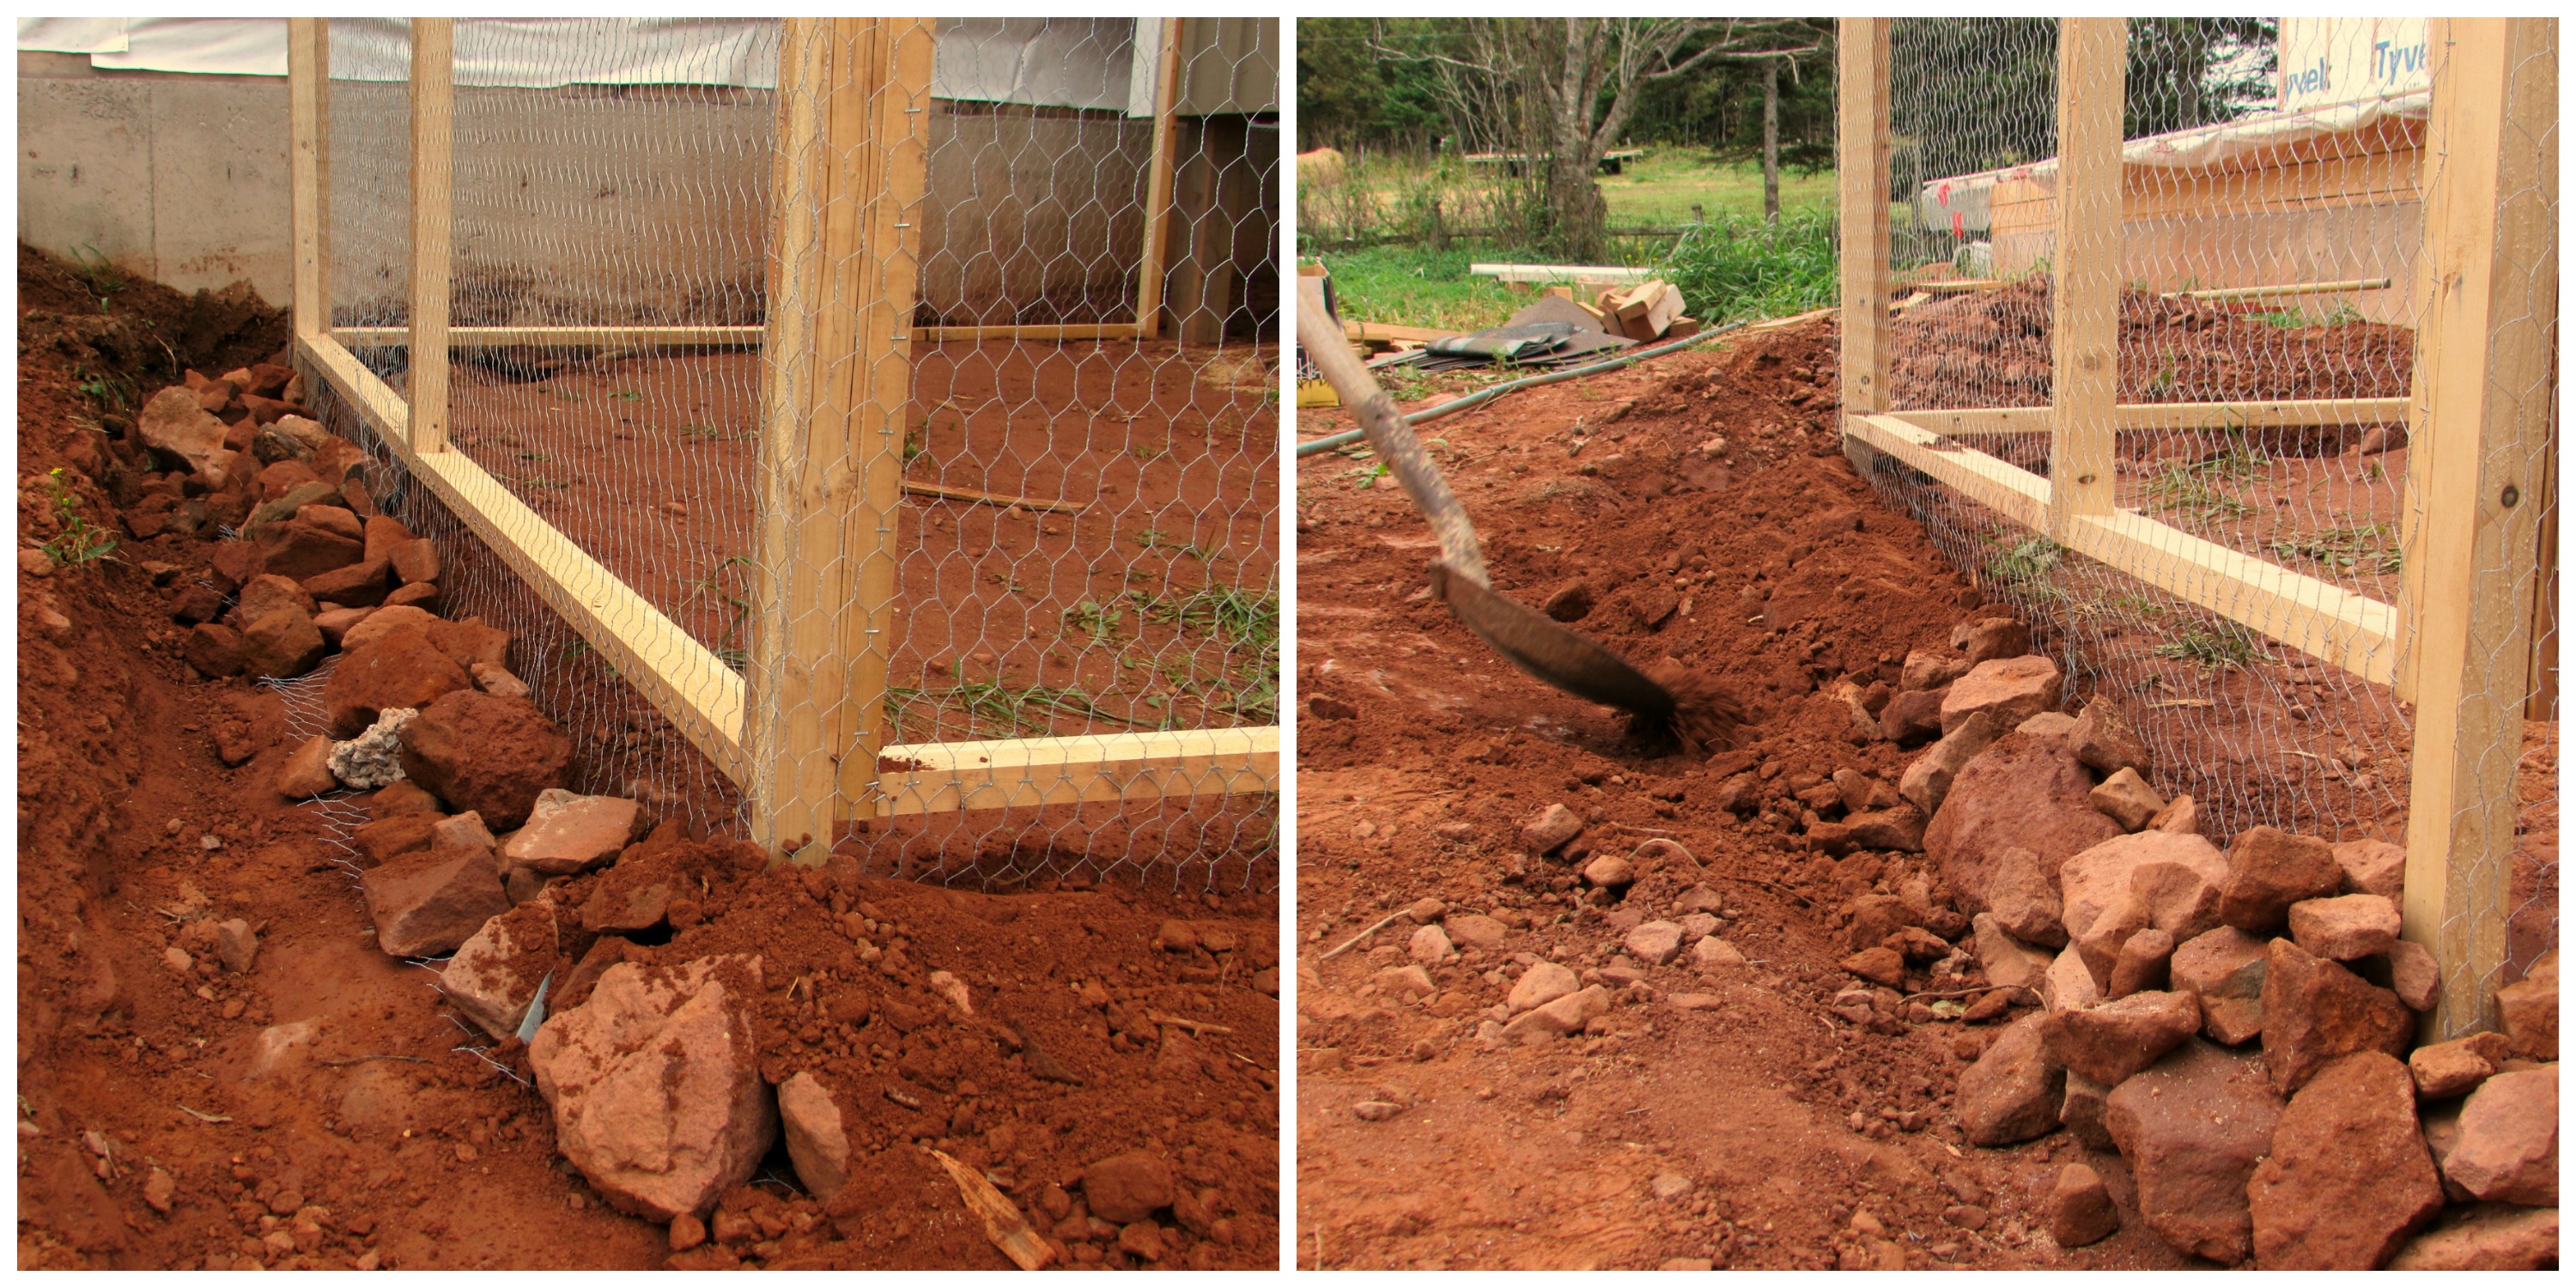
With the coop done, we built the run with a few more pieces of salvaged lumber and the chicken wire we bought at the local farm co-op. The mesh extends below the bottom of the run and laid into a trench just outside the frame. It was buried with whatever stone we could find handy and then backfilled with soil. The idea is to keep anything outside the coop that wants in, out. (That sentence makes sense, right?)
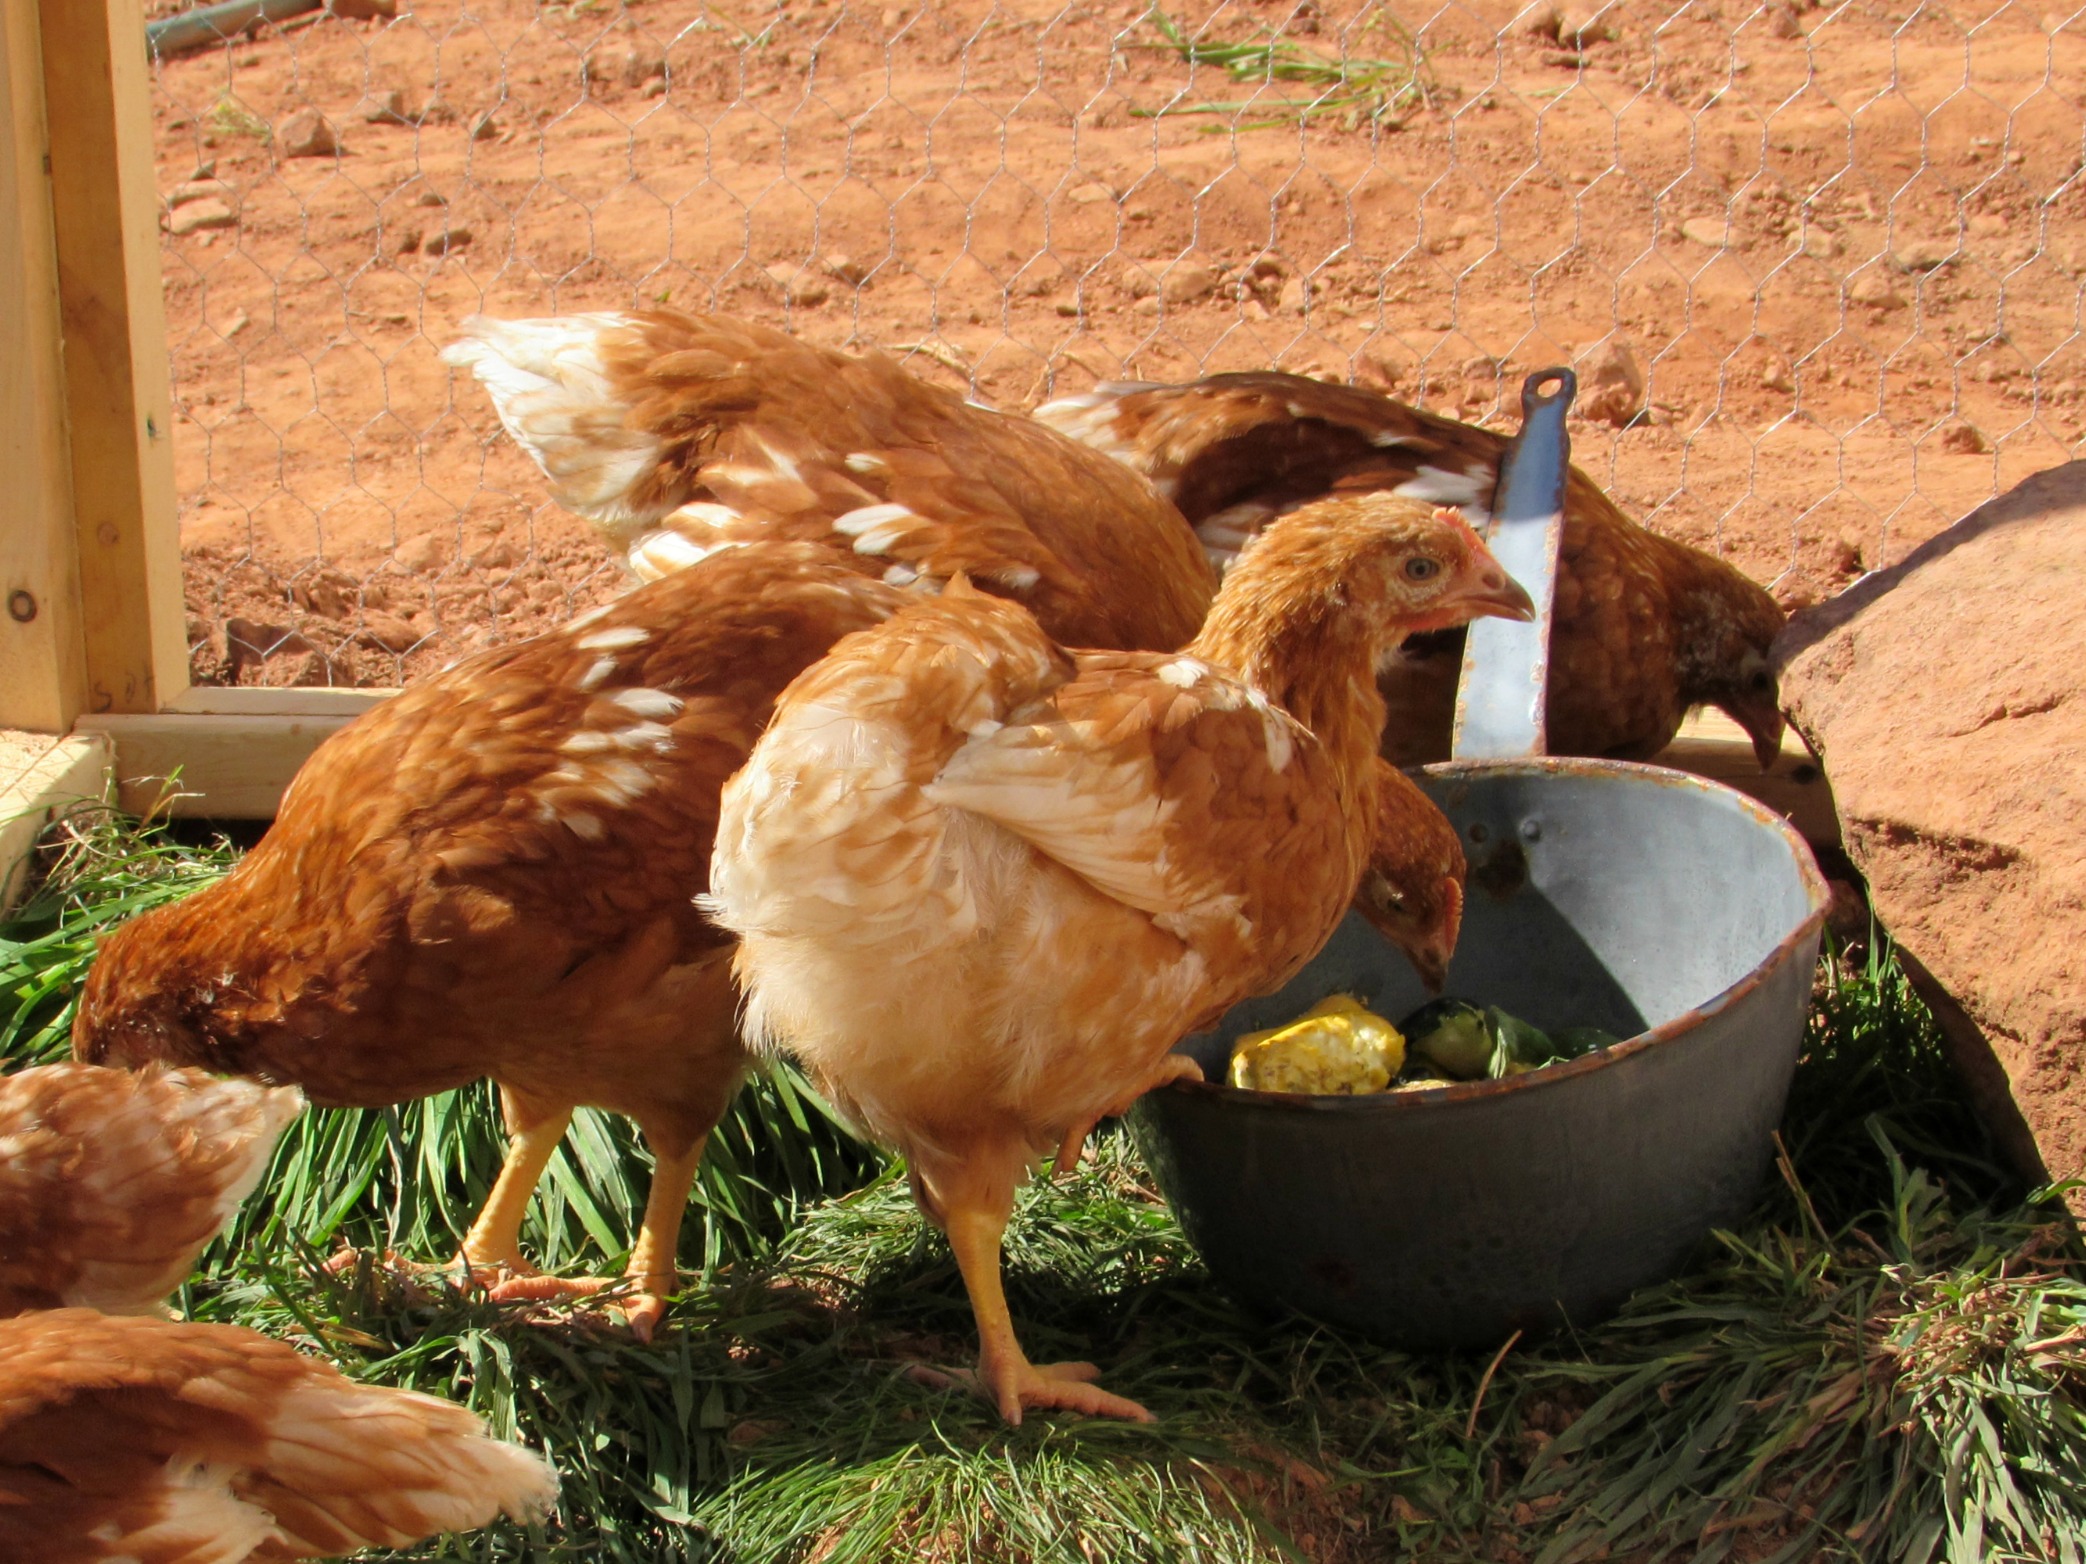
Vanessa then dug up a few patches of grass and replanted it into the run. They’ll eat some of the grass and want to dig and scratch as well.

And there you go. The only thing left was to introduce the girls into their new home.
Then we realized they didn’t have a ramp to get from the coop into the run and back.

So with the last of the scraps I had around, we quickly assembled the ramp and left the birds to explore.
So far, they seem to love the new environment. The chicks may have been cute but to be honest, I’m happy to get them out of our house and frankly, I think they’re just as happy to get out of their cramped brooder.

So I think we met our objective: for just over a hundred bucks we’ve built a great reclaimed-wood chicken coop. Even the two enamel pots we use to bring the kitchen scraps to the girls were found underneath the old rear-yard deck we demolished.
The one thing we’ll have to do before winter sets in is to insulate the coop. I framed it to allow for a quick installation of 1-1/2″ styrofoam insulation to the walls, ceiling and floor which we’ll do when we can afford it. But we’ve learned that chickens are tough birds and will handle our cold winters with relative ease.
Next year, when we build Chicken Coop 2.0, we’ll likely move this one to the back and use it for the meat chickens we plan on having – or perhaps a small coop we use when introducing new birds to our flock. Either way, it turned out better than we hoped for and we’ll find a good use for it!
Now we just wait for eggs.
So the demolition is underway on the back addition. Initially, we thought we would simply remove and dispose of the structure altogether.

What we didn’t know at the time was that the addition was near-original to the house. A covered walkway/wood shed leading from the back door to an “indoor outhouse” was it’s original intent. Past owners insulated and finished the space, and it’s current condition and use is not practical for our needs.

So once we removed the interior finishes, we both had a change of heart. We’ve decided to carefully dismantle the roof and walls to relocate and reassemble it near the rear of the property.

I think I’ve settled on nesting it under the trees and use it as it as a woodshed/garden tool storage. We do need (and planned on building) some garden/outdoor storage – and in using the original structure, we get to maintain it’s character and save some serious moolah since the material for the structure is already here.

I will have to build new footings and floor, but the majority of the walls, roofing – and even sheathing – is reusable.
We’ve never wanted to just ignore the historic significance of this old home we bought. But in the same breath, we also recognize that it’s current condition necessitates a full gut and renovation. It will be our dream-home after all, so it still needs to meet our needs. In relocating this structure and repurposing it for our needs, we can keep its historical ties and fill a need we have by reimagining it for another purpose.

As part of our desire to be more self sufficient, we will eventually have laying hens for our egg needs and the new shed will be modified to incorporate a coop. All in all, it seems like a win-win scenario for us.
Another week and another disposal bin in our driveway – although this will be the last one for a while, at least. We spent a good part of today cleaning up around the back of the barn. I just don’t understand how people can use their backyard as a dump. Earlier this year (before the winter really settled in) we cleaned up as much as we could at the time. Windows, flooring material, mattresses, a piano, wire, tarps, cans and bottles, Styrofoam and countless pieces of wood were left there over the years. And now with the warmer weather and the grass having died back, we’re able to finally get rid of the last of the junk. And wow – that feels good. The only things left there is the oil-drum fire pit and the remains of an old tree trunk – now hollowed out and housing little critters for Murdoch’s enjoyment.

In fact, while we were cleaning up, he flushed out a vole and quickly dispatched the little guy. No, no sympathy here.
We also burnt away some of the tall, dead grass around the back yard. The house has been though two summers without much garden care, so when we arrived in the fall, the grass was waist-high in places.

Burning off the dead stuff seems to be the most practical option. Either that or rent some sort of brush cutter before we put the lawnmower to it.

We also uncovered our driveway. We had “patches” of asphalt showing through our dirt driveway. Turns out, our driveway is paved – just buried under years of grass, dirt and pine needles.

Now cleared away, we have a nice, clean parking pad. Raking up the old tall grass, we’ve also discovered a few spots of garden plants poking up.

Looks like we’ll have at least a few beds of lilies around the house in a short while.

And finally, fishing season opened here on Tuesday. And yes, I did wet my line. No, I didn’t catch any fish. On the weekend, our temperatures soared to nearly 20 degrees and severe runoff from the snow pack thawing, combined with rain on Monday, caused quite a lot of flooding around the rivers. All of the watersheds around our home had gone from babbling brooks to raging white-water rivers. Needless to say it was difficult fishing.
It wasn’t all for loss though – Vanessa saw and took this beautiful picture of a heron in the river behind our house.

We’ll give it a try again soon as things settle down in the rivers. But I like the way my wife thinks. She says the sooner we get the demo done, the more time we’ll have to go fishing.

OK. Where’s my hammer?
