Moving Day!

News flash: Chickens grow fast.

With that realization, we stepped up our game last week and built the coop for our six “Golden Girls”.  We’ve been holding out on building it in hopes we would be able to have our new garden shed built at the same time.  The plan was to have the coop attached to and shared with the shed – making the care for the chickens and egg collecting easy and efficient.

Unfortunately with fall approaching, we find ourselves short on funds to build the luxury shed.  While we will be using the majority of the salvaged material for the shed, it will still cost more than we have to get it the way we want it – so for now, a quick and easy coop is the way to go.  And because it’s “temporary”, inexpensive as well.

Before we go further, we’ll take a little walk back in time.  Remember the original addition attached to the back of our house that we removed in the spring?

IMG_2133

We carefully dismantled everything and stored the material in the barn and yard for future use.

IMG_2223

That’s where we began.

A quick look through the pile and I found a couple of pressure treated 4″x4″ posts and some 2″x8″ joists taken from the back porch and deck.  I had a sheet of plywood left over from building our garbage chute that we used when we were gutting the second floor of the house – we’ll use that for the floor.  The concrete blocks were left behind from a previous owner and taken out of the old crawlspace prior to our foundation getting done.

coop Collage1

So far no cost to us.

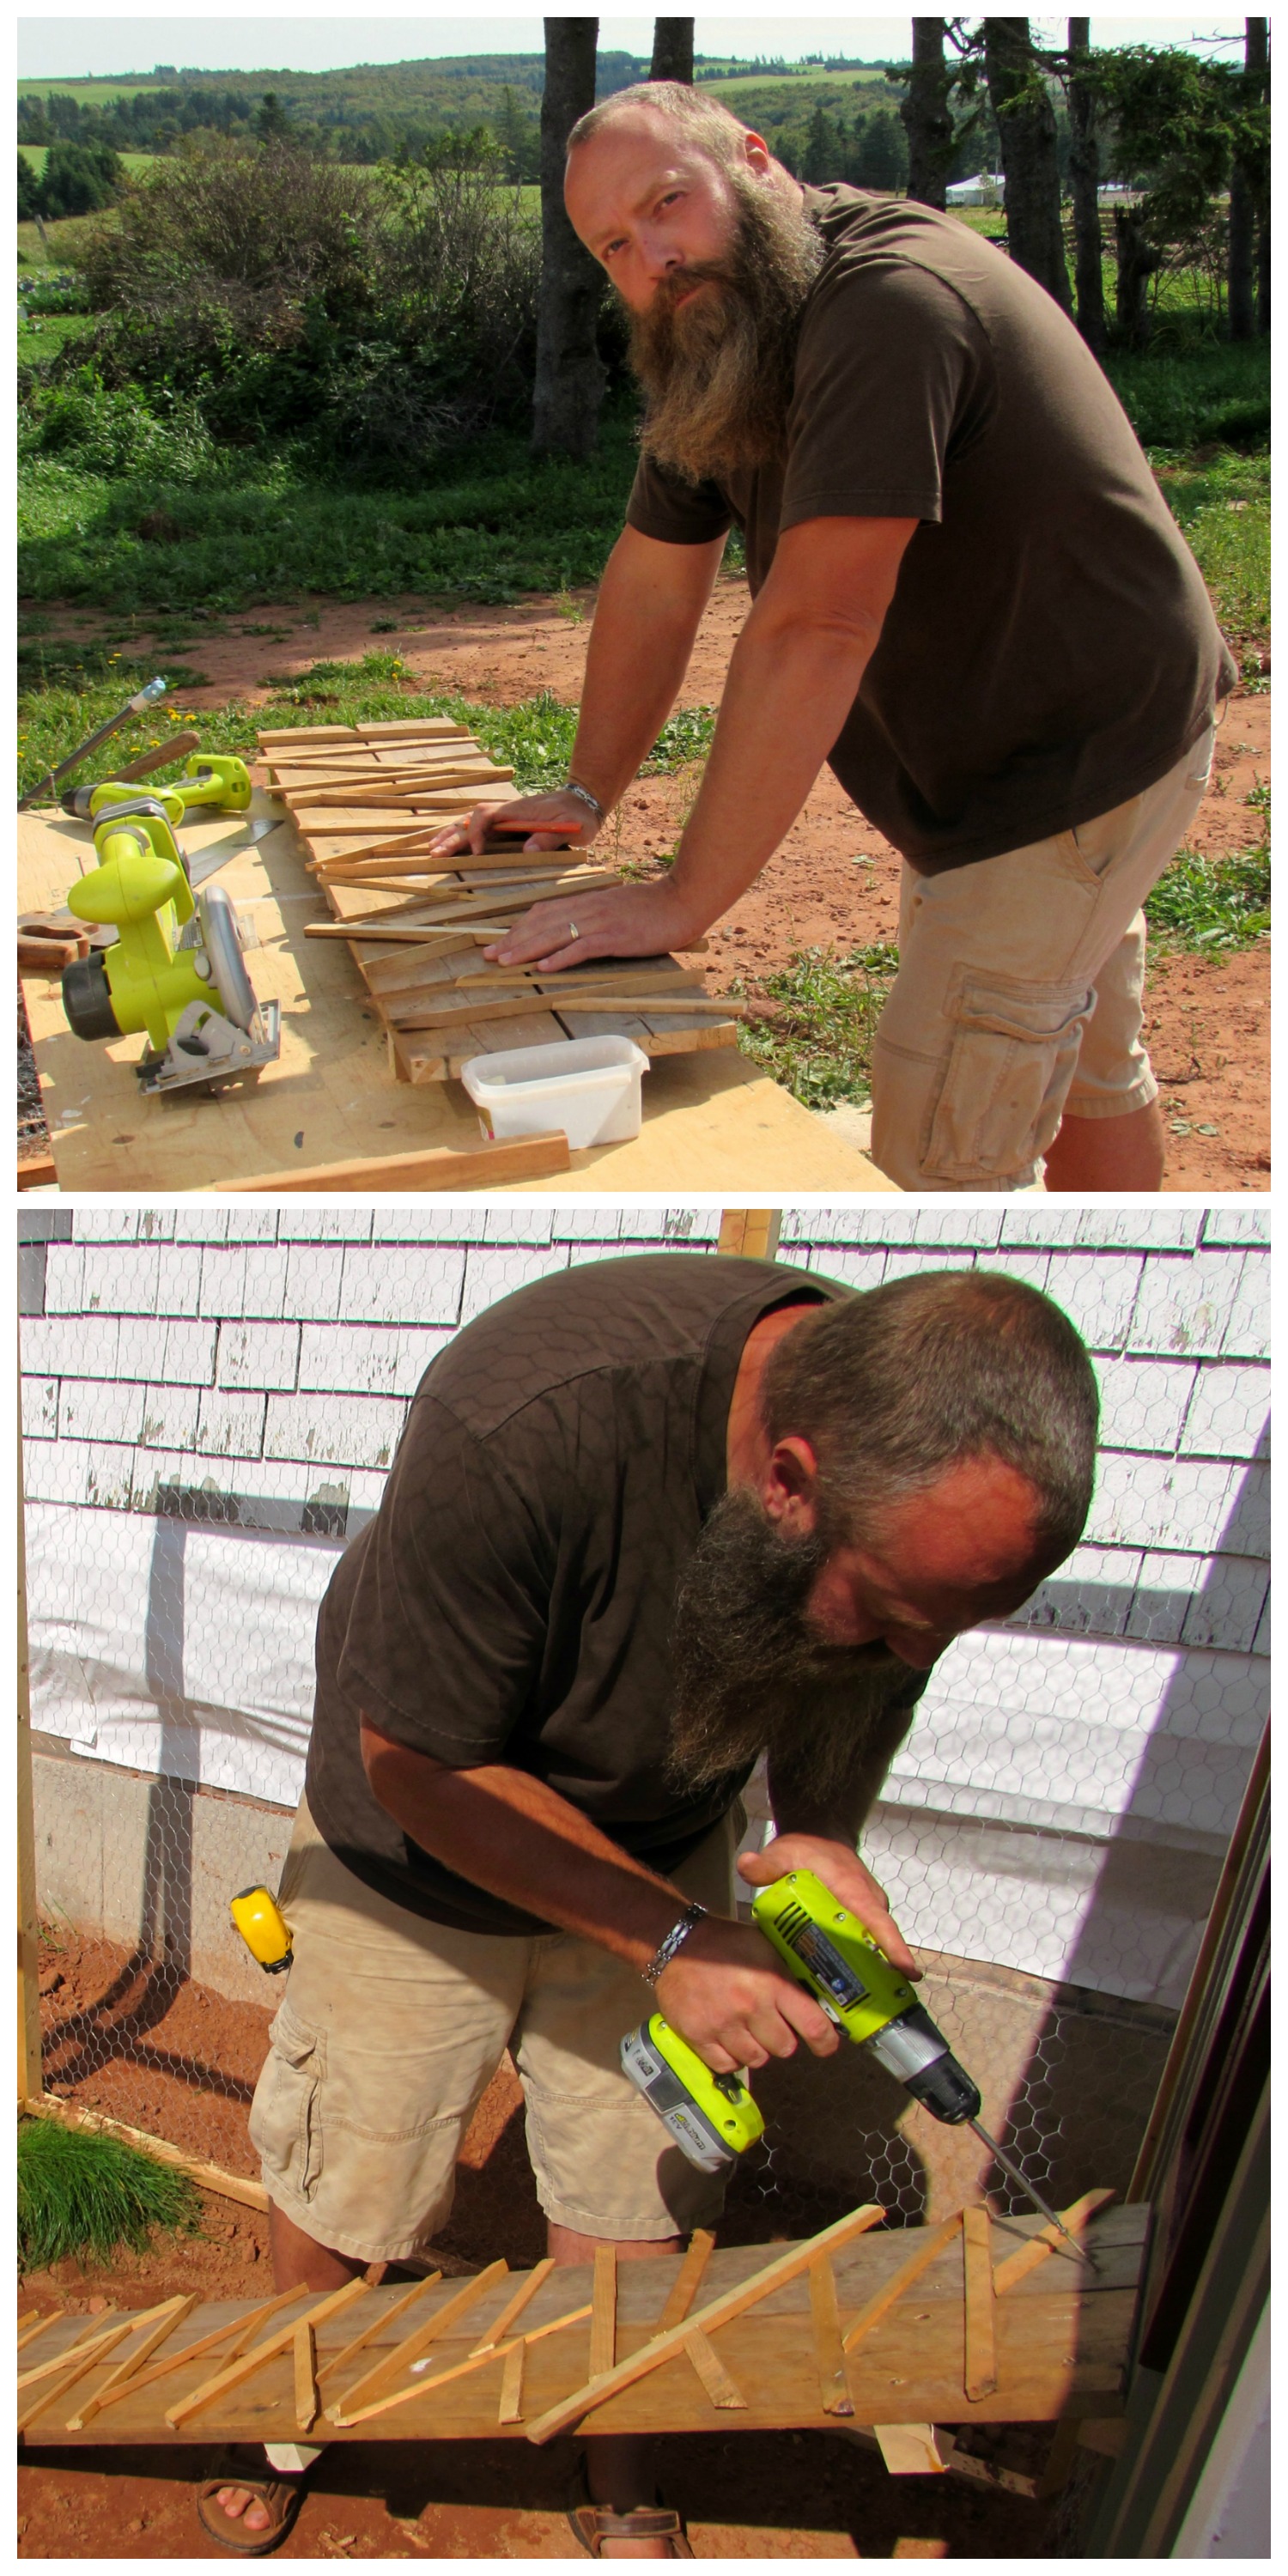
Once the deck and floor was built, we scavenged some 2″x4″s and framed the walls and roof.  Rather then sheathing the coop with plywood and applying some sort of siding, we elected to use the pine boards taken from the old addition ceiling and made board and batten siding applied directly to the frame – no plywood.

coop Collage2

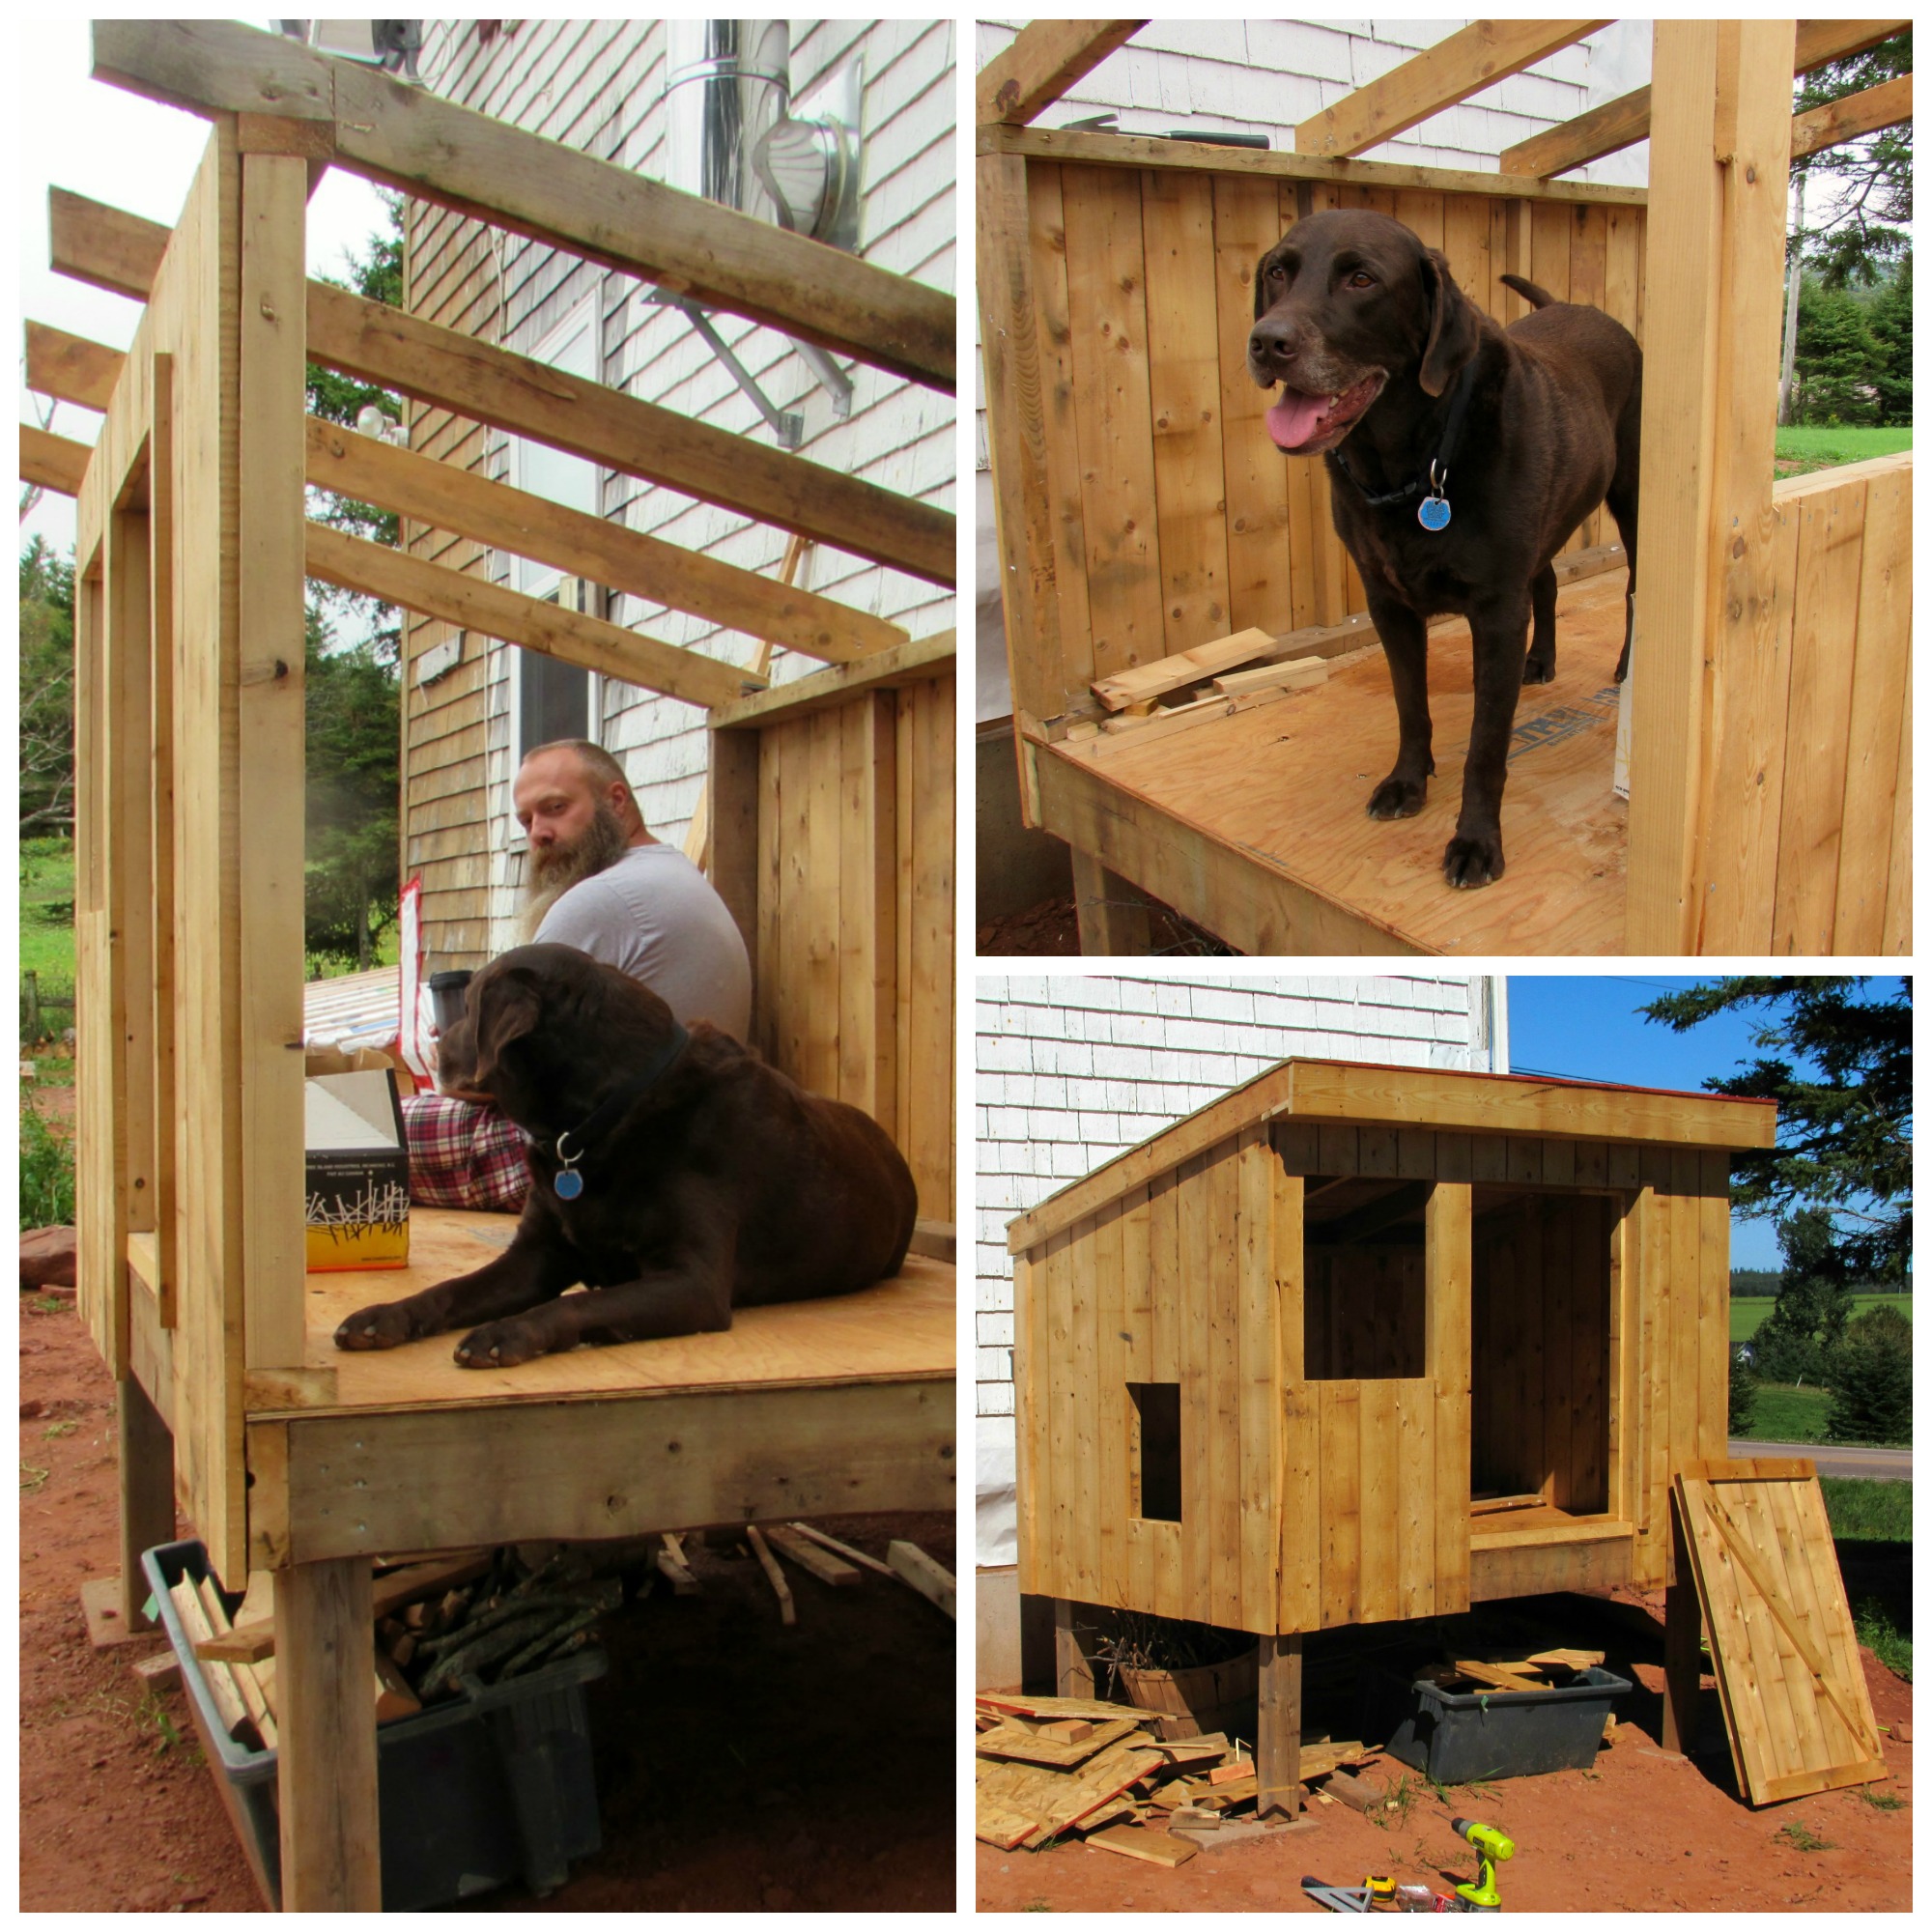
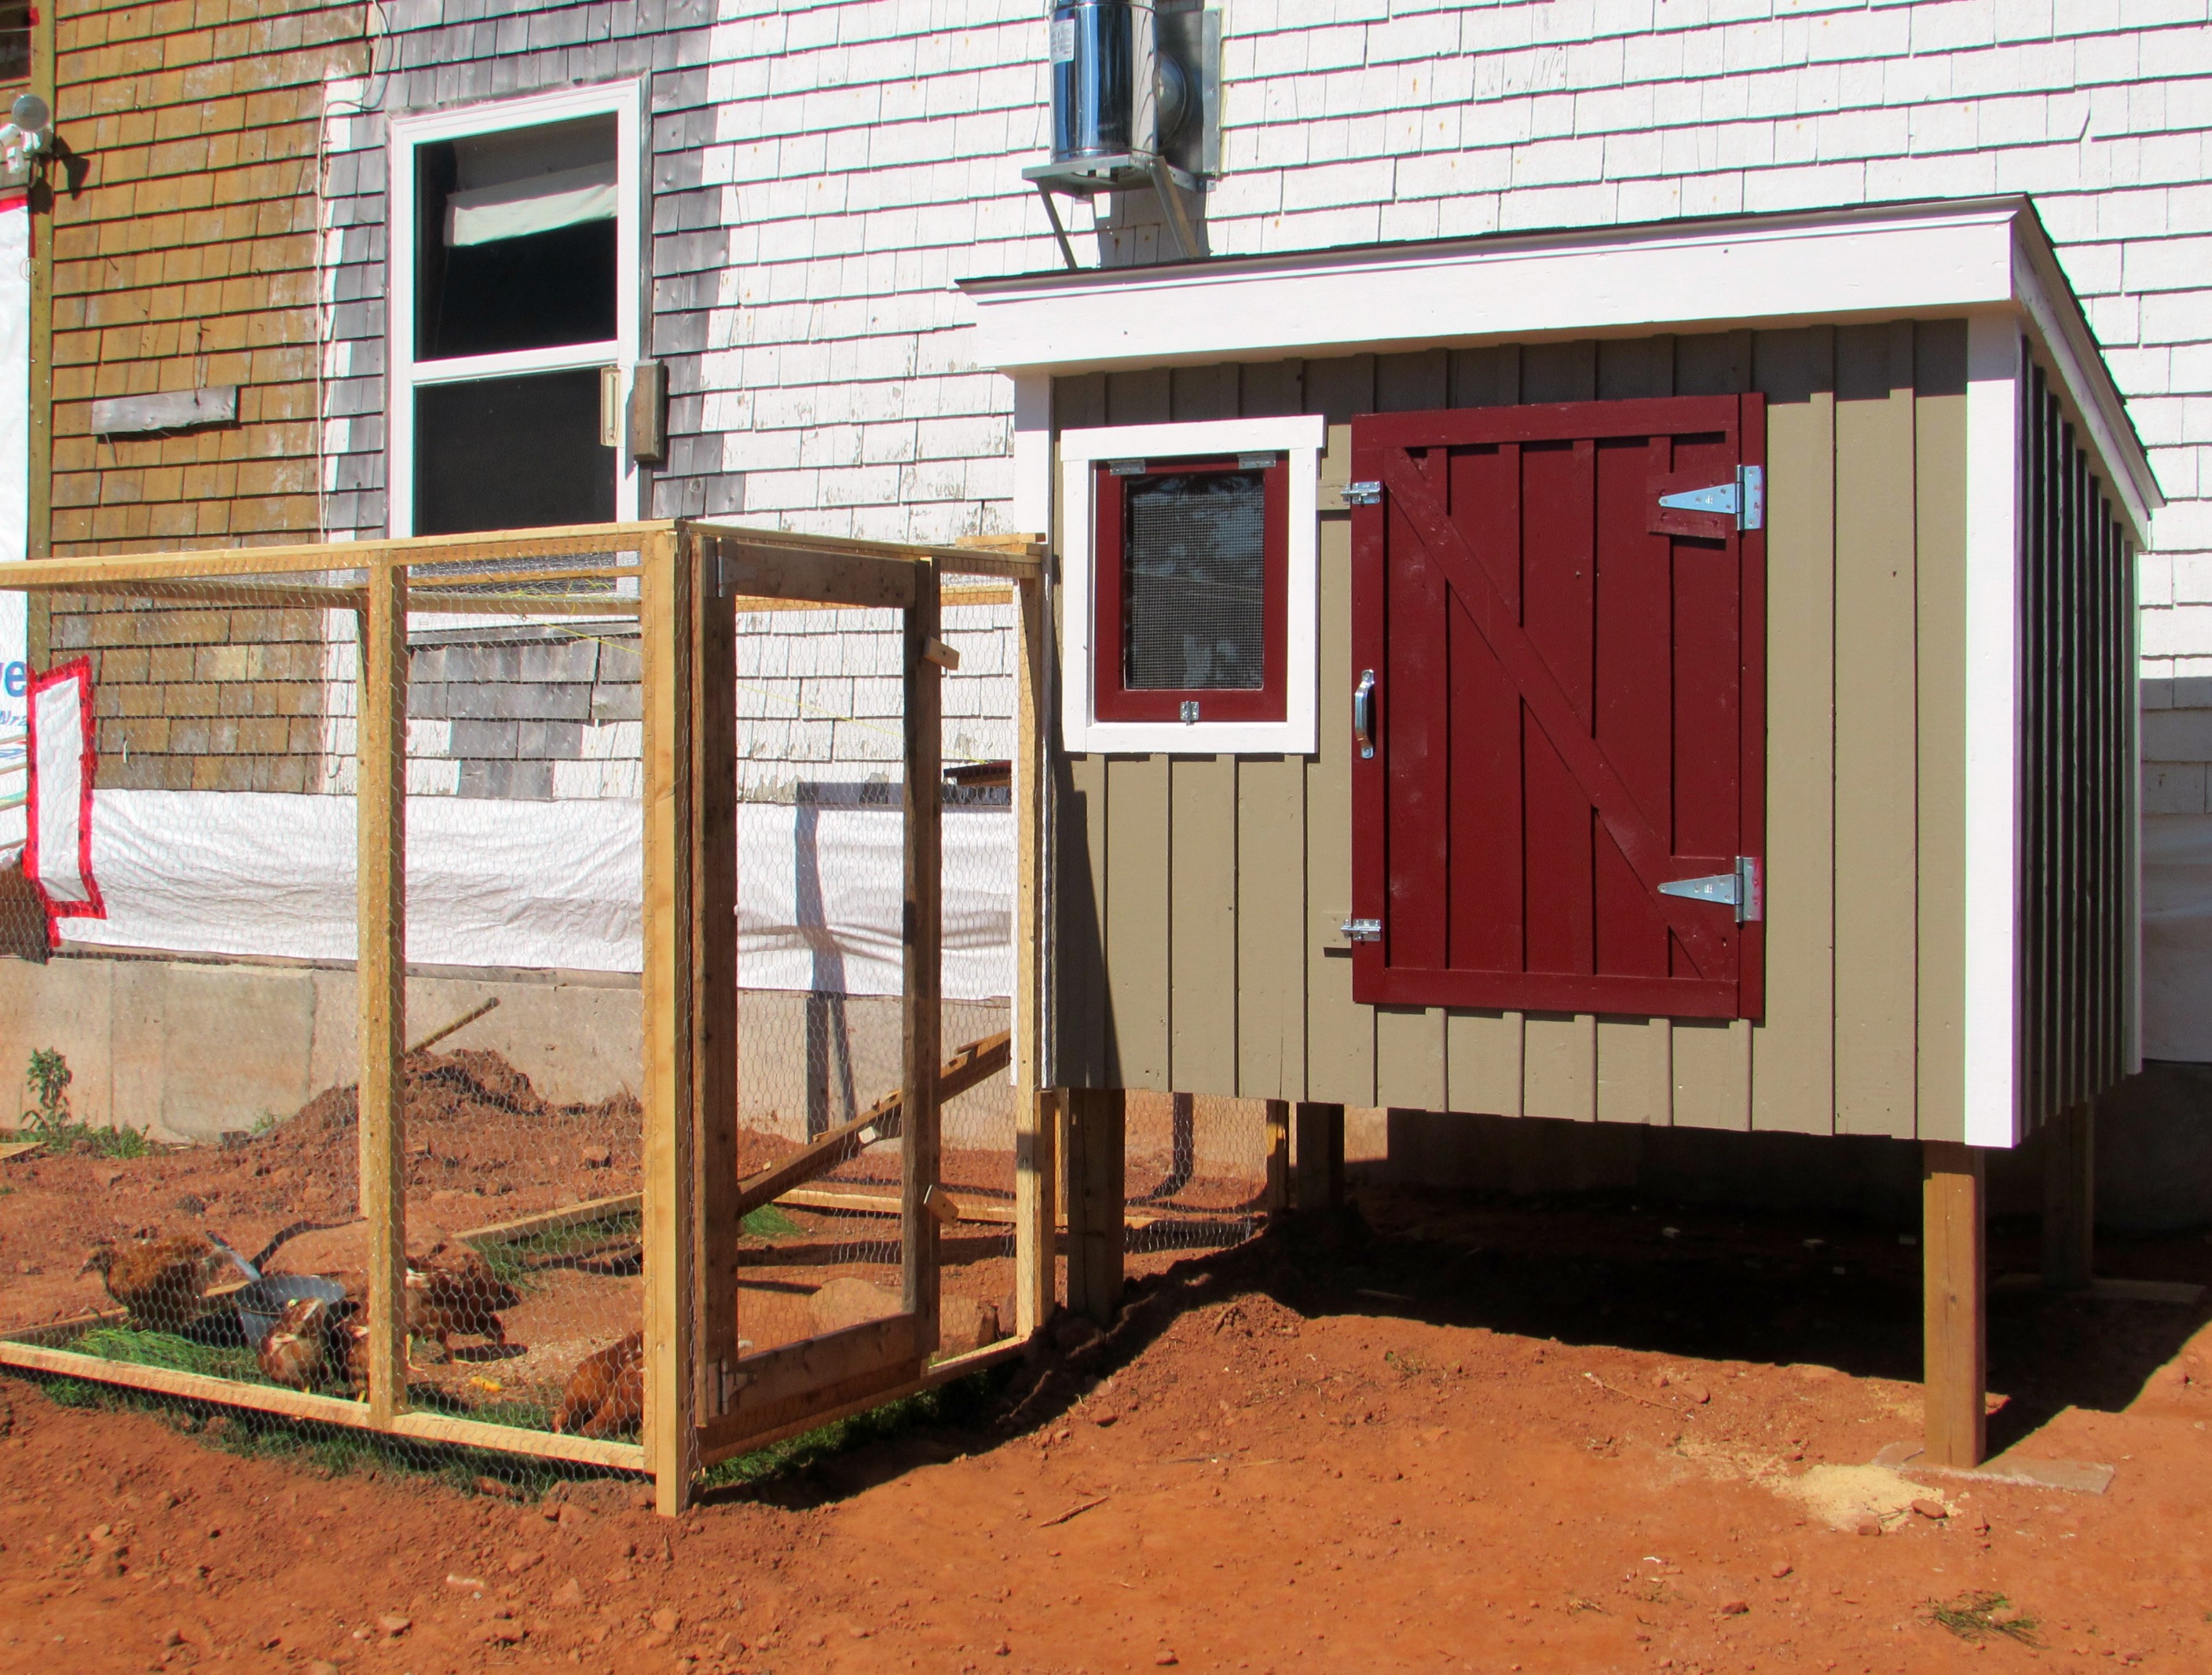
We debated the exterior finish for the coop.  Would we leave it natural? stain the wood? paint?  Given our location and climate, leaving it unfinished wouldn’t be an option.  It wouldn’t take long for the exposed pine and spruce to deteriorate and although it’s a temporary home for the girls, I want it to last.  We’ve been trying to decide what colors to paint our house next year and thought we’d test our choices on the coop.  But then again, paint’s not cheap either.  That’s when I remembered that somewhere in the house is a box with some of the paint we brought with us from Ontario.  The taupe was from our garage door and trim, the red from our front door.

The window was one of several we found in the barn from who-knows-where, but it was perfect for our needs.  I just had to build the frame for it.  We also built the door for the coop with the pine boards. From there, we finished the framing and and sheathed the roof with a sheet of OSB sheathing we used inside for the baffle vents in our attic.  When we cleaned out the barn shortly after moving to PEI, we found part of a bundle of shingles the previous owner used for some roof repairs.

coop Collage3

We bought three lengths of shingle/fascia flashing, a quart of white paint and the door and window hardware.

With the coop done, we built the run with a few more pieces of salvaged lumber and the chicken wire we bought at the local farm co-op.  The mesh extends below the bottom of the run and laid into a trench just outside the frame.  It was buried with whatever stone we could find handy and then backfilled with soil.  The idea is to keep anything outside the coop that wants in, out.  (That sentence makes sense, right?)

coop Collage4

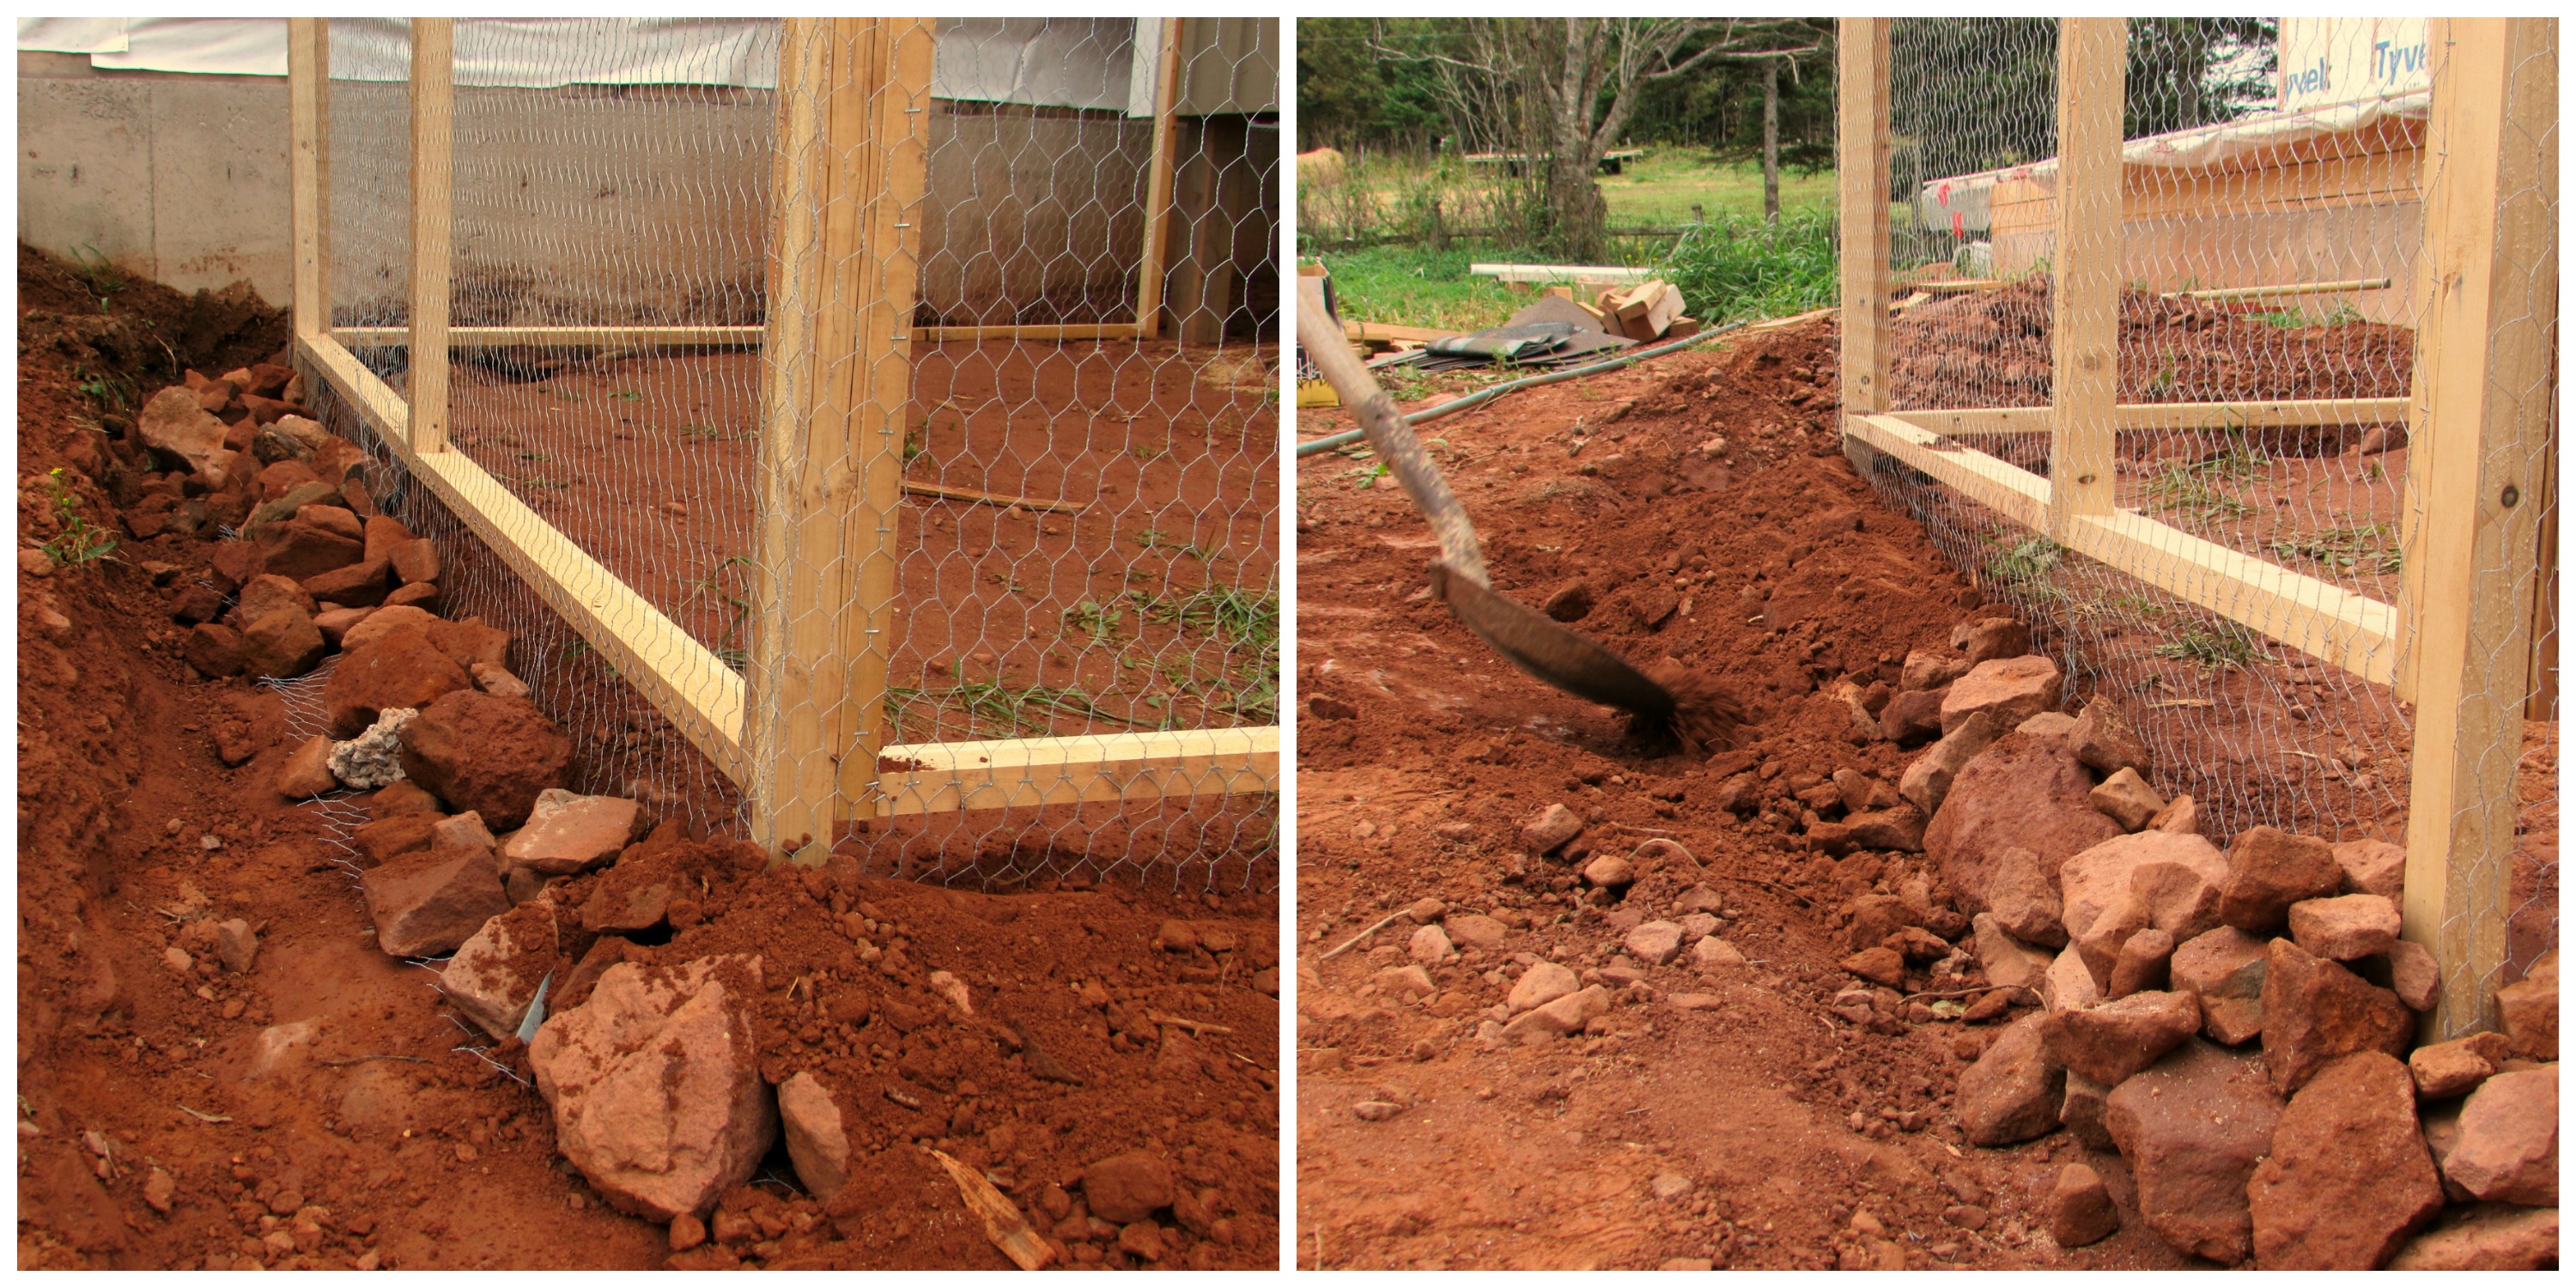
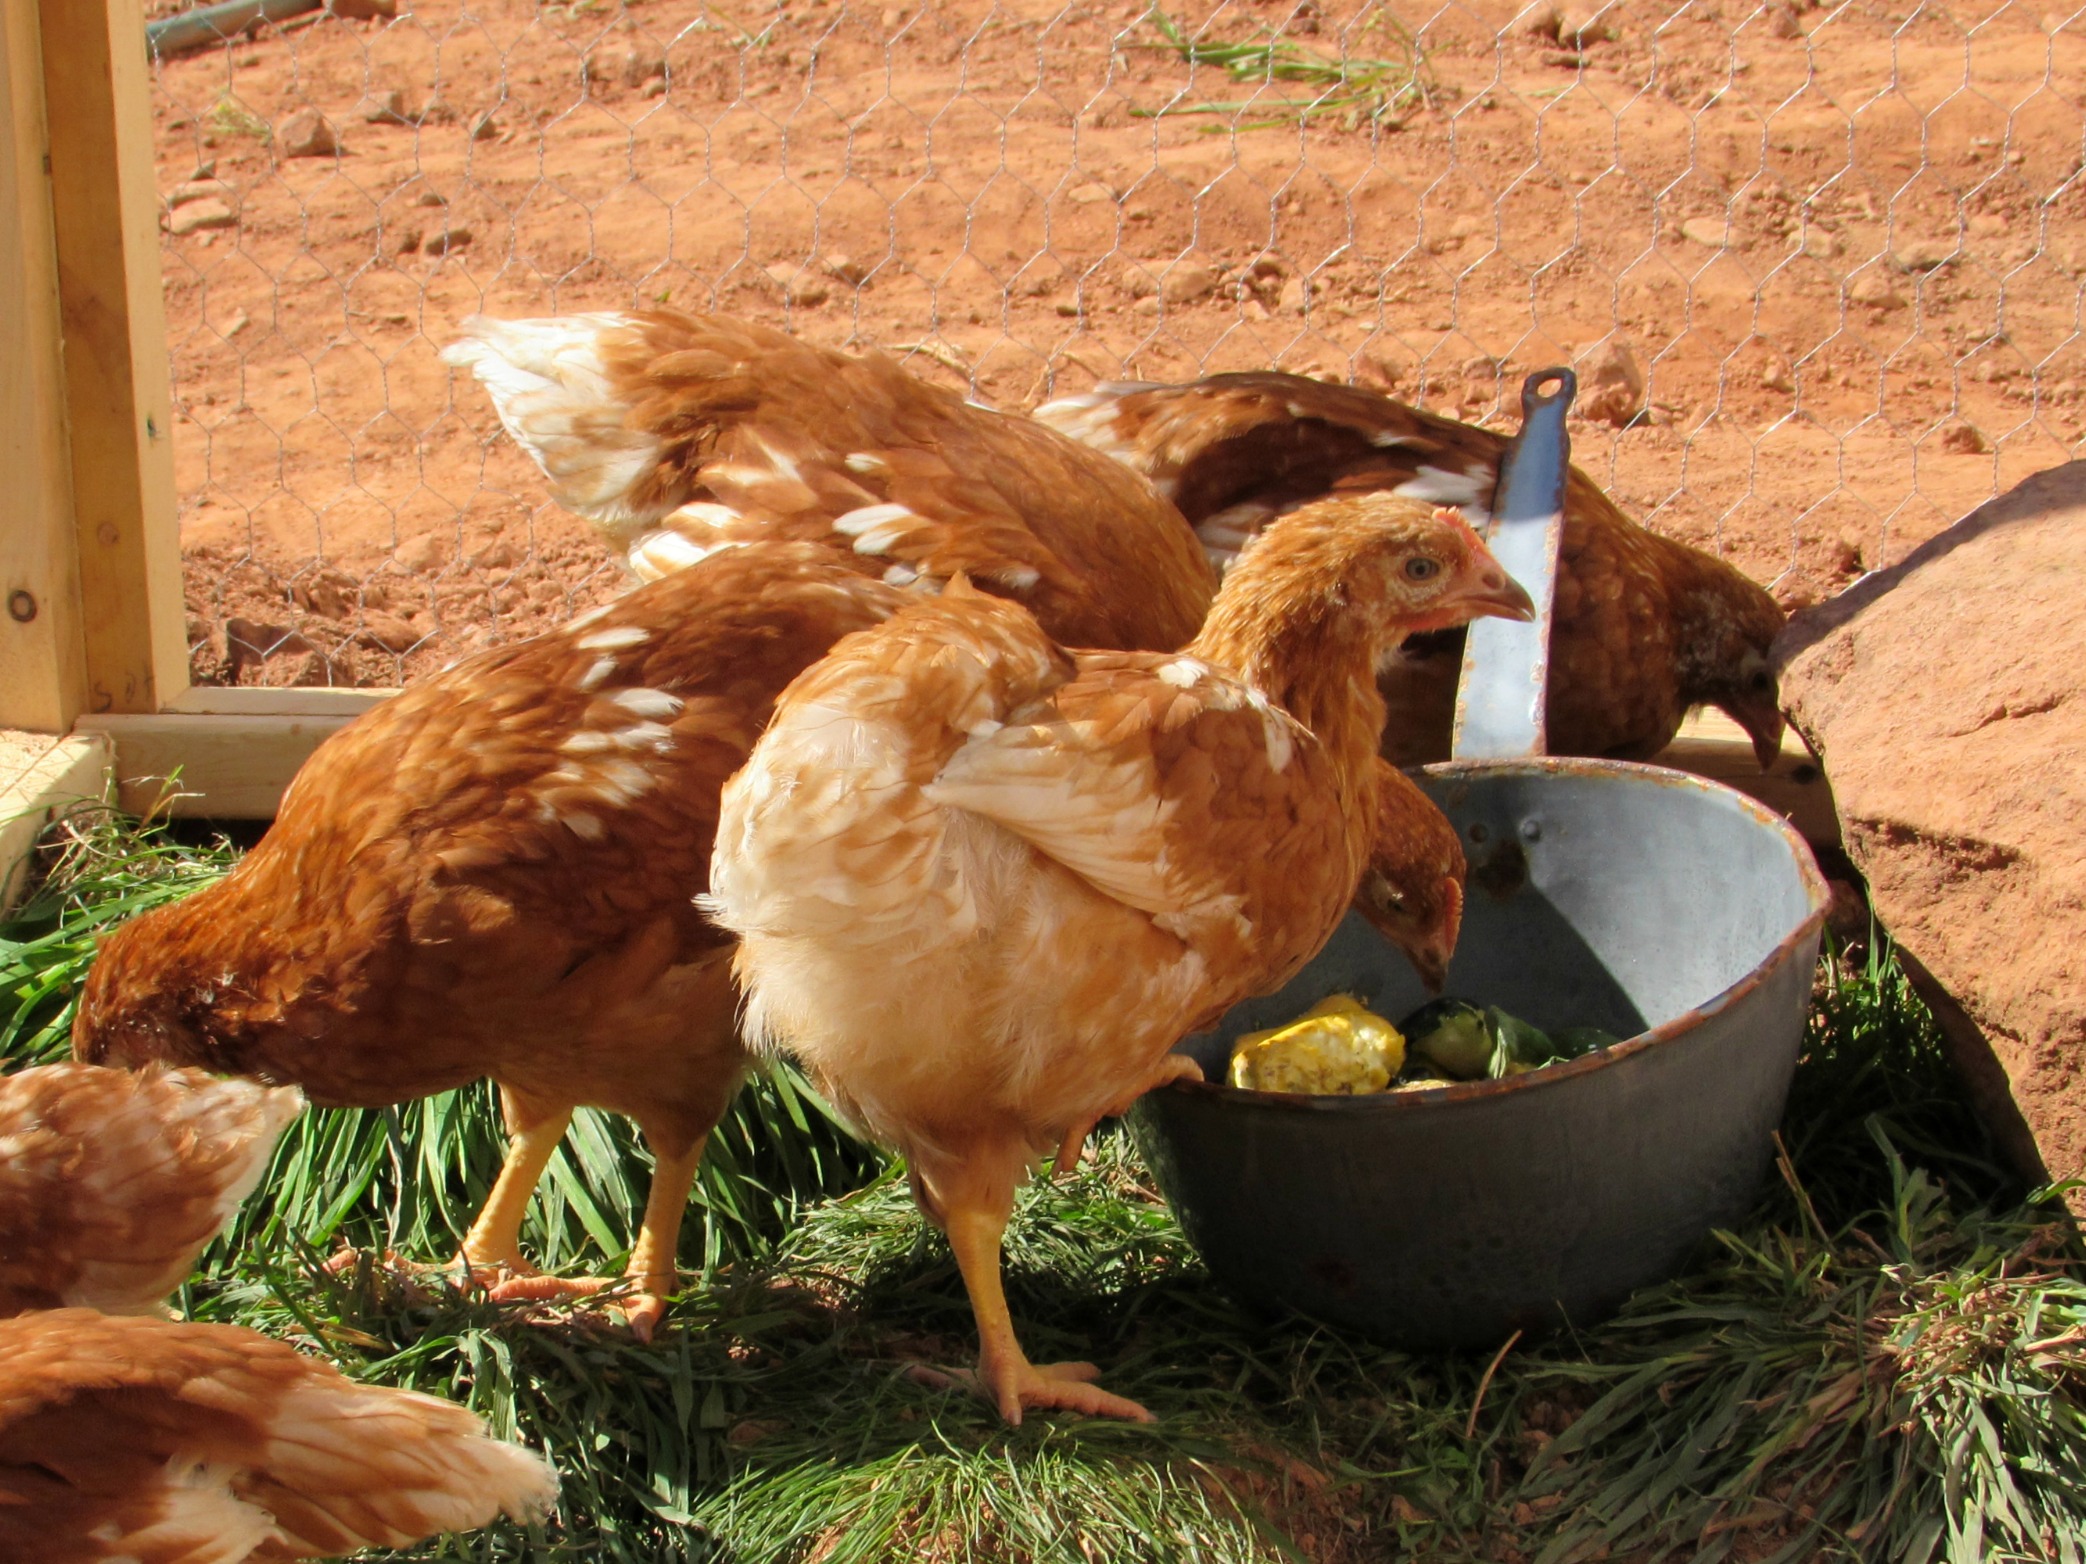
Vanessa then dug up a few patches of grass and replanted it into the run.  They’ll eat some of the grass and want to dig and scratch as well.

coop Collage5

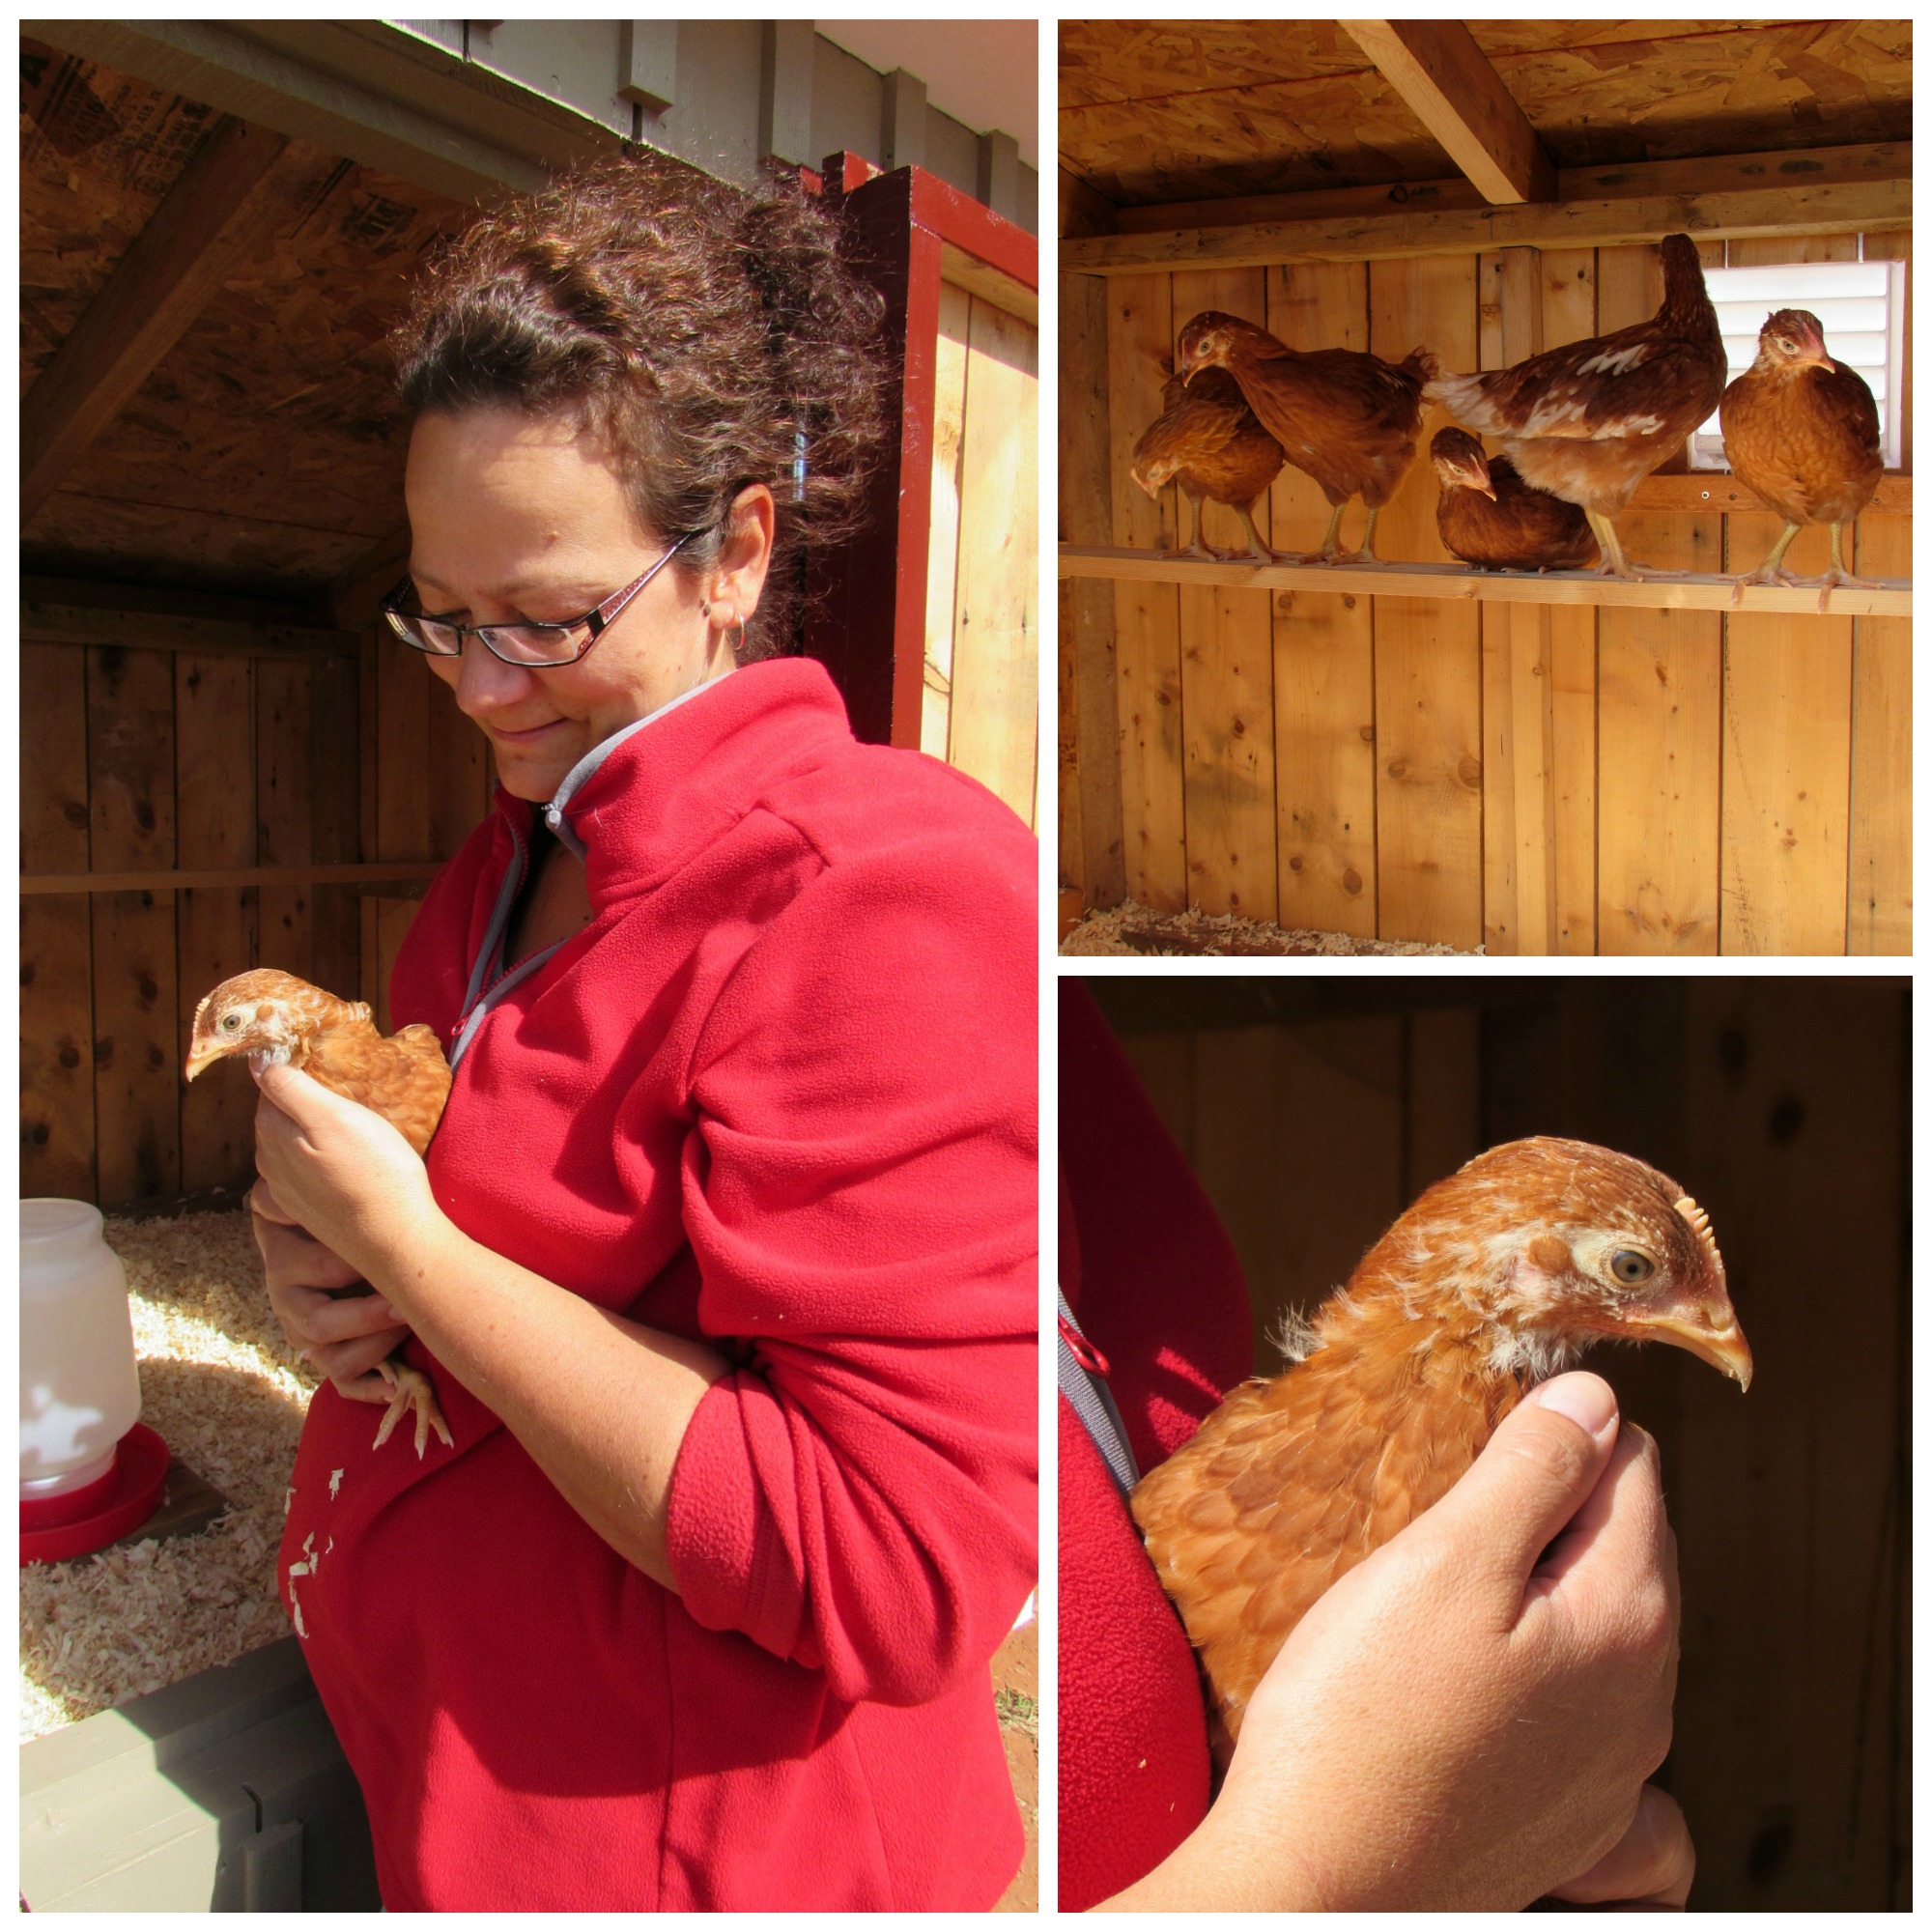
And there you go.  The only thing left was to introduce the girls into their new home.

coop Collage6

Then we realized they didn’t have a ramp to get from the coop into the run and back.

IMG_4190

So with the last of the scraps I had around, we quickly assembled the ramp and left the birds to explore.

coop Collage7

So far, they seem to love the new environment.  The chicks may have been cute but to be honest, I’m happy to get them out of our house and frankly, I think they’re just as happy to get out of their cramped brooder.

IMG_4238

So I think we met our objective: for just over a hundred bucks we’ve built a great reclaimed-wood chicken coop.  Even the two enamel pots we use to bring the kitchen scraps to the girls were found underneath the old rear-yard deck we demolished.

IMG_4247

The one thing we’ll have to do before winter sets in is to insulate the coop.  I framed it to allow for a quick installation of 1-1/2″ styrofoam insulation to the walls, ceiling and floor which we’ll do when we can afford it.  But we’ve learned that chickens are tough birds and will handle our cold winters with relative ease.

Next year, when we build Chicken Coop 2.0, we’ll likely move this one to the back and use it for the meat chickens we plan on having – or perhaps a small coop we use when introducing new birds to our flock.  Either way, it turned out better than we hoped for and we’ll find a good use for it!

IMG_4251

Now we just wait for eggs.


Disaster

It was bound to happen sooner or later.

We’ve had our first letdown on our old island farm.  And it came in the form of a disease called “late blight”.

IMG_3960

Sadly, once infected, the affected plants (in our case, tomatoes) are essentially doomed and destroying these plants is the only hope of preventing it from spreading to other plants.

IMG_3961

This disease is famous as the cause of the Irish potato famine in the 1800’s. Phytophthora infestans is not a fungus or a bacterium or a virus. It belongs to a group of organisms called “protists”, although they are still commonly referred to as “fungi”.

IMG_3956

On tomato, the first symptom on plants is often a brown/black lesion on the stem. Leaves develop large brown/black blotches, often starting at leaf margins. In humid weather and in early mornings, a fuzzy mould can often be seen on the underside of the brown/black blotches or on the stem lesions.

IMG_3957

On tomato fruit, infection causes a brown/black, leathery rot.  It may also become soft and mushy if invaded by secondary organisms.

In cool, wet or humid weather the pathogen produces structures called “sporangia”. These sporangia can travel up to 20 kilometers in wind or wind-blown rain. Rain-spread sporangia can cause infection even in a garden where tomatoes or potatoes have not been grown before.

Potatoes are also very susceptible to late blight – hence the cause for concern when it is detected here in Prince Edward Island.  Fortunately, our potatoes seem to have come away unscathed.  We’ve been enjoying new potatoes daily for a couple of weeks and we’re ready for our big harvest for cold-storage this weekend.

We first heard of a blight-outbreak in our area on the local news.  It was just a few days later when we started seeing the signs of infection on our own tomatoes.  And once it started, everything went downhill quickly.

IMG_3955

With the onset of the disease, we moved to remove the plants and bag them for disposal.  It’s strongly recommended that you NOT compost the affected plants as the organisms may not die in the composting process.  Burying, burning or sending the plants to the landfill is the best way to rid your garden of the active problem.

IMG_3964

Although the plants were dying, we could still use the green tomatoes if we acted quickly.  Often with late blight, even green tomatoes brought in the house to ripen may still rot anyway.  In wet weather, green fruit may have been infected already, or be carrying spores on the surface. As the fruit ripens, rot develops.

IMG_3962

Some gardeners report that washing green fruit in soap and water after picking, or dipping green fruit in a 10% bleach solution (1 part household bleach to 9 parts water) followed by a soap and water wash, reduces fruit rot during ripening.  We didn’t take any special measures to allow the tomatoes to ripen – so we did lose quite a lot to rot, but we still enjoyed a few fresh tomato sandwiches in the meantime.

IMG_3968

So with the glut of green tomatoes, we spent a couple of days making a few different preserves – Salsa Verde, Green Tomato and Pineapple Chutney and Piccalilli.  I’ll be sharing some of these ideas in future posts, but today, it’s all about Green Tomato Chow.

On Prince Edward Island, these firm, under-ripe green tomatoes are transformed into a tangy-sweet condiment that is often served alongside salt cod cakes.  I’ve had Green Tomato Chow (or Chow Chow, or Yum Yum, depending on your upbringing) on a couple of occasions since moving to the island.  Most recently with crab cakes from the Blue Mussel Cafe in North Rustico.   Think of it as a relish, to be served alongside seafood, pork, sausages or even hamburgers.

At any rate, it’s a great way to use up some of your end-of-season green tomatoes – whether by choice or by….blight.


tomato collage 2

GREEN TOMATO CHOW

  • Green tomatoes, sliced – 5-1/2 lbs.
  • Onions, halved and sliced – 1-1/2 lbs.
  • Pickling salt – 1/3 cup

Layer tomatoes and onion with salt in large pot.  Cover and let stand on counter overnight.  Drain.  Add the following ingredients to the tomato mixture in pot.

  • Granulated sugar – 3-1/3 cups
  • Mixed pickling spice (tied in cheesecloth) – 4-1/2 tbsp
  • Turmeric – 2 tsp
  • White vinegar – 2 cups

Heat and stir until sugar dissolves.  Bring to a boil then reduce to simmer for two hours, stirring occasionally.  More turmeric can be added for color and more sugar can be added for taste.

For canning, pour into hot sterilized jars leaving 1/4″ headspace.  Seal and process for 10 minutes in hot water bath.  Makes about 4 pints.


So not all was lost.  Although our first season growing a variety of tomatoes was a bit of a bust, we have learned a lot.  We lost about 90% of the tomatoes we planted.  One variety we chose is labelled as blight-resistant, and these “Mountain Merit” tomatoes are chugging along nicely in their beds.  So it seems we’ll still be enjoying some red tomatoes after all.

IMG_3958


This Chow recipe was inspired by “Company’s Coming – Preserves” by Jean Pare.