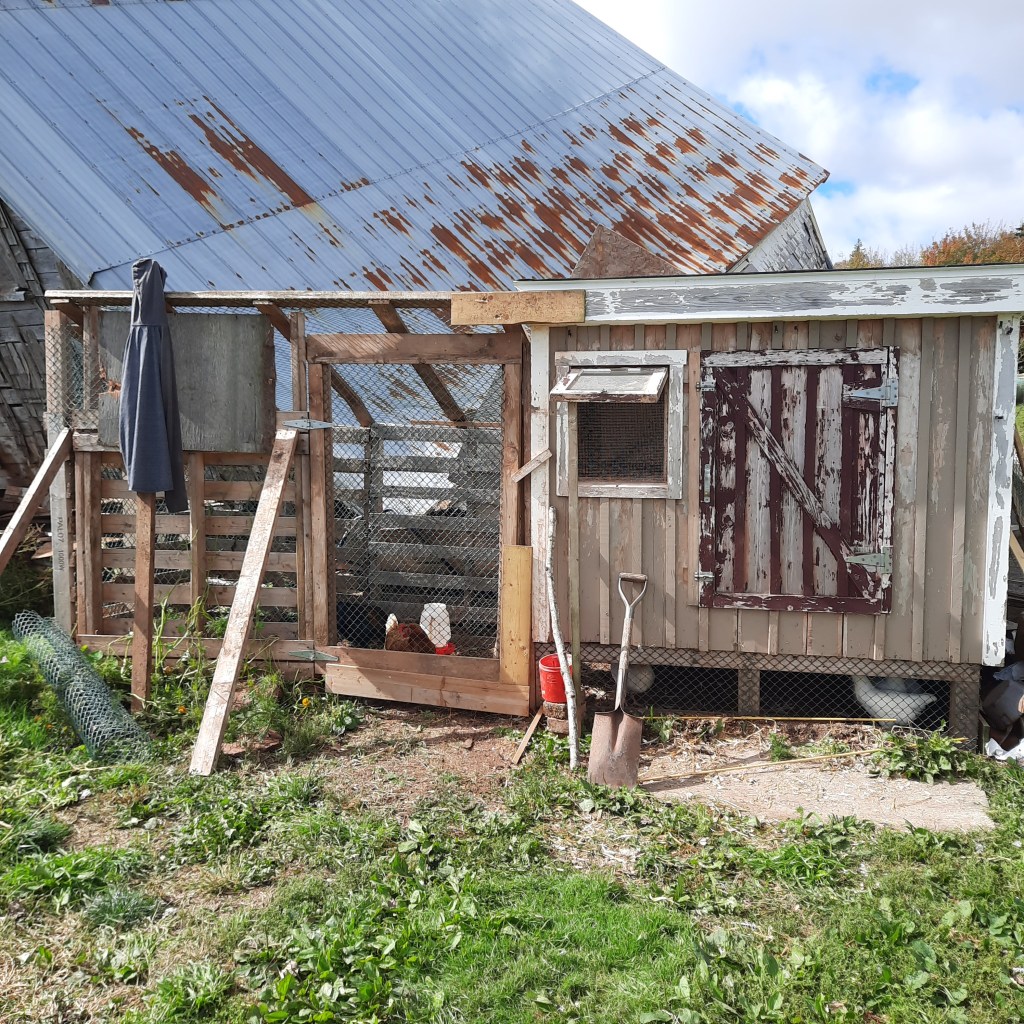
We worked on the shed / meat chickens coop over the weekend. Moved it to a new location and sprucing it up for the 🐔 ♡


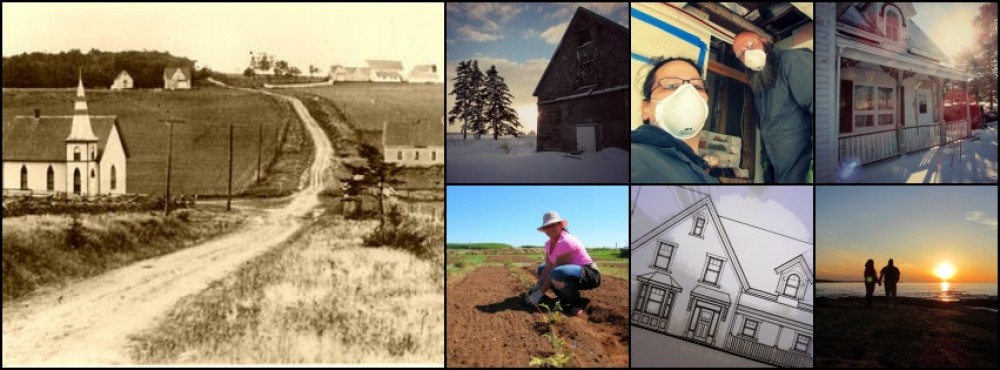
We worked on the shed / meat chickens coop over the weekend. Moved it to a new location and sprucing it up for the 🐔 ♡
It’s been a while…..
Just a little hurricane Fiona update


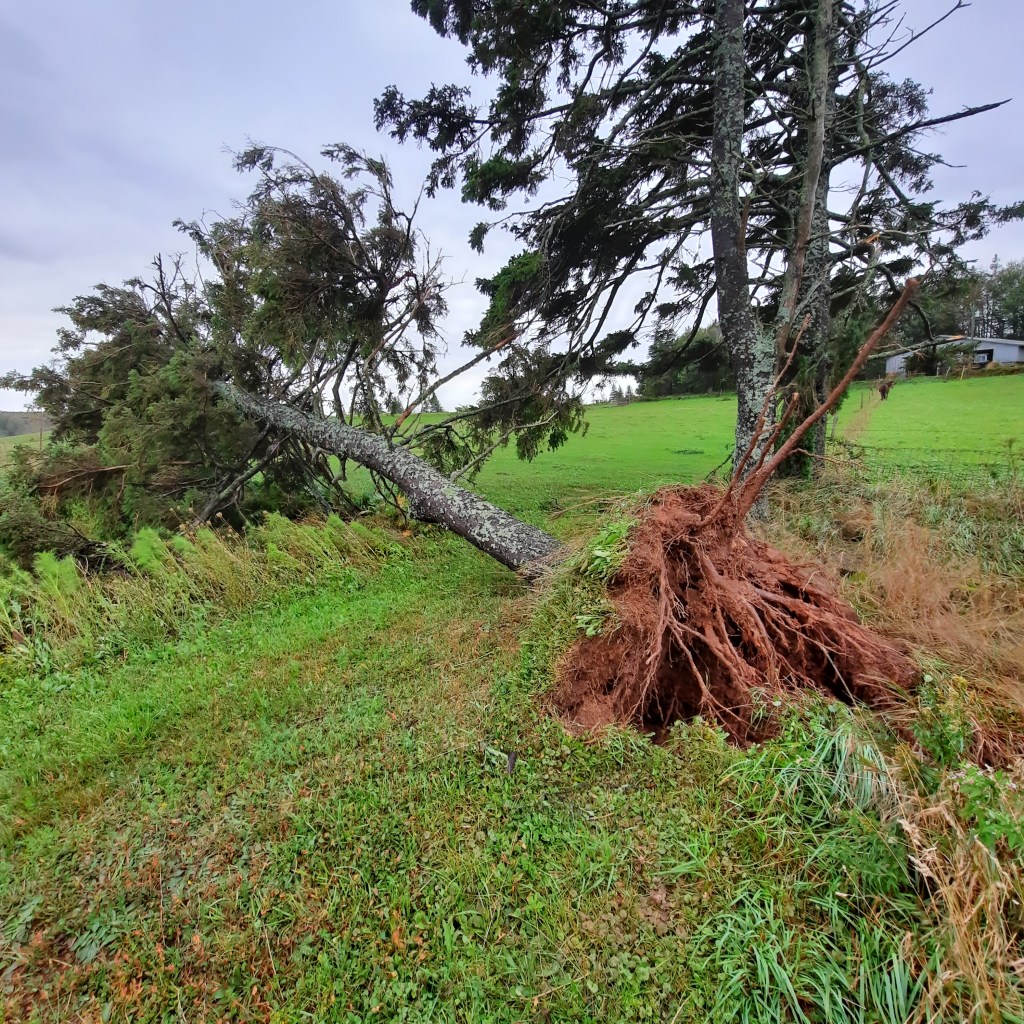


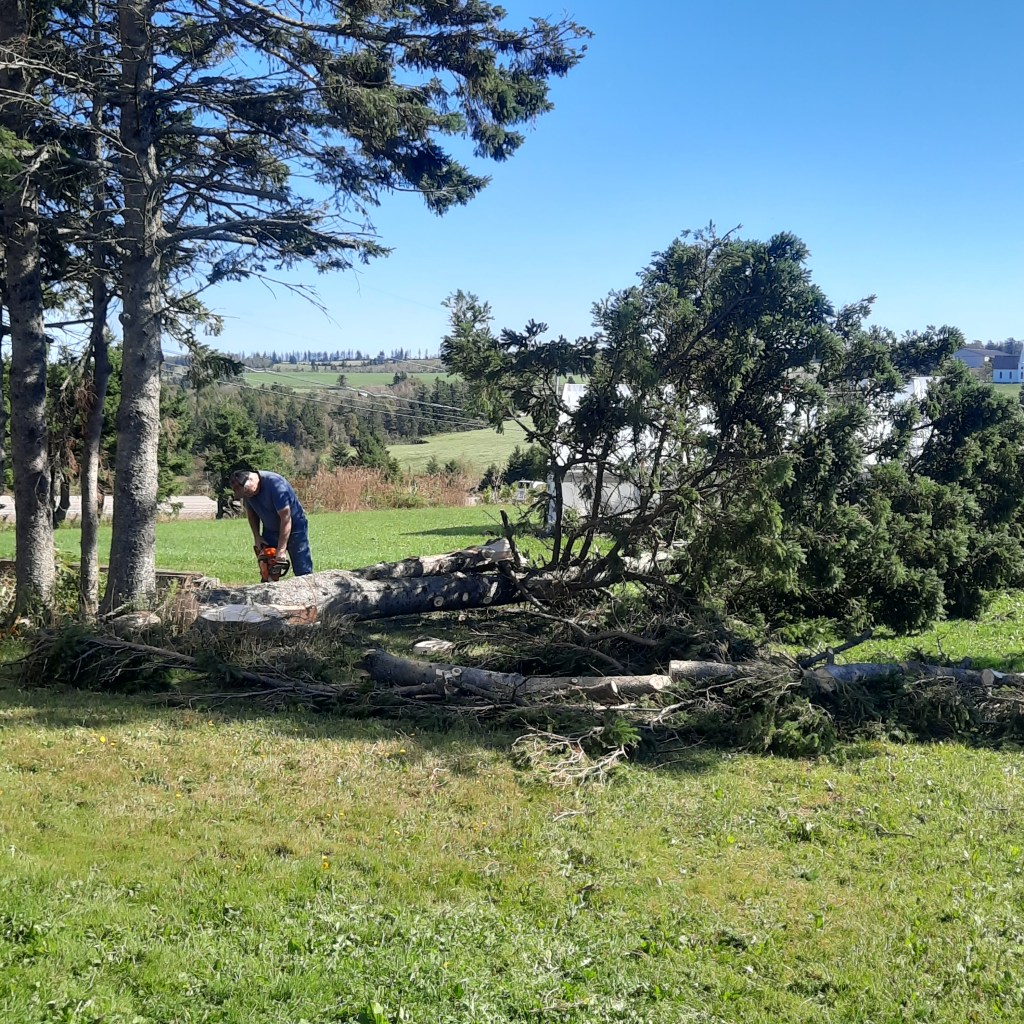


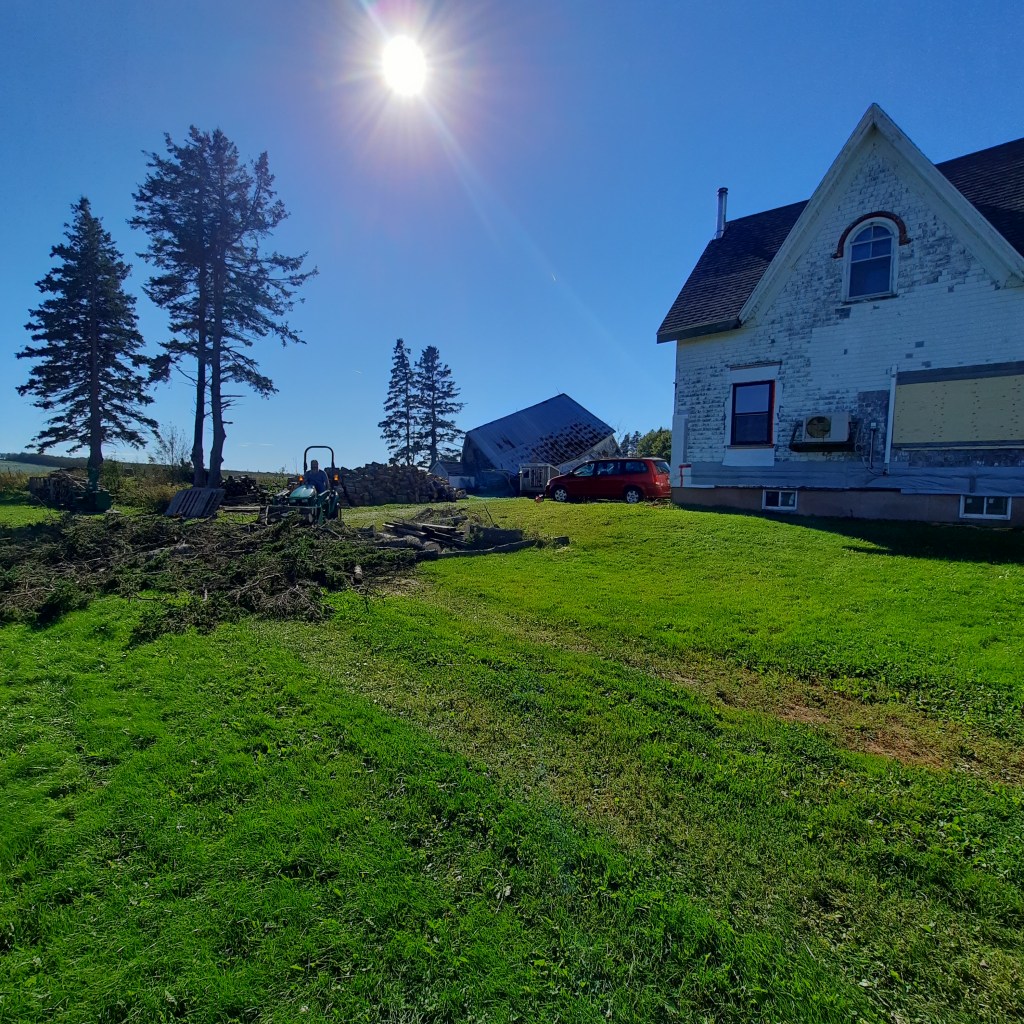


It’s been too many days since Sept 24th…. we are doing well, we still have lots without power…. most of our neighbors finally got power this past Monday. The island will never look the same:(
Thanks for your thoughts and prayers♡
Continuation of the hand crafted window trim and a sneak peak in the shop where all the carpentry magic takes place♡


-timber
Well, ok, maybe a few words.
As promised in my last post, I’d make every effort to post something more regularly than I have been. So as the saying goes, a picture’s worth a thousand words. Here’s the first post in our new Wordless Wednesday category.
….makes for a dull blog?
For what it’s worth, I’ve written several updates since my last post. Unfortunately they’re tucked away in the recesses of my brain waiting patiently for someone to shine a flashlight into the void, guiding their way out the darkness and onto your computer screen.
Until then, I humbly offer the following review of our summer.
My last post was full of anticipation for the upcoming growing season. Now we’re enjoying the early fruits of our labor and impending harvest.

For weeks now, the zucchini have been growing to mammoth proportions (which we’re processing into zucchini relish) and the zucchini we rescue from that fate end up on the grill with a little olive oil, sea salt and cracked pepper. Mmmm.
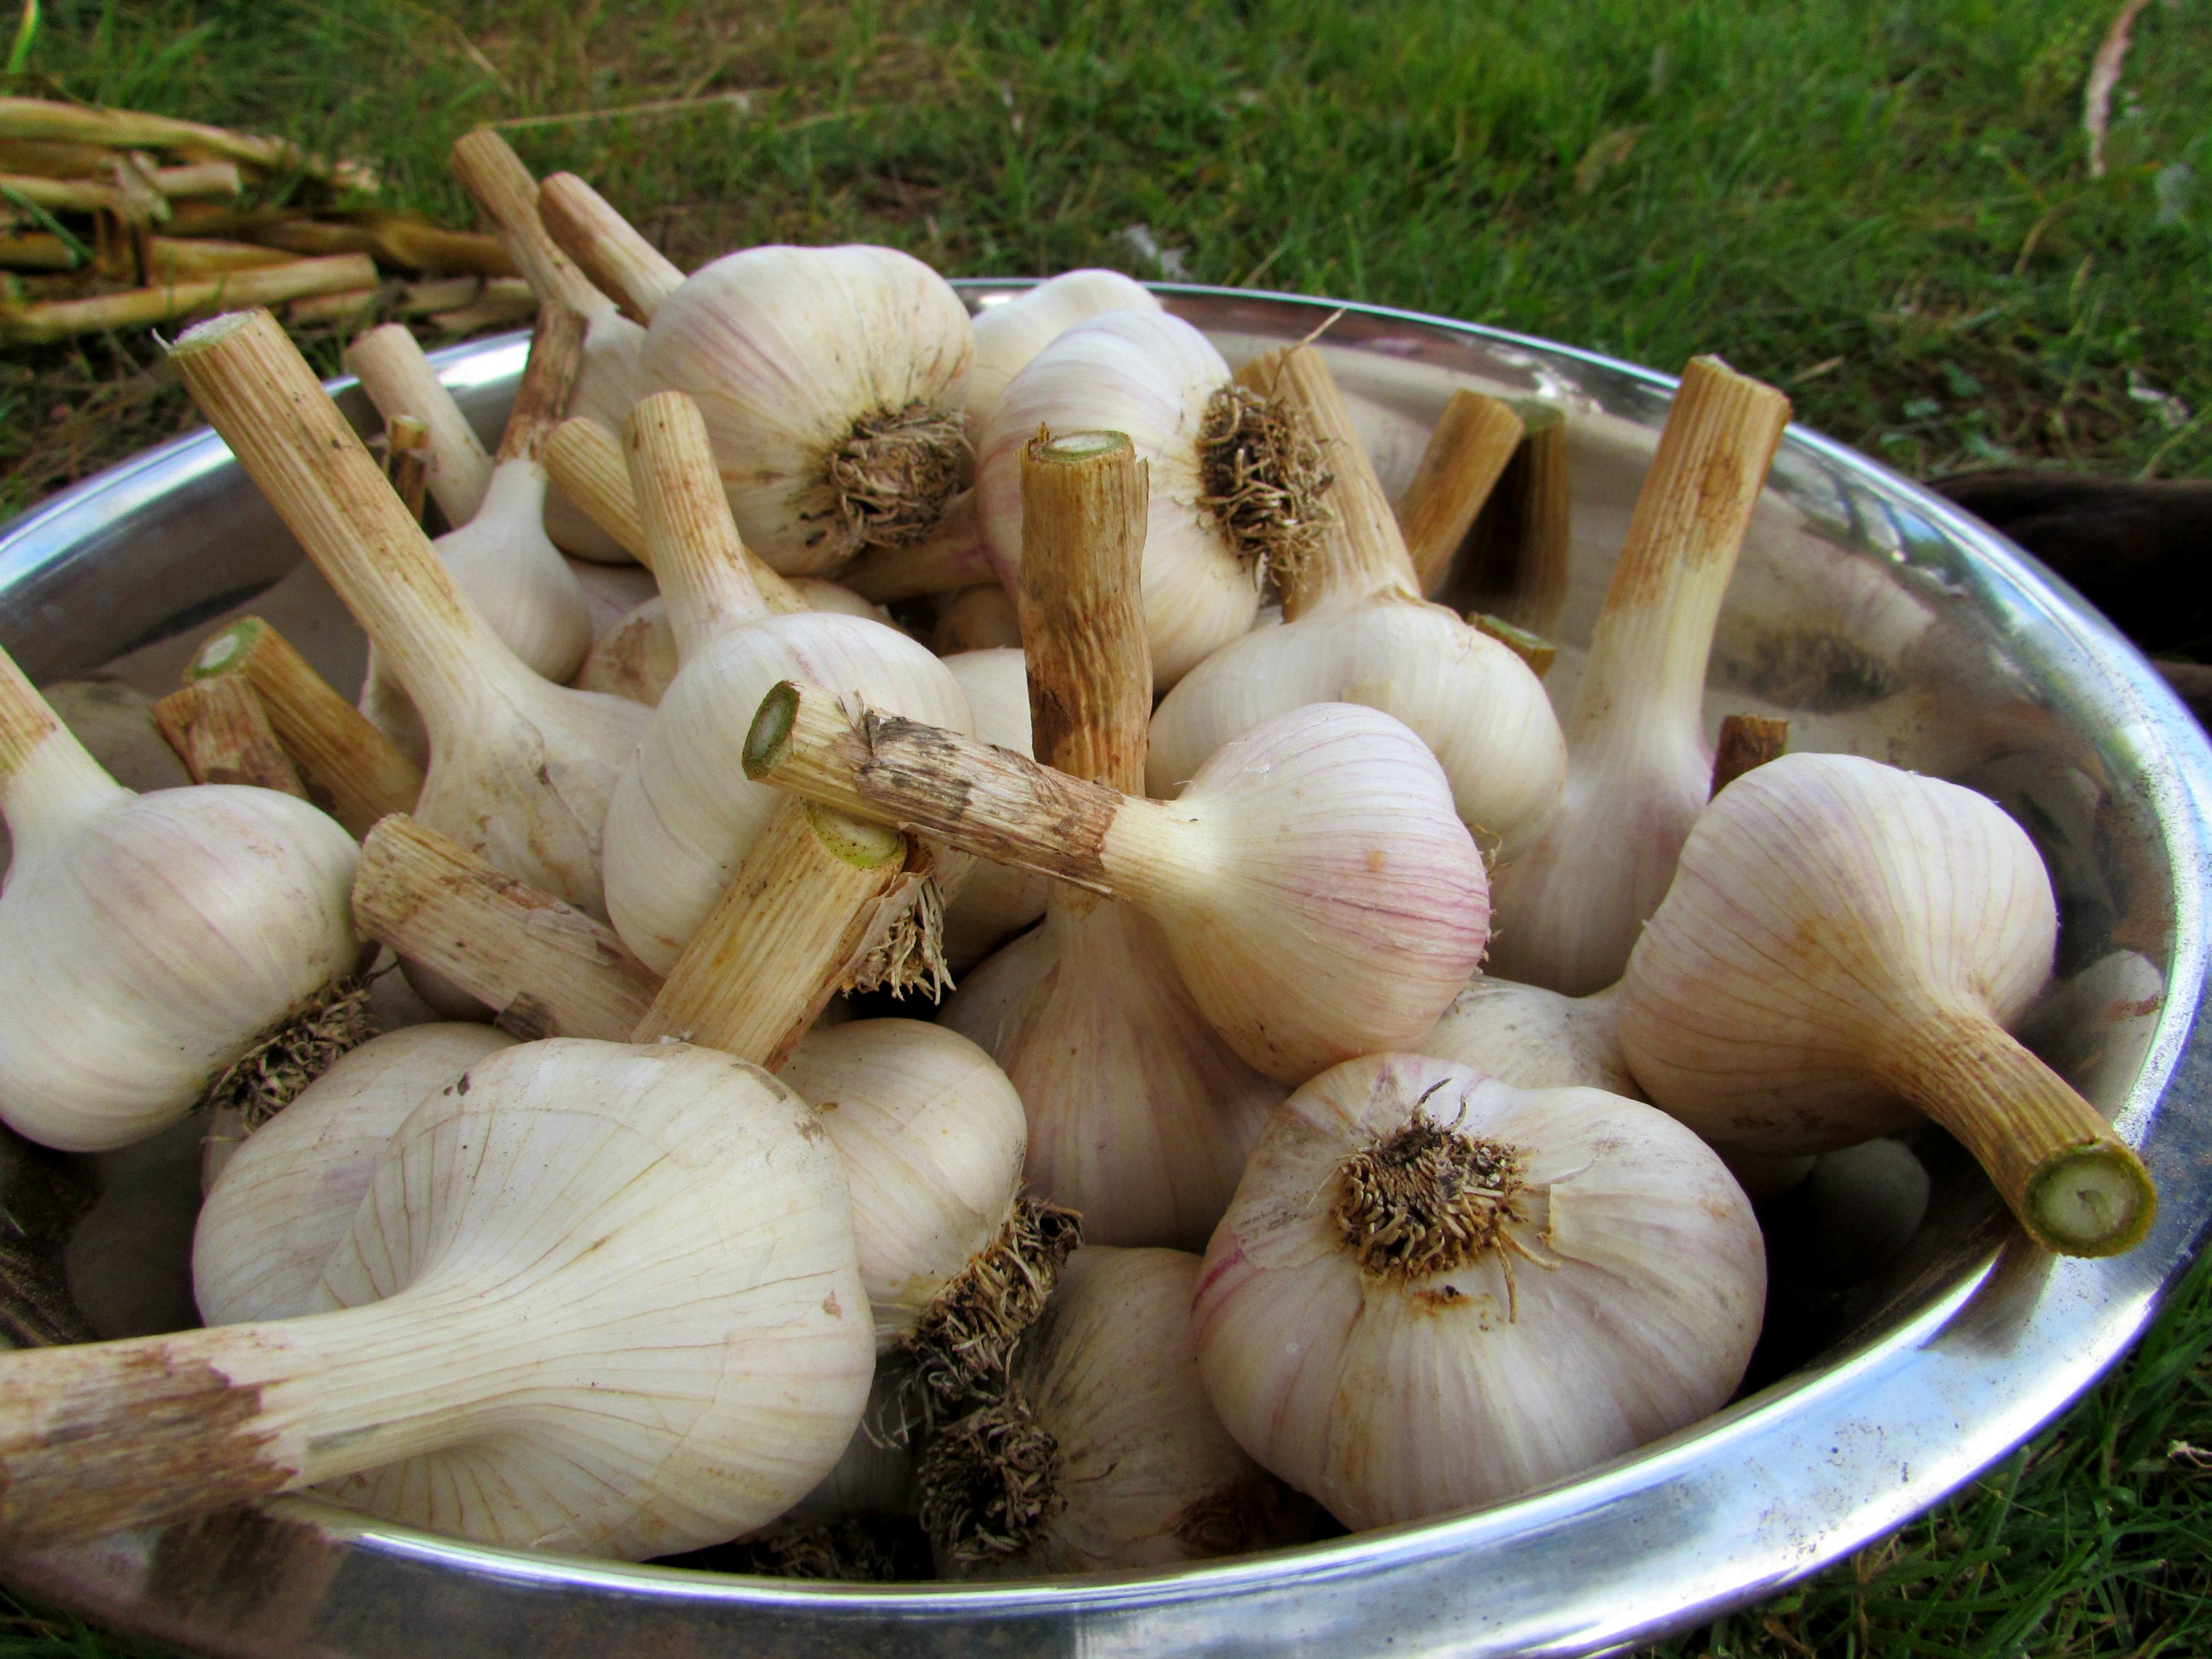
We harvested all of our garlic a few weeks ago, pulling them from their beds and hanging them to cure.
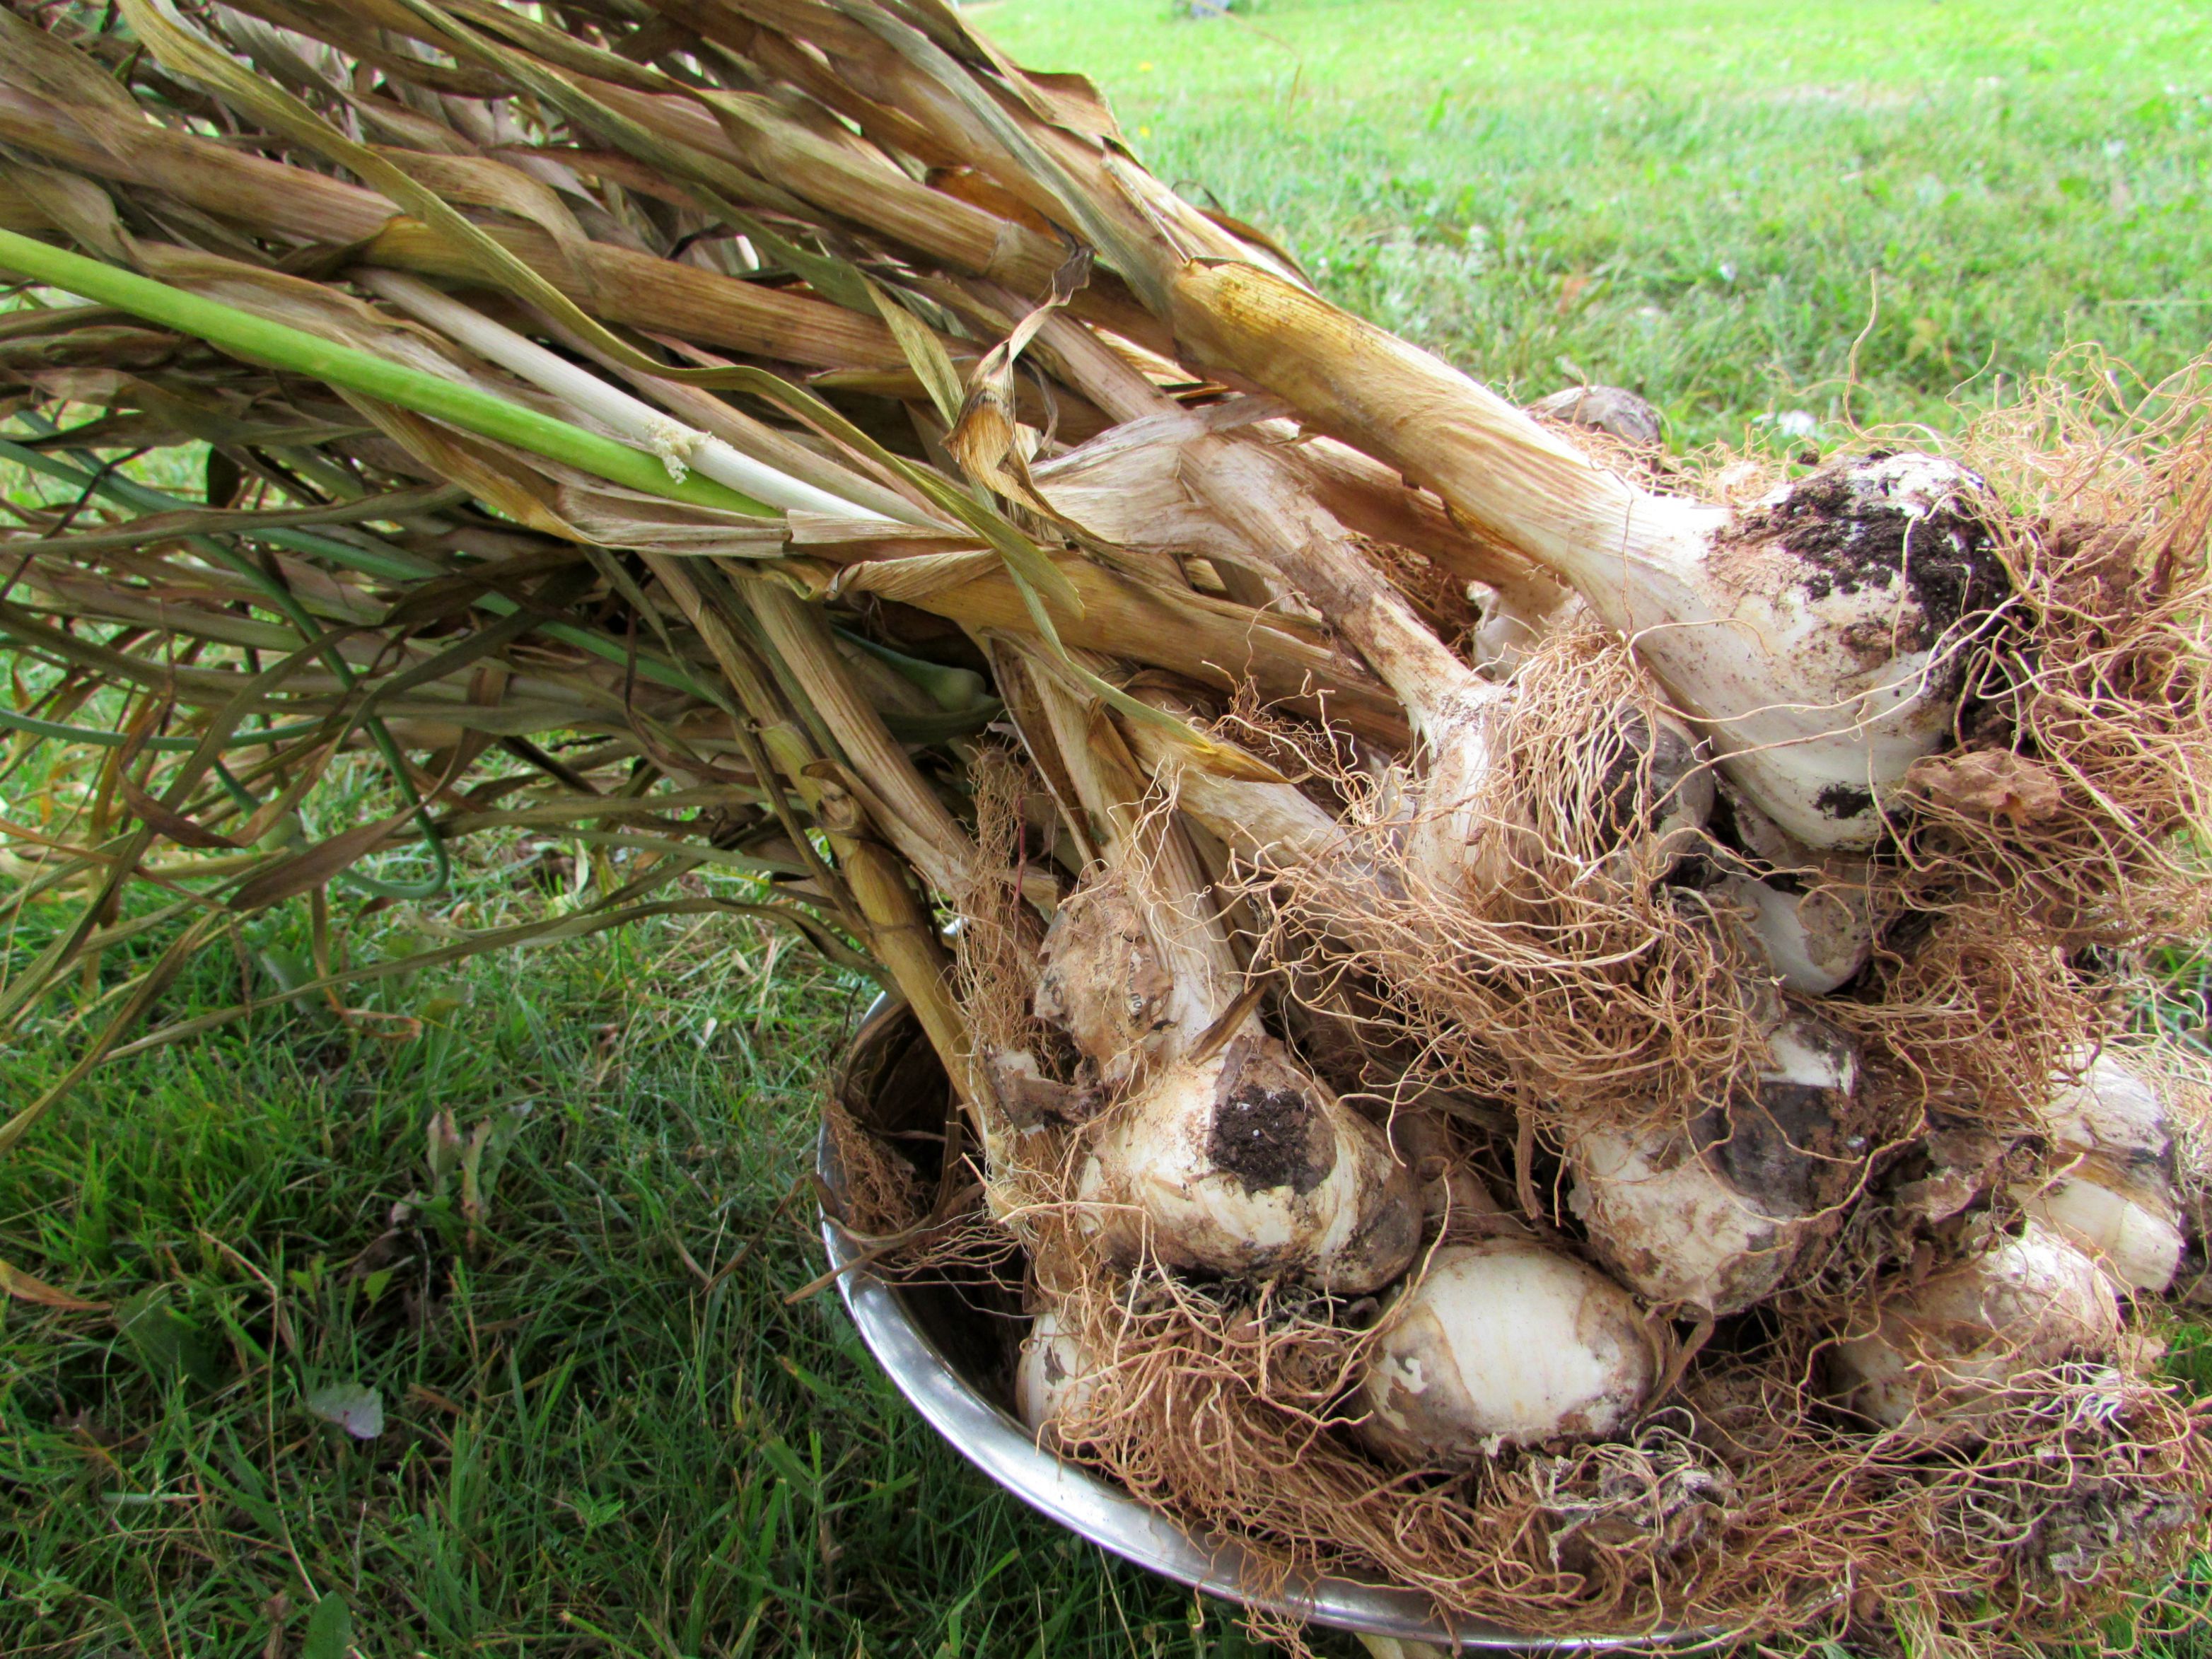
Each “leaf” of the garlic represents a layer of the paper surrounding the cloves. While the garlic is ready to use after harvesting, it’s important to dry the heads in order to store them for an extended period.
We let them cure for a couple of weeks in the warm, unfinished second floor bathroom of our home. Once sufficiently dry, we clipped the leaves and roots and have them ready to use for the next few months.

The beauty of growing our own garlic (aside from, you know, eating it) is that we have all we need to plant and grow next years’ supply. We’ll set aside the largest and best garlic heads and plant those cloves this fall for next summers’ harvest. Fresh food is awesome. FREE, fresh food is awesomer.
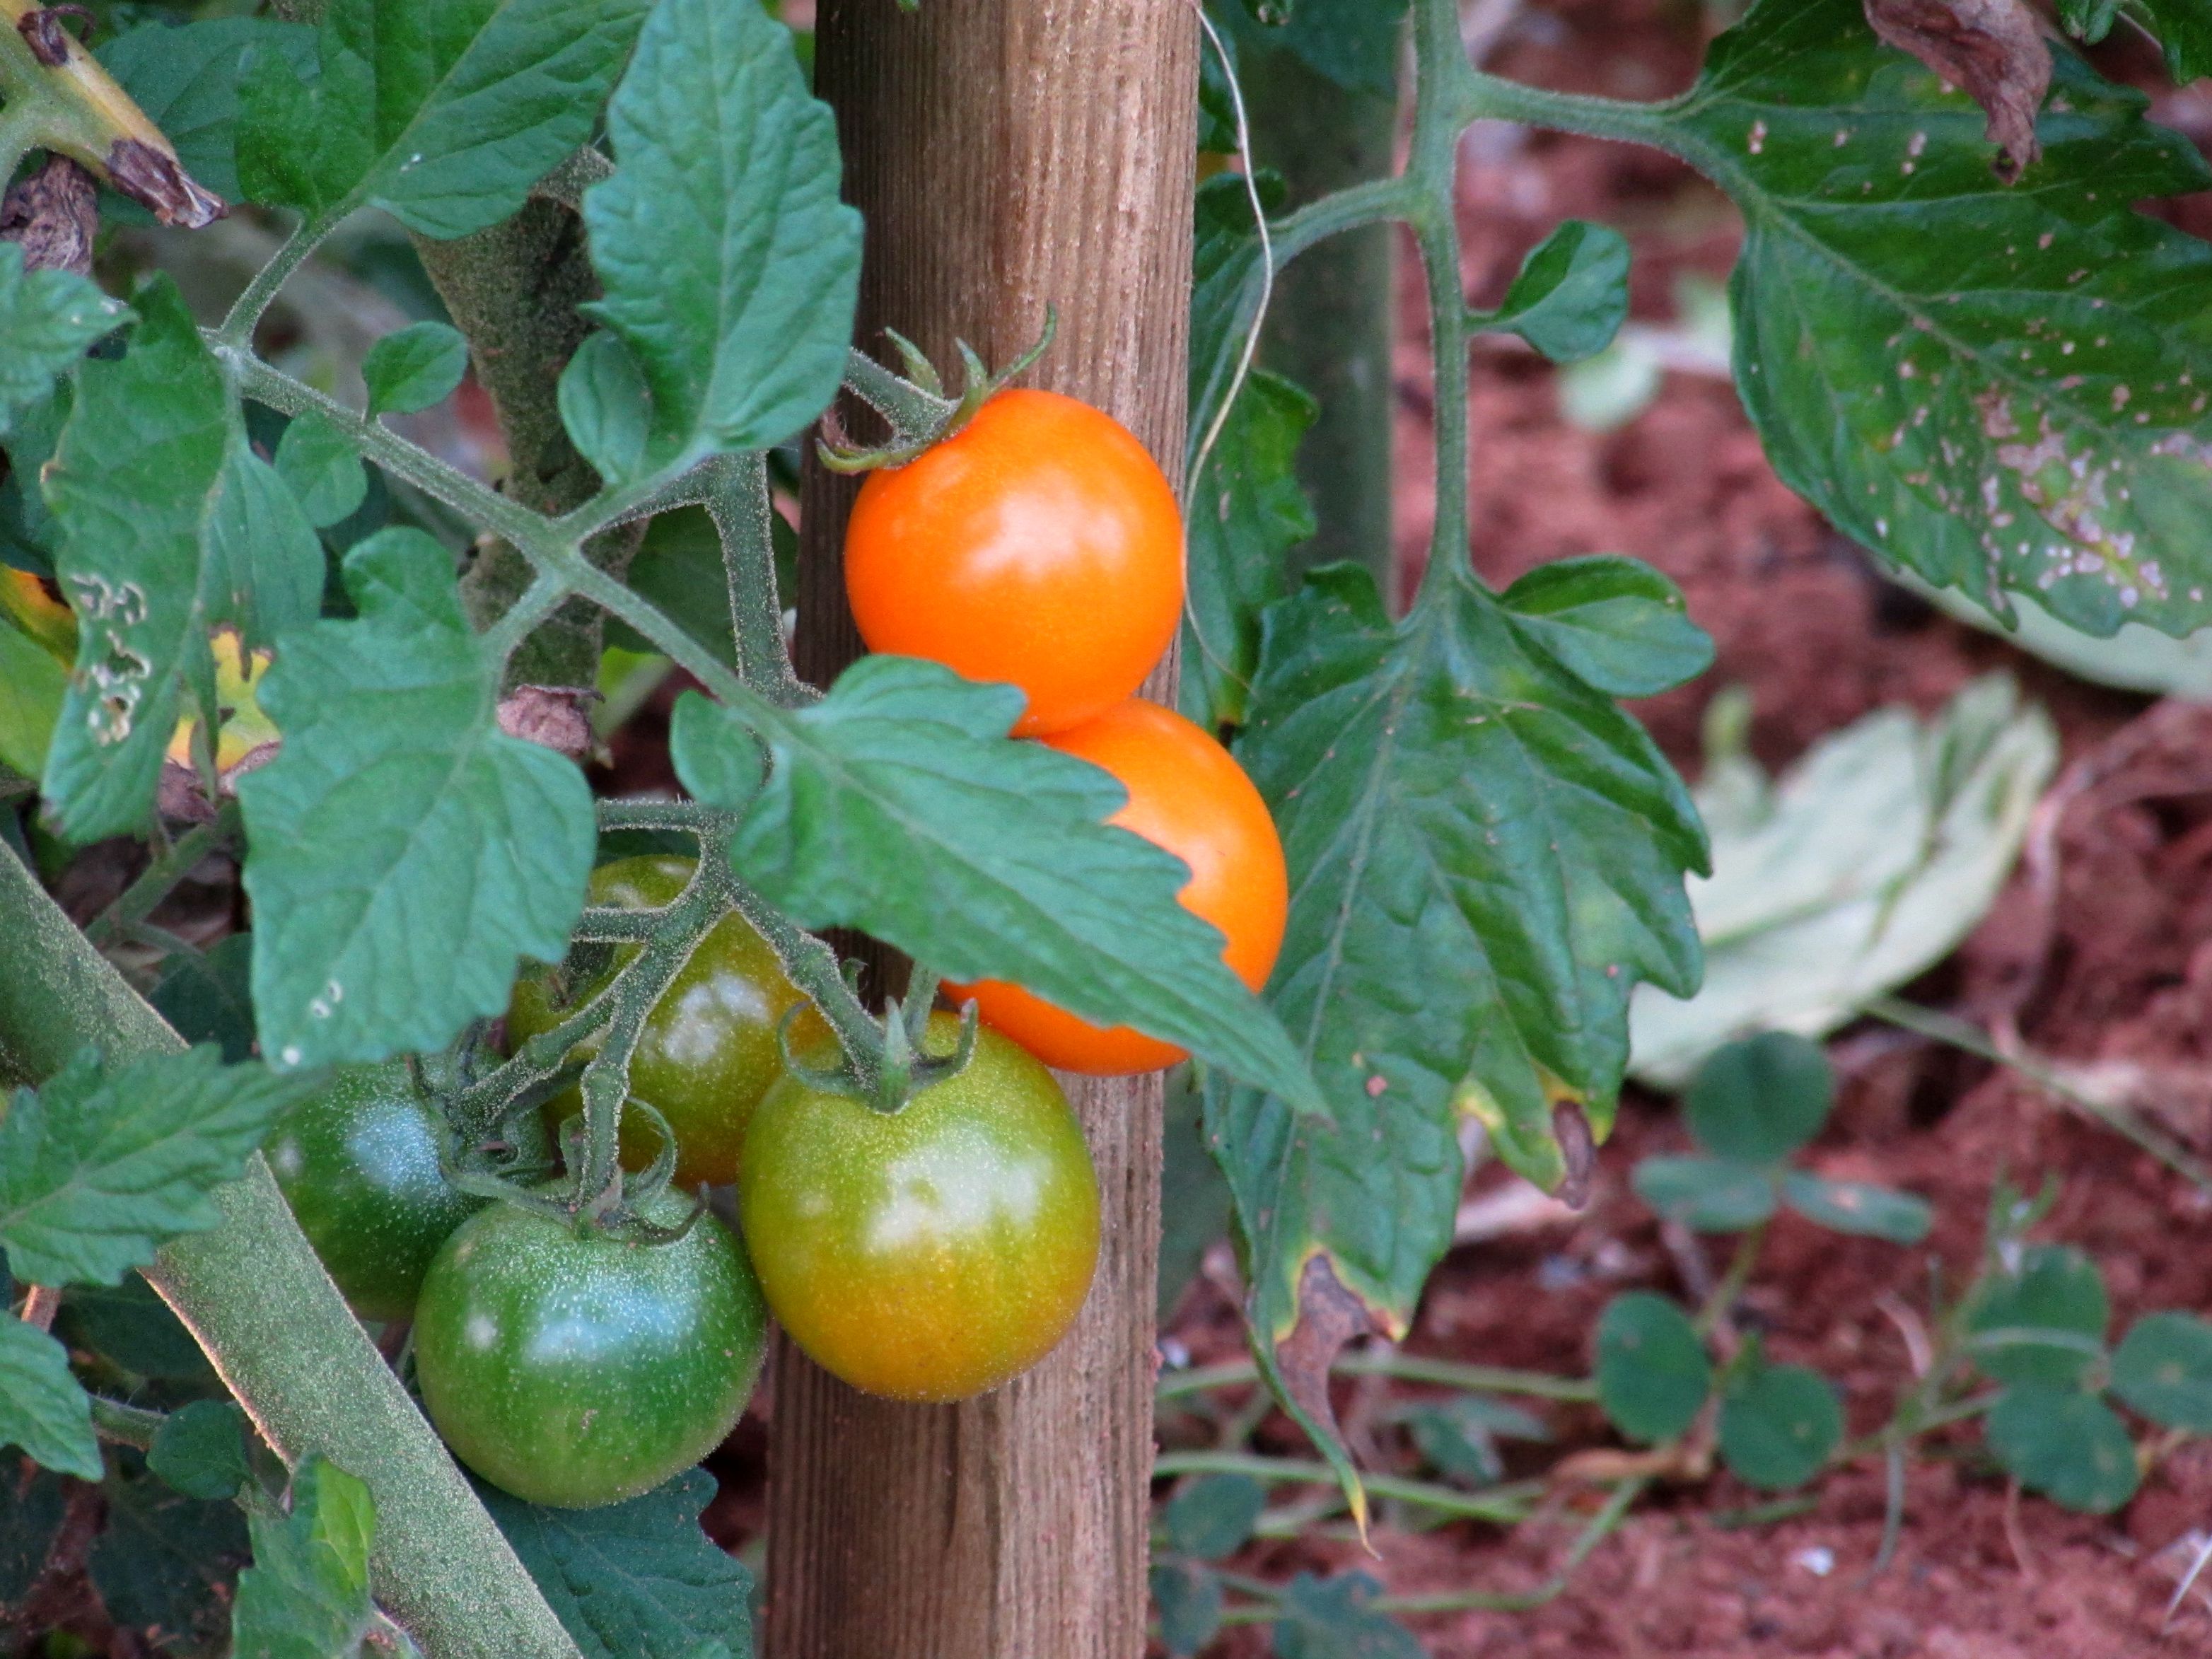
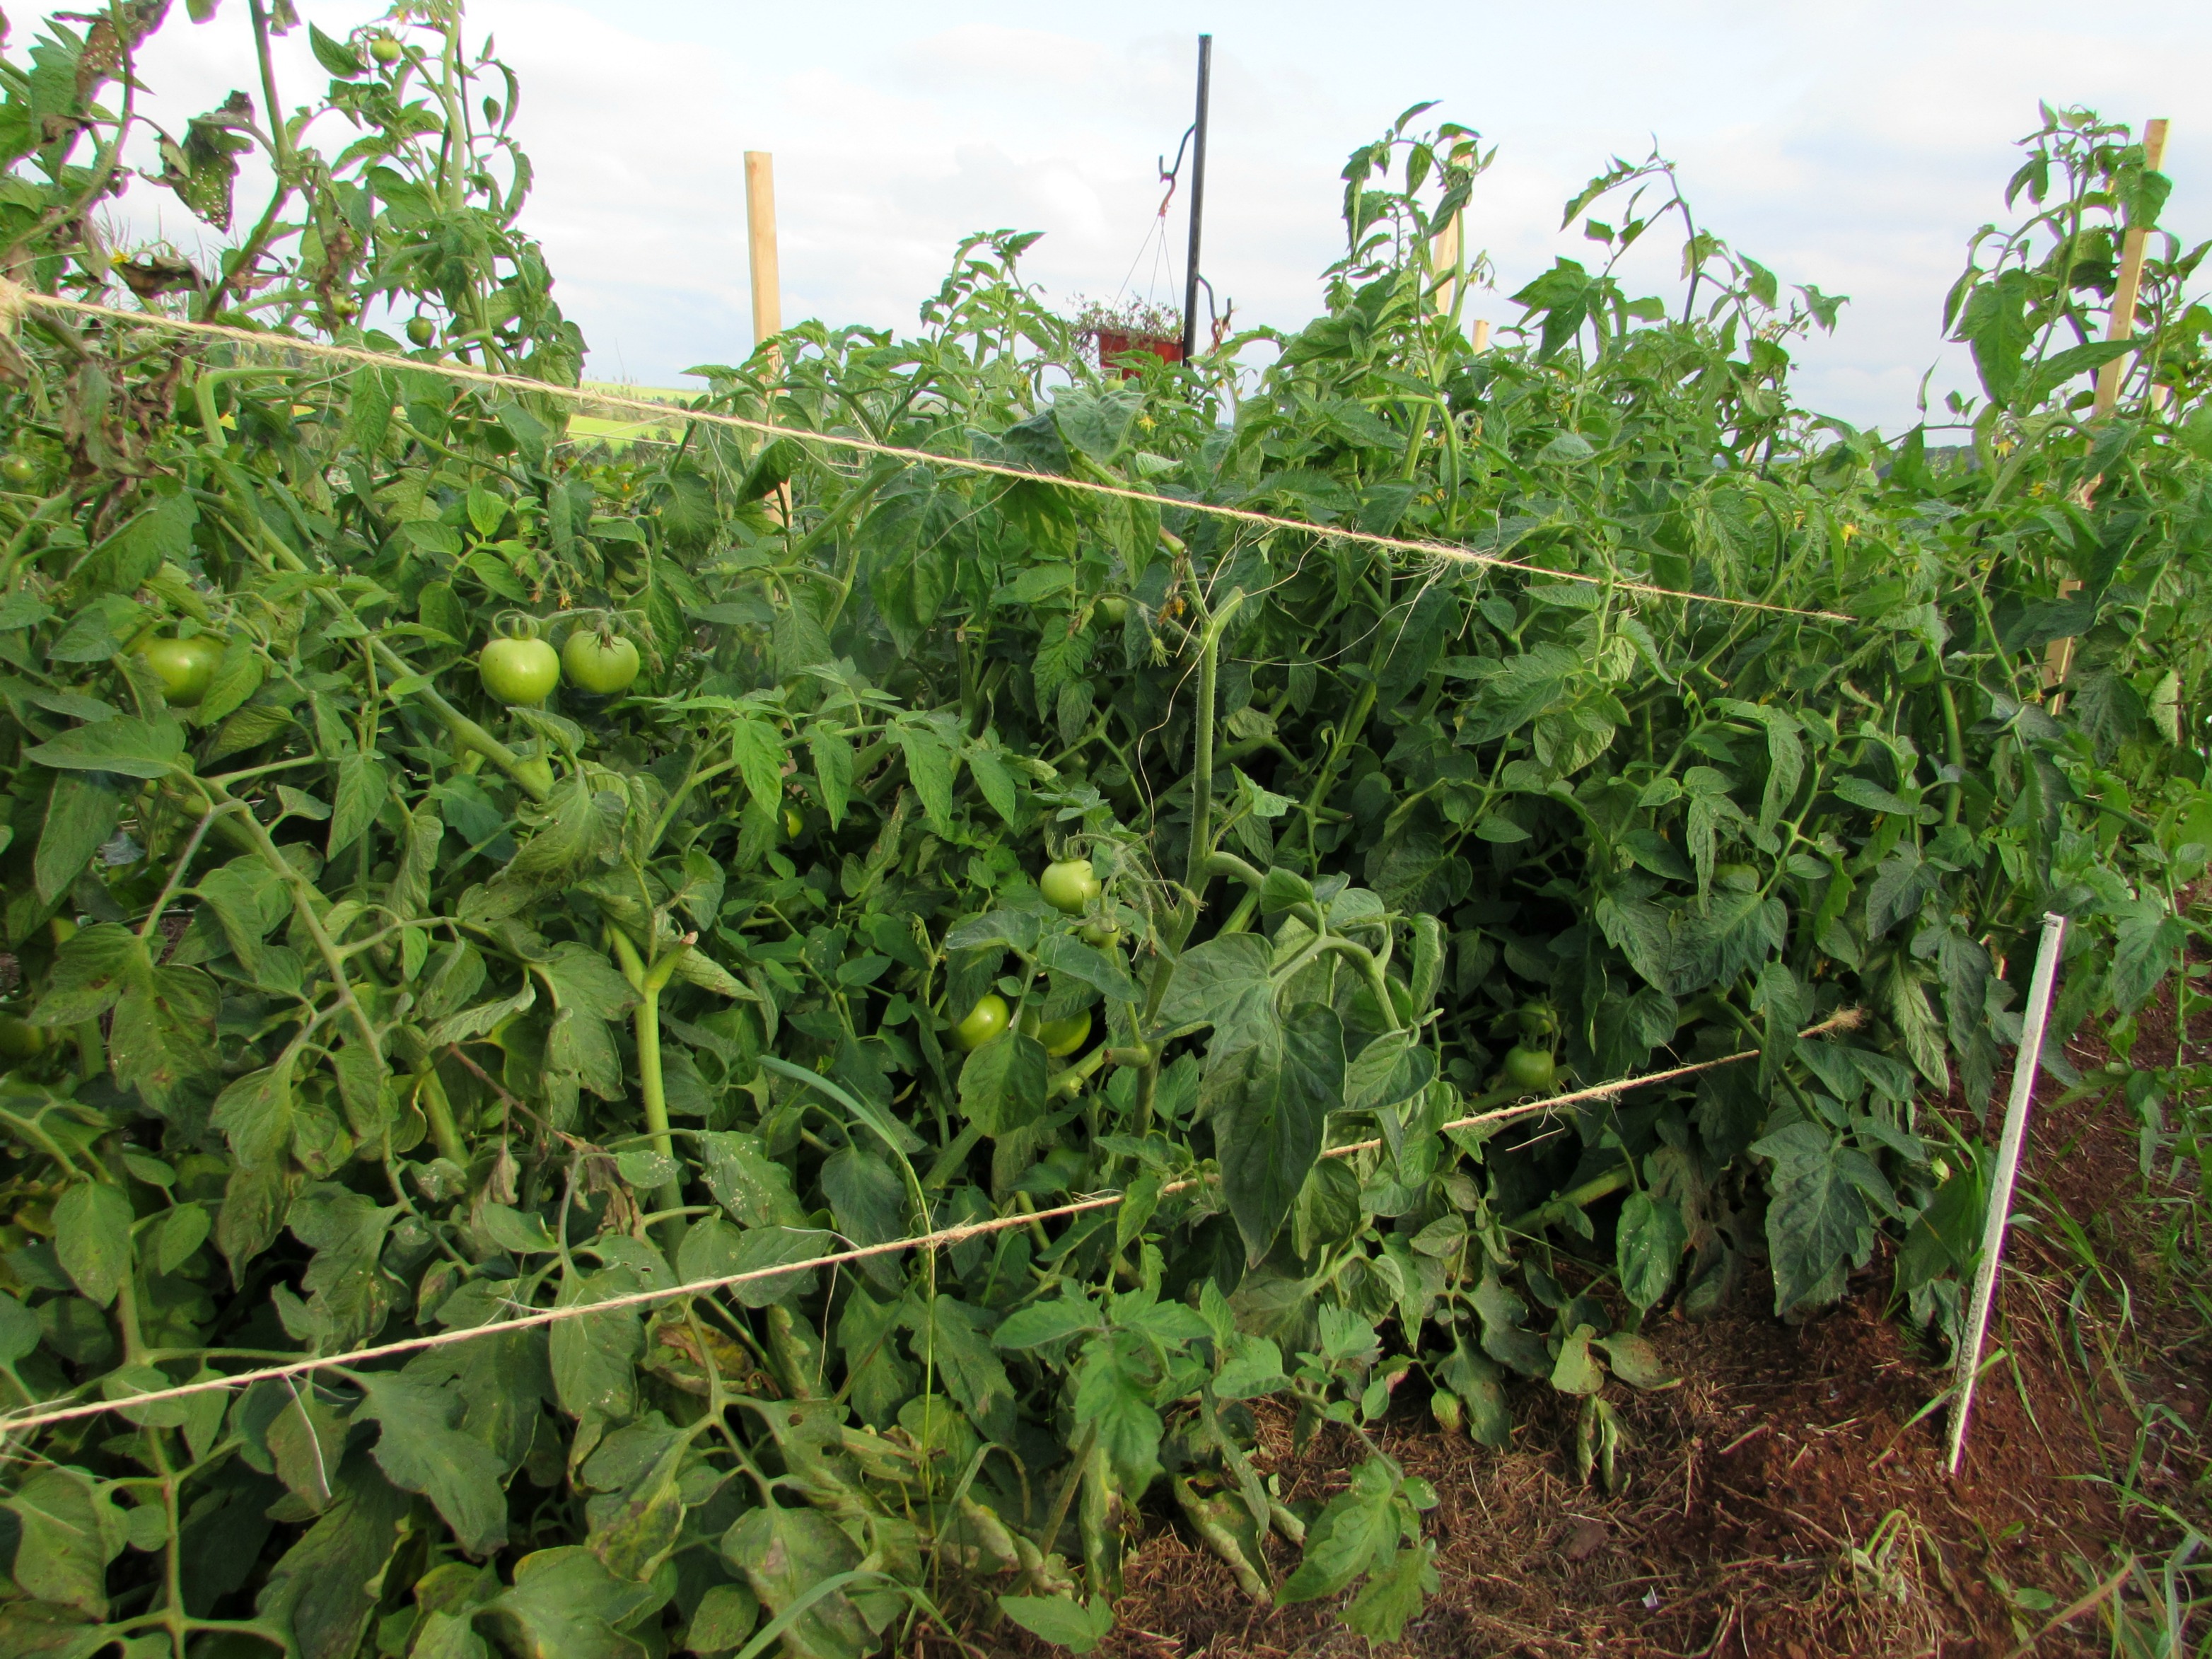
We’ve had a beautiful summer. Although dry, it’s been downright hot for weeks. The tomatoes are thriving and just starting to show signs of their maturity.
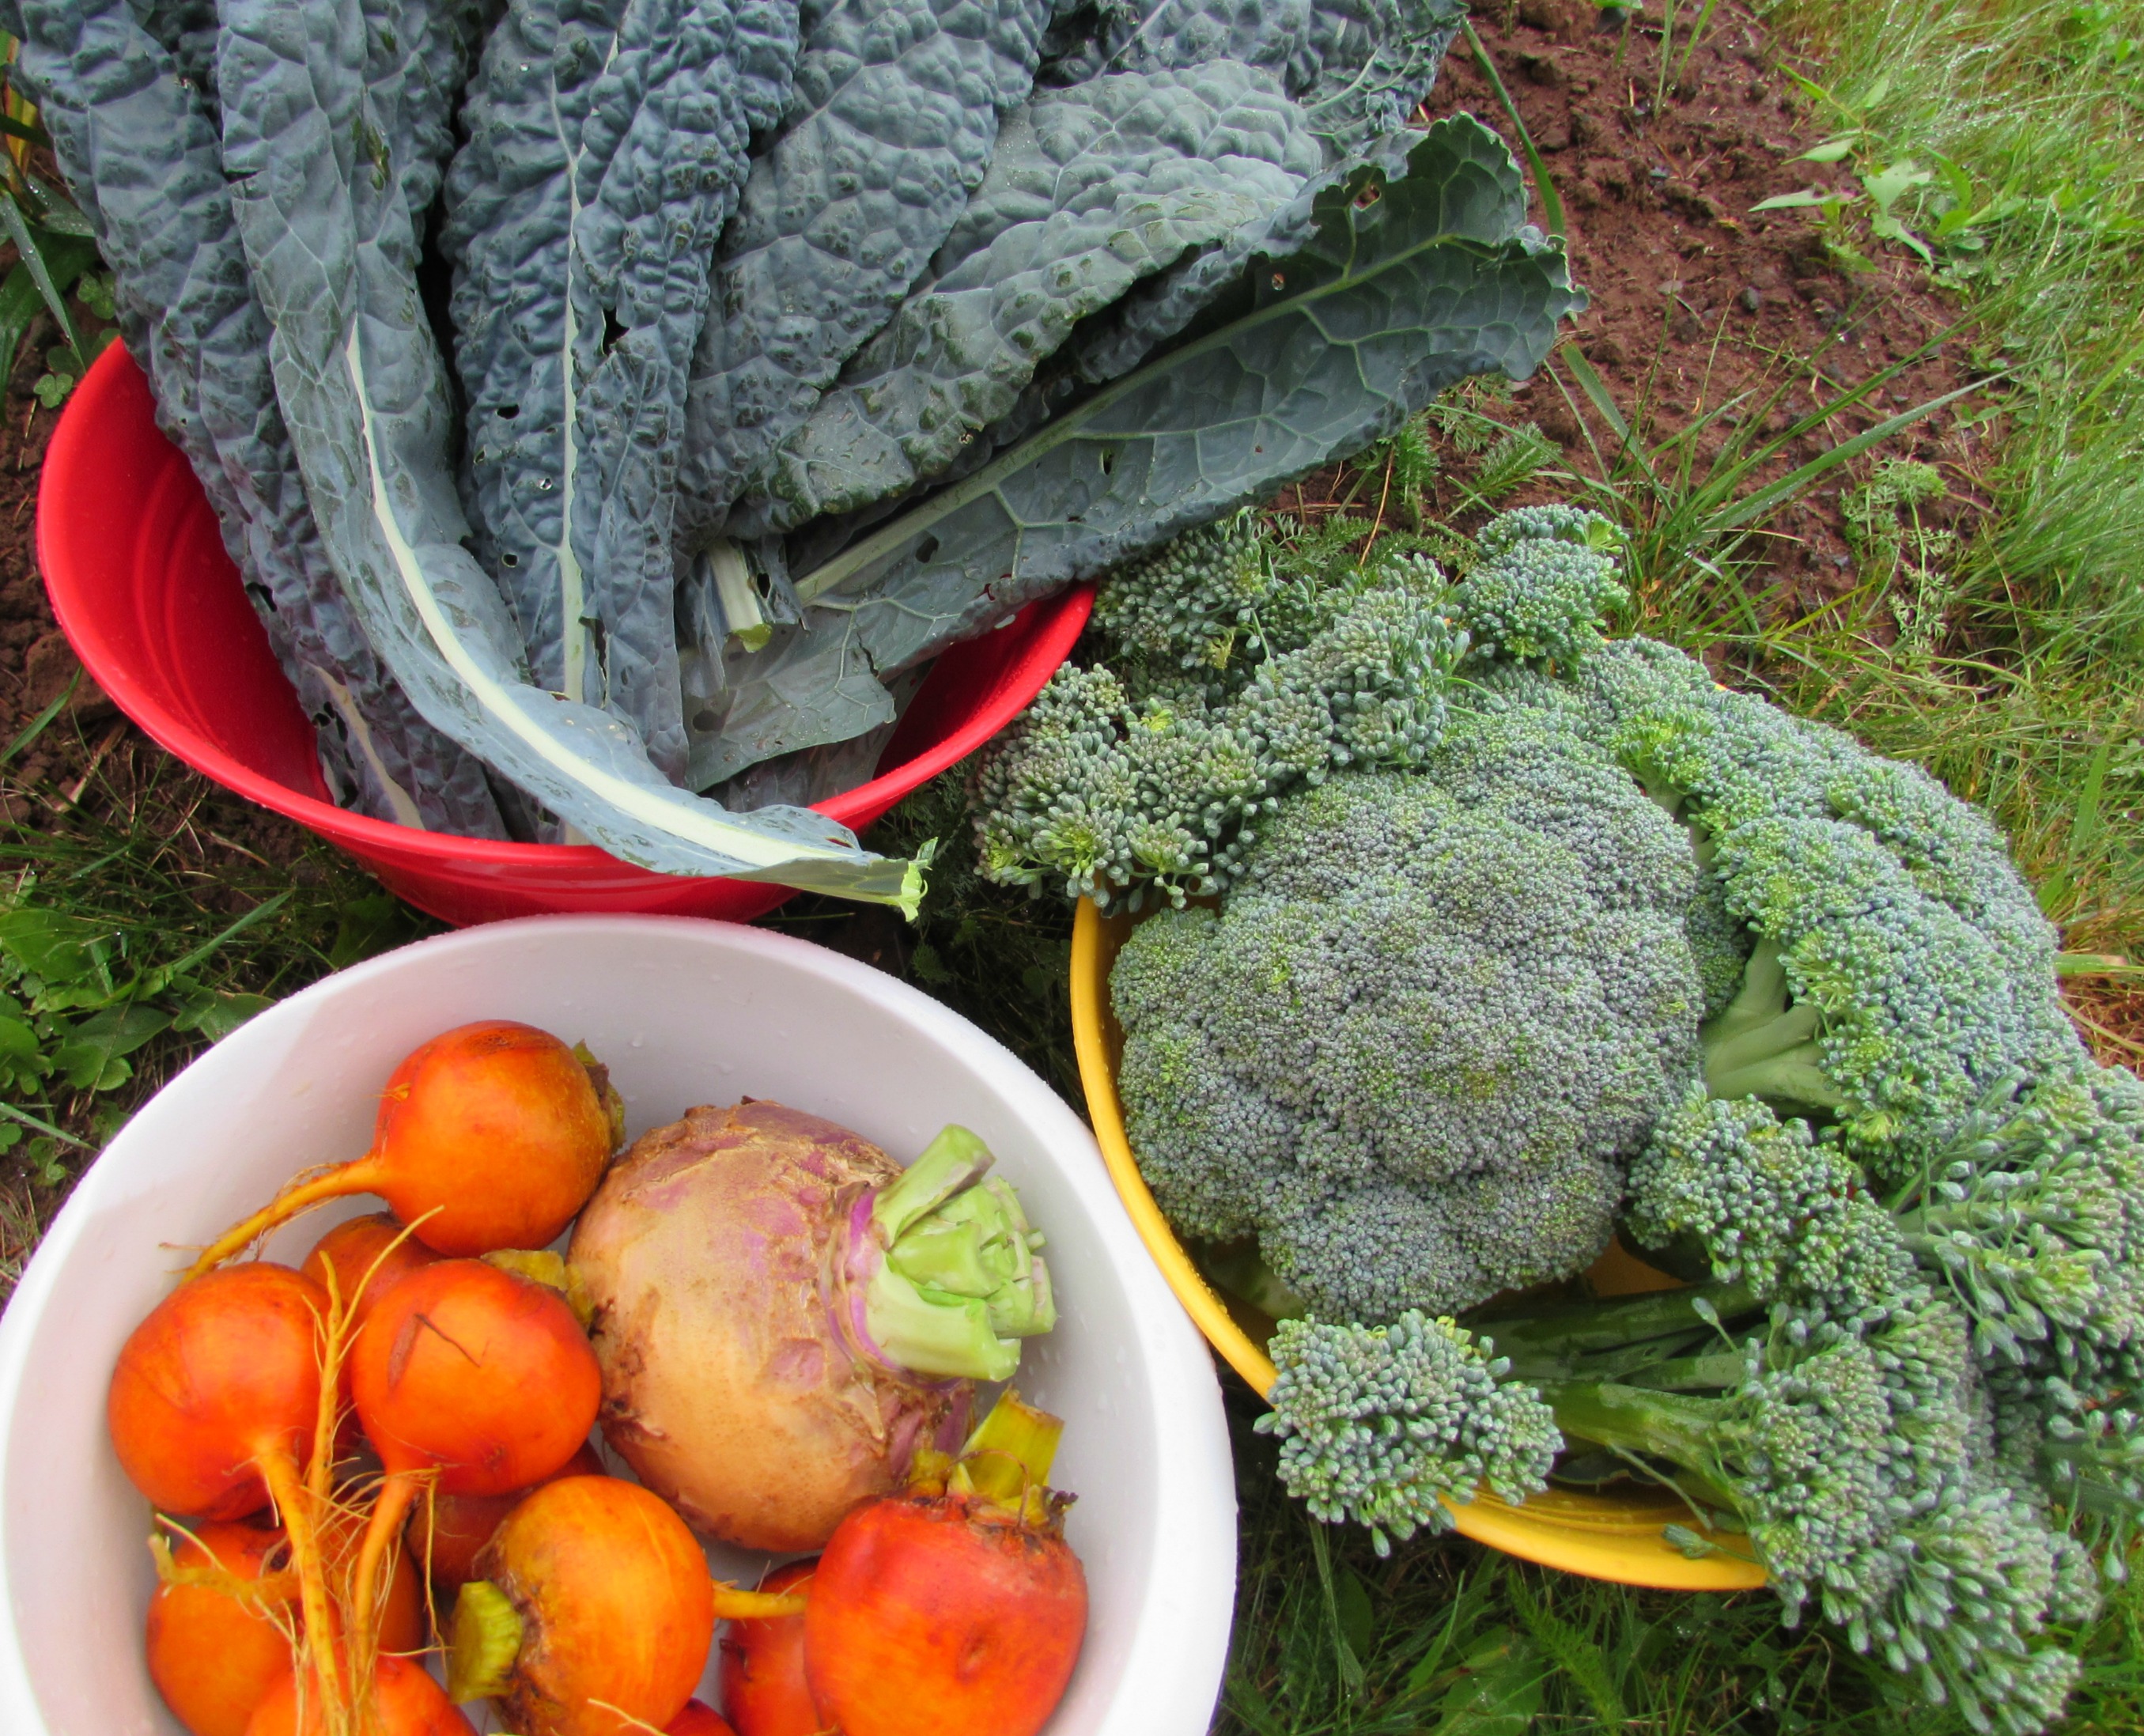
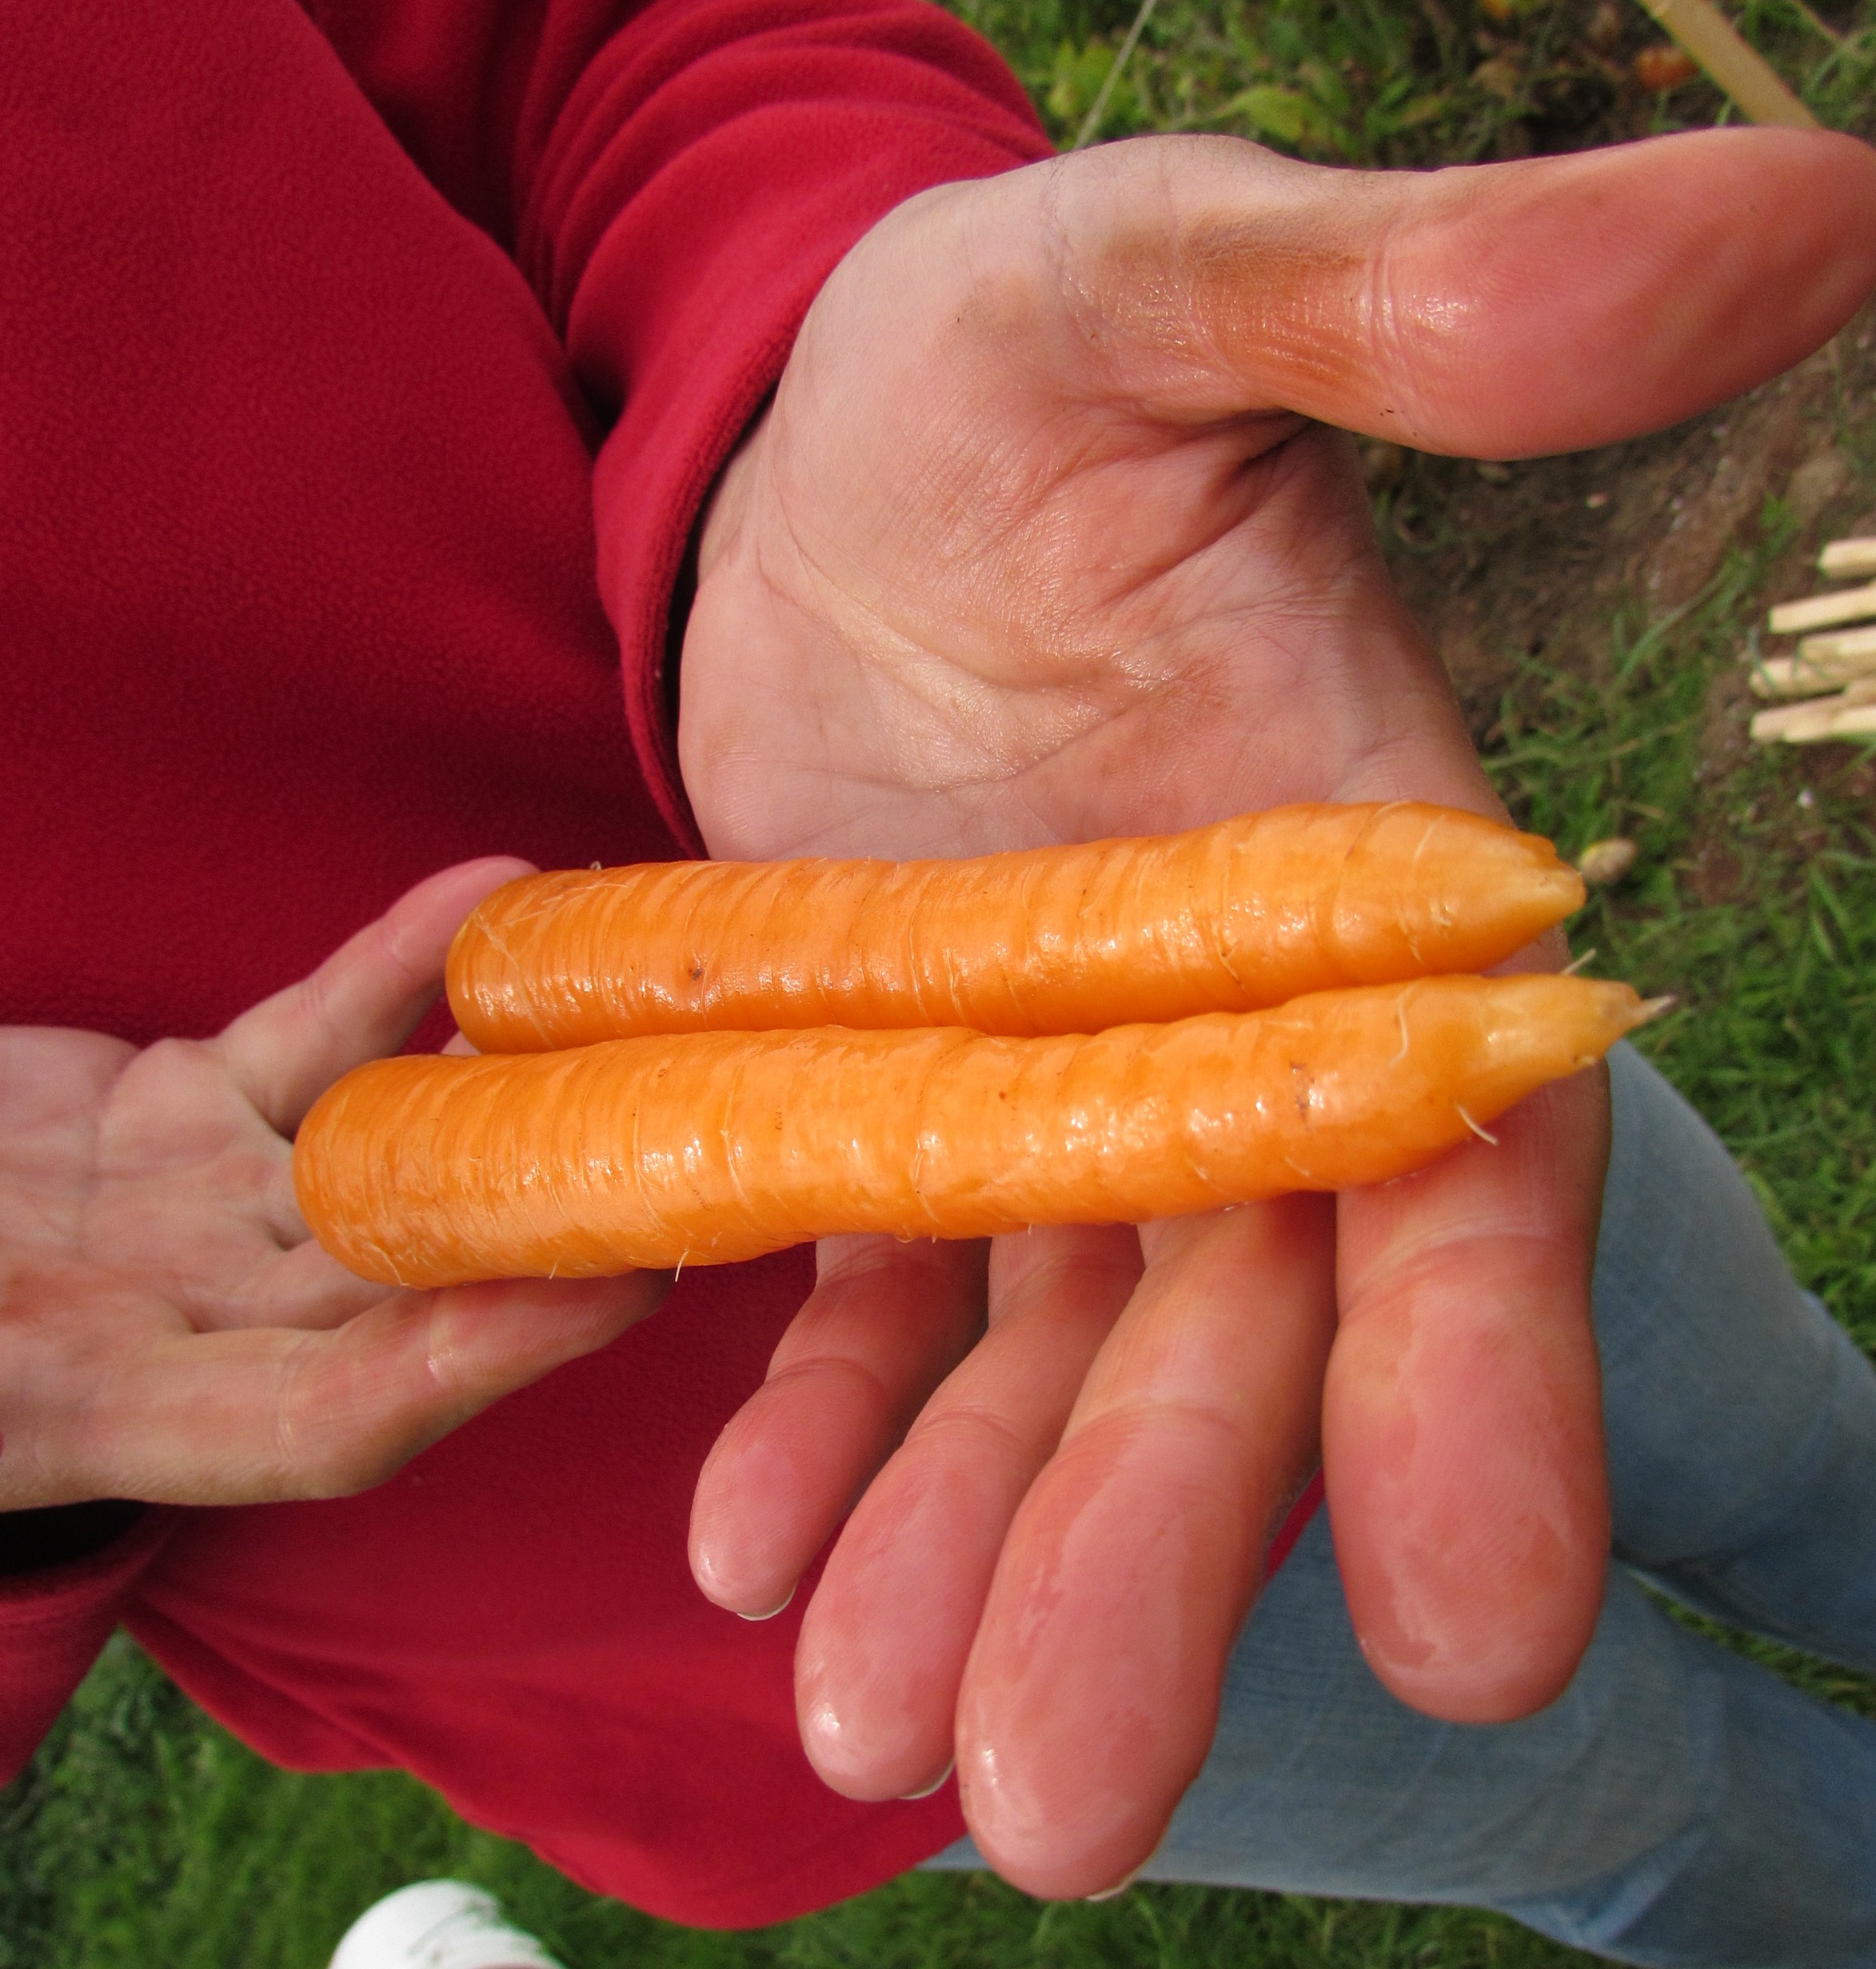
The peppers are plumping and the potatoes are nearing their harvest time. We’ve had one crop of peas already picked, another almost ready and a third crop growing for a fall harvest. Likewise with the carrots, beans and beets. Squash and pumpkins are flourishing in our lasagna beds and our second planting of cauliflower, broccoli, kale, collards and kholrabi will be ready in a few weeks.

Aside from the gardens, our flock of hens grew by six this summer.

Violet, Pansy, Dahlia, Sunflower, Petunia and Lily have joined the Golden Girls – and at 18 weeks of age, they should start fulfilling their end of the bargain and begin to give us a daily egg each.
We had the pleasure of having my Mom visit for the majority of July. As much as she was looking forward to a visit, I think we enjoyed it as much or more.

Well, we certainly enjoyed exploring and discovering new restaurants and shops that Vanessa and I intended to (but never have) tried. But more than that, we just enjoyed the company.

Vanessa and I both are working full-time at new jobs. I’ve been working for a disaster restoration contractor for the past several months. Although I have to admit, after a long day (or week) of working on other people’s homes and properties, it’s hard to find the motivation to do the same for ourselves. Vanessa is now at Cavendish Farms processing one of PEI’s most famous commodities: potatoes! It’s actually working out very well for us. I work a fairly typical work-week: Monday to Friday with occasional evening or weekend projects. Vanessa works two day shifts, two night shifts and then has four days off. Those four days have proven invaluable to us as she’s able to tend to things around the homestead (like curing garlic and raising chicks).
So. There you have it. Sort of. Its hard to wrap up three (four?) months in 600-or-so words, but I think I managed to empty out a few things rattling around in my head. I’ll do all I can to right-this-ship and resume my regular updates. It’s looking like an exciting fall around our old island home. Just do me a favor and let me know you’re still out there. I get a lot of my motivation and inspiration after hearing from you.

Thanks – and blessings from our home to yours!

“I make myself rich by making my wants few.” [Thoreau]
It’s that time of year when we look back on what 2014 was and what we hope 2015 will hold.
For Vanessa and I, we’re grateful for what last year held for us. The house renovations have been coming along nicely but slowed since we’ve been working full-time now. We’re still eating our own vegetables we grew last summer: potatoes, carrots, beans, peas, corn, pickles, onions and squash. The six chickens have started giving us about four eggs daily – even with winter’s cold embrace taking over. And we have each other. What else do we need?
We have our health, home, food and warmth – and with that, all of our needs are met. Then there’s the other stuff we take for granted that’s really a luxury for most of the global population: we have cars, hobbies, music, internet access and more clothes than we actually wear. I sometimes think it’s even too much.
One of the things I’ve loved most about our move has been our embrace of the concept of living with less. At one point it was a conscious decision to do without some of the luxuries we’ve always enjoyed. Dining-out together was a big one. So was buying things we wanted but really didn’t need – just because we could.
Now we just want to live a simpler, minimal life. Not militant minimalism, mind you – I don’t want to “make do” with two plates, two forks, two cups and two choices of clothes to wear. But we can do with less. In fact, it’s one of the more rewarding things we’ve done in our move. We sold or gave away a lot of items we didn’t need or want to move to PEI – and we’ve not needed to replace them as of yet, either.
We’ve found that very little is needed to make a happy life.
So for 2015, if we’re talking resolutions (and I’m not really), then it would be to stay-the-course. Keep our needs few. After all, things will never make one happy – it just creates a desire for more things or bigger things. We will unburden our lives by owning less stuff and doing more of the things we love.
For the past year we’ve been dreaming of our “big picture” together. What we want our house to be. How we’d like to farm. The wood lot we want to purchase and how we’d use that for our needs. But we realize a dream is just a dream without a plan. This year, we’ll be expanding our gardens and offering limited weekly eggs and vegetable boxes for sale. The woodlot we hope to purchase will be both an investment and a source of income.
As for you, we hope you have a wonderful new year filled with happiness. Dream big dreams, but don’t stop there, make a plan to see those dreams fulfilled.
We’ve just passed our one-year anniversary since making the move to our old island home. About this time last year, we had our new well dug, the moving truck unloaded and were getting settled in for what was going to be the worst winter PEI had seen in almost fifty years.
Fast-forward a year or so and we’re making preparations for what’s going to be a milder-than-average winter for PEI – that’s if you choose to believe the Farmer’s Almanac’s winter outlook. (I choose to believe). With Vanessa and I both working near full-time hours now, the work around our house has slowed considerably. Our projects are broken down into manageable, bite-sized jobs that we can tackle in the couple of daylight hours remaining after work or what we can fit into a Saturday between grocery shopping and other errands to run.
Last week it was to finish insulating and sheathing the lower exterior walls left open from raising the house for the new foundation and sill replacement from the summer. We had the open portions enclosed with an air barrier in the interim, but with the temperatures dropping, we needed to infill with insulation and enclose it with sheathing.

I was able to find full-dimension 1″ x 12″ rough-sawn pine boards for the same price as 3/4″ plywood. So, in keeping with the original construction, and not needing to build out the thickness of the studs to match the old remaining sheathing, it was a simple decision. And it made for a simple (read: quick) job. In the spring, we’ll be building a wrap-around deck and porch, so for now this will get us through the winter. Shingle and siding repairs to follow the porch-build. We also managed to get our first load of firewood into the house. Vanessa passed it through the window…

…and I stacked it in the basement.

We’ll go through about five of these piles this winter
No more trudging through the snow to the barn to collect our daily firewood needs. Nosiree! Now it’s just down to the bottom of the basement stairs to gather up what we need. And with the season’s first snowfall in the forecast, it’s one more job off the list – and not a moment too soon.

Thankfully, that’s not going to last. With temperatures on the plus-side for the better part of next week, we’ll be able to do a few more things outside before winter really arrives. Somewhere out there, there’s almost sixty pounds of carrots, onions and cabbage to harvest. The cold temperatures are just sweetening their flavors as the plants produce natural sugars to act as their antifreeze. For now, until the thaw, we just stoke the fire. And I have to admit – there’s nothing nicer than wood-heat on a chilly day.

“Look at the birds of the air; they do not sow or reap or store away in barns, and yet your Heavenly Father feeds them. Are you not much more valuable than they?”
Well, it’s clear that we won’t starve this fall. in fact, we’ve been blown away at the bounty of our harvest from our gardens this year. And it’s not over yet!

Over the past couple of weeks, between working on a few projects around the house, we’ve been slowly harvesting our crops as they become ready.

We picked our first variety of sweet corn last week and blanched and froze the majority of it. Yes, we ate a lot of it fresh as well – and we shared a couple dozen among friends and neighbors, too.


The later-maturing variety is almost ready now – perhaps by this time next week. That will be another 90-100 ears to process as well.

I think we can call our potatoes a success, too. We grew four varieties: red, yellow, russet and purple. The Purple Chieftain was the most plentiful – in sheer number of potatoes harvested – although they were probably the smallest ones on average.

After that was the Russet. These turned out a bit smaller than I expected but will be great baked and french fried. The yellow and red were the largest of all.

Each individual potato is a handful. We’ll certainly be growing more of the red ones especially.
All in all, we dug up over 150 pounds of spuds from the ground last week, That doesn’t include the who-knows-how-many pounds of new potatoes we took as we needed previously.

I never weighed the cucumbers and zucchini we grew – but we have pickled almost 30 pints and/or quarts of them.
We’ve also enjoyed fresh green beans and yellow wax beans for the past few weeks but with the plants producing more than we can eat fresh, we picked, blanched and froze the remainder – over fifteen pounds!

But sadly, not everything went so swimmingly. I’ve already written about the issues we had with our tomatoes – then last week a cold snap claimed the sweet potatoes and winter squash plants. Unfortunately, even though we covered the plants that evening, the cold was too much and these plants were beyond recovery.
But, like the second corn harvest, we still have cabbage, rutabaga, carrots, parsnip, onions, pole beans, leeks, beets and swiss chard to pick as needed – and then to harvest for long-term storage as well.
Then we have some of the more unusual crops to enjoy. Like these little guys:

Ground Cherries (or Cape Gooseberries or Husk Berries depending on your preference). A member of the tomato family, ground cherries grow in a little papery husk while on the plant and are ready for harvest when they fall to the ground.

Sweet and juicy and pineappley – I love them over vanilla ice cream.

The berries can be prepared in a tart or pie-shell as well – I’ll let Vanessa take care of that bit of research and let you know.
Other than some fruit, we haven’t bought any produce to speak of since the end of July. And frankly, like most people know of home-grown tomatoes, there’s nothing like picking and preparing vegetables fresh from the garden. And it’s good knowing that there’s no pesticides or chemical fertilizers to worry about.
Today, we did a big cleanup on the harvested beds and planted a cover-crop of buckwheat to replenish some of the nutrients and organic matter in the beds. Left in the bed to die as the cold approaches, it will also help protect the soil from wind-erosion through the winter.
And already, we’re planning what and how to plant the beds next year. Until then we continue to enjoy this bounty.
Thank you, Lord.

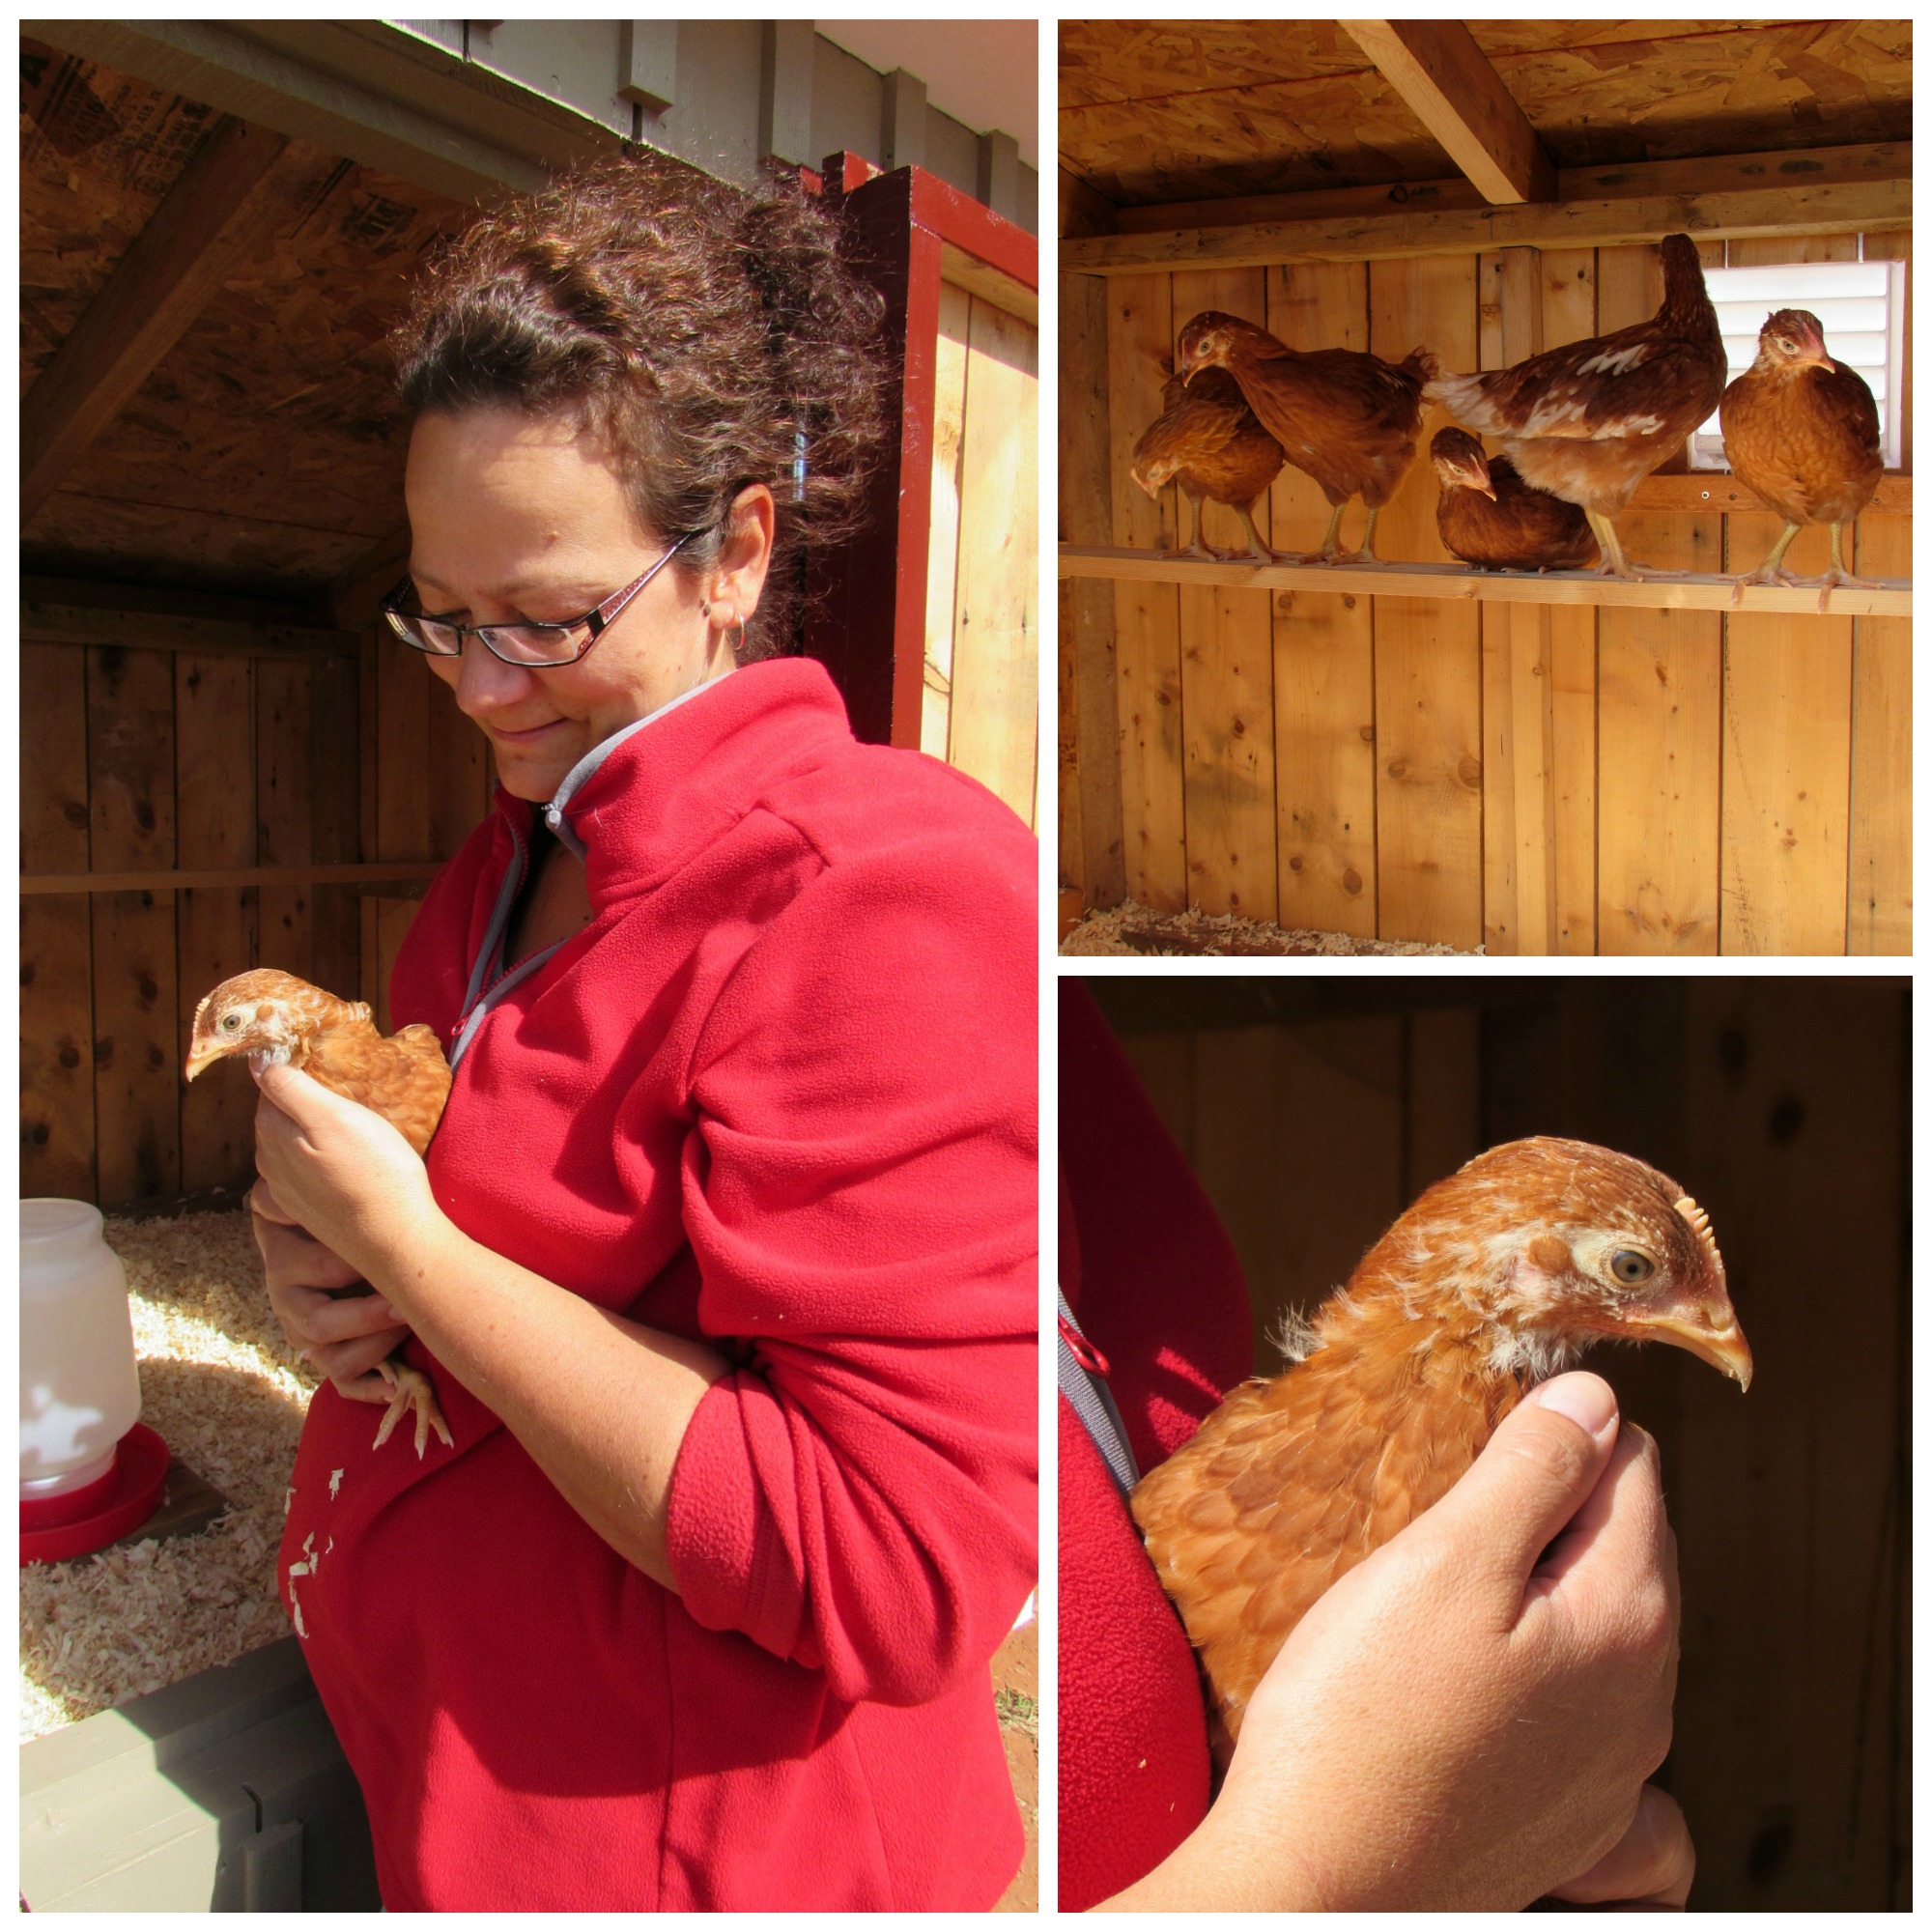
News flash: Chickens grow fast.
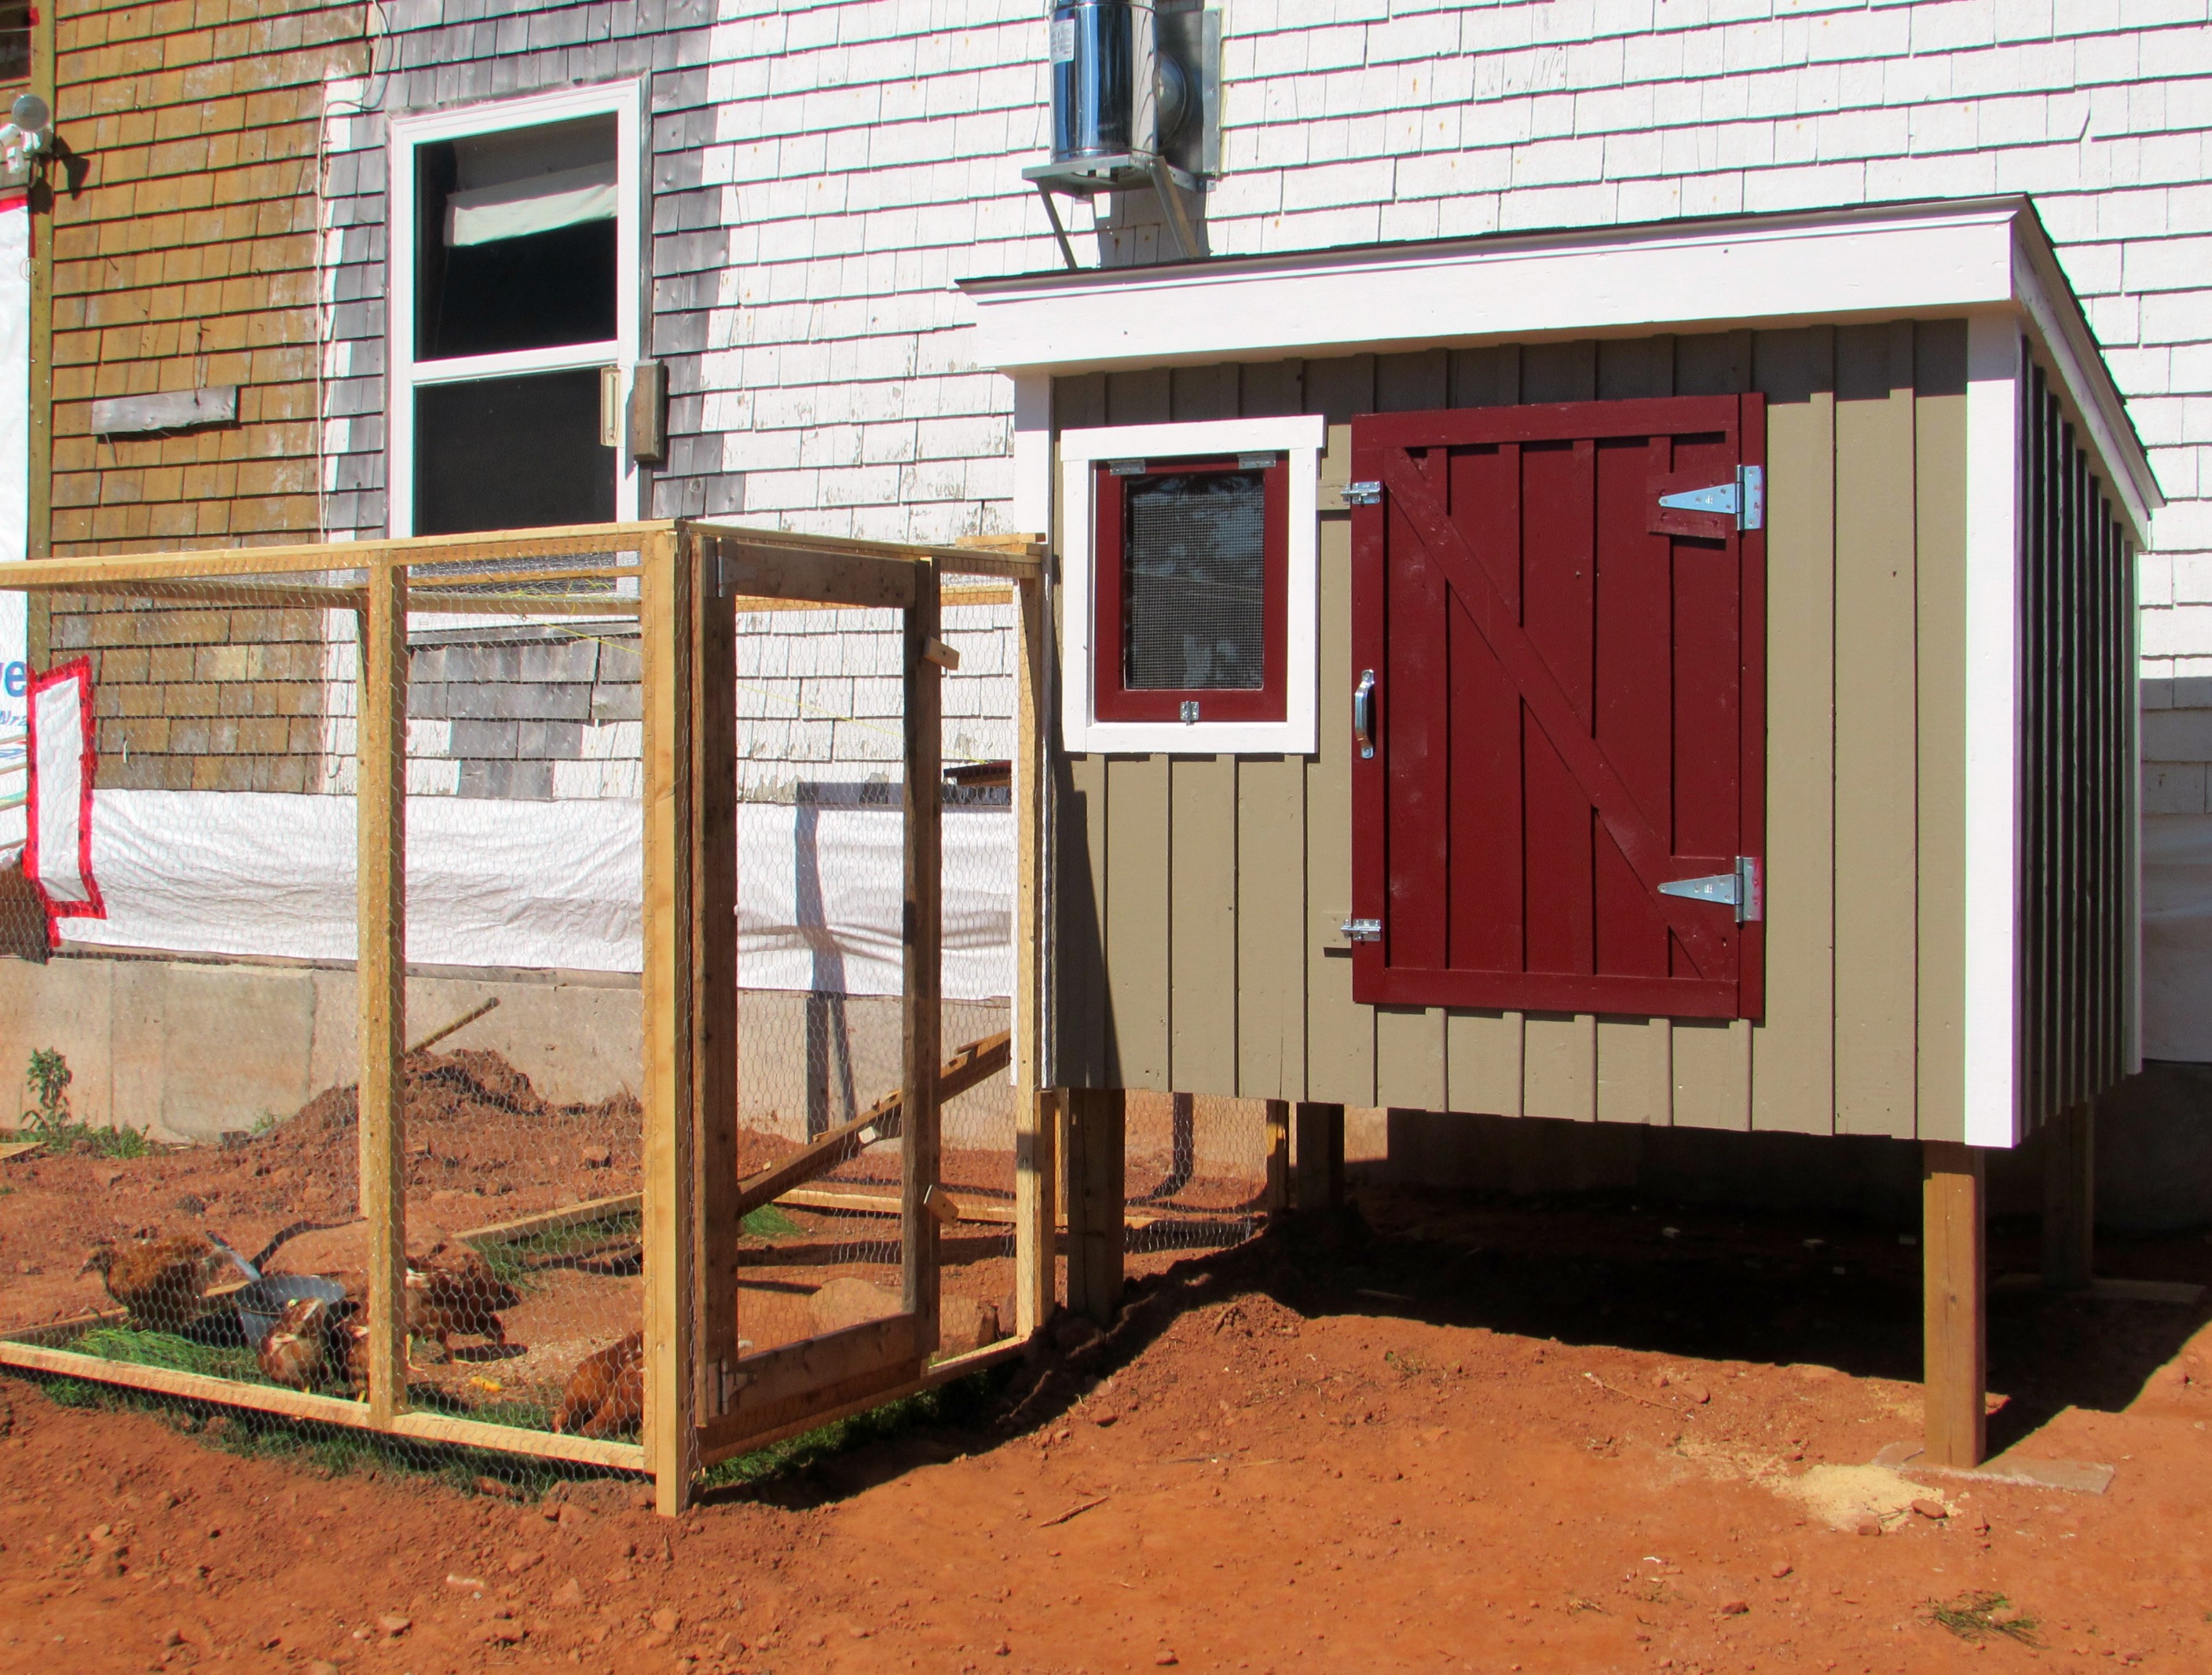
With that realization, we stepped up our game last week and built the coop for our six “Golden Girls”. We’ve been holding out on building it in hopes we would be able to have our new garden shed built at the same time. The plan was to have the coop attached to and shared with the shed – making the care for the chickens and egg collecting easy and efficient.
Unfortunately with fall approaching, we find ourselves short on funds to build the luxury shed. While we will be using the majority of the salvaged material for the shed, it will still cost more than we have to get it the way we want it – so for now, a quick and easy coop is the way to go. And because it’s “temporary”, inexpensive as well.
Before we go further, we’ll take a little walk back in time. Remember the original addition attached to the back of our house that we removed in the spring?

We carefully dismantled everything and stored the material in the barn and yard for future use.

That’s where we began.
A quick look through the pile and I found a couple of pressure treated 4″x4″ posts and some 2″x8″ joists taken from the back porch and deck. I had a sheet of plywood left over from building our garbage chute that we used when we were gutting the second floor of the house – we’ll use that for the floor. The concrete blocks were left behind from a previous owner and taken out of the old crawlspace prior to our foundation getting done.

So far no cost to us.
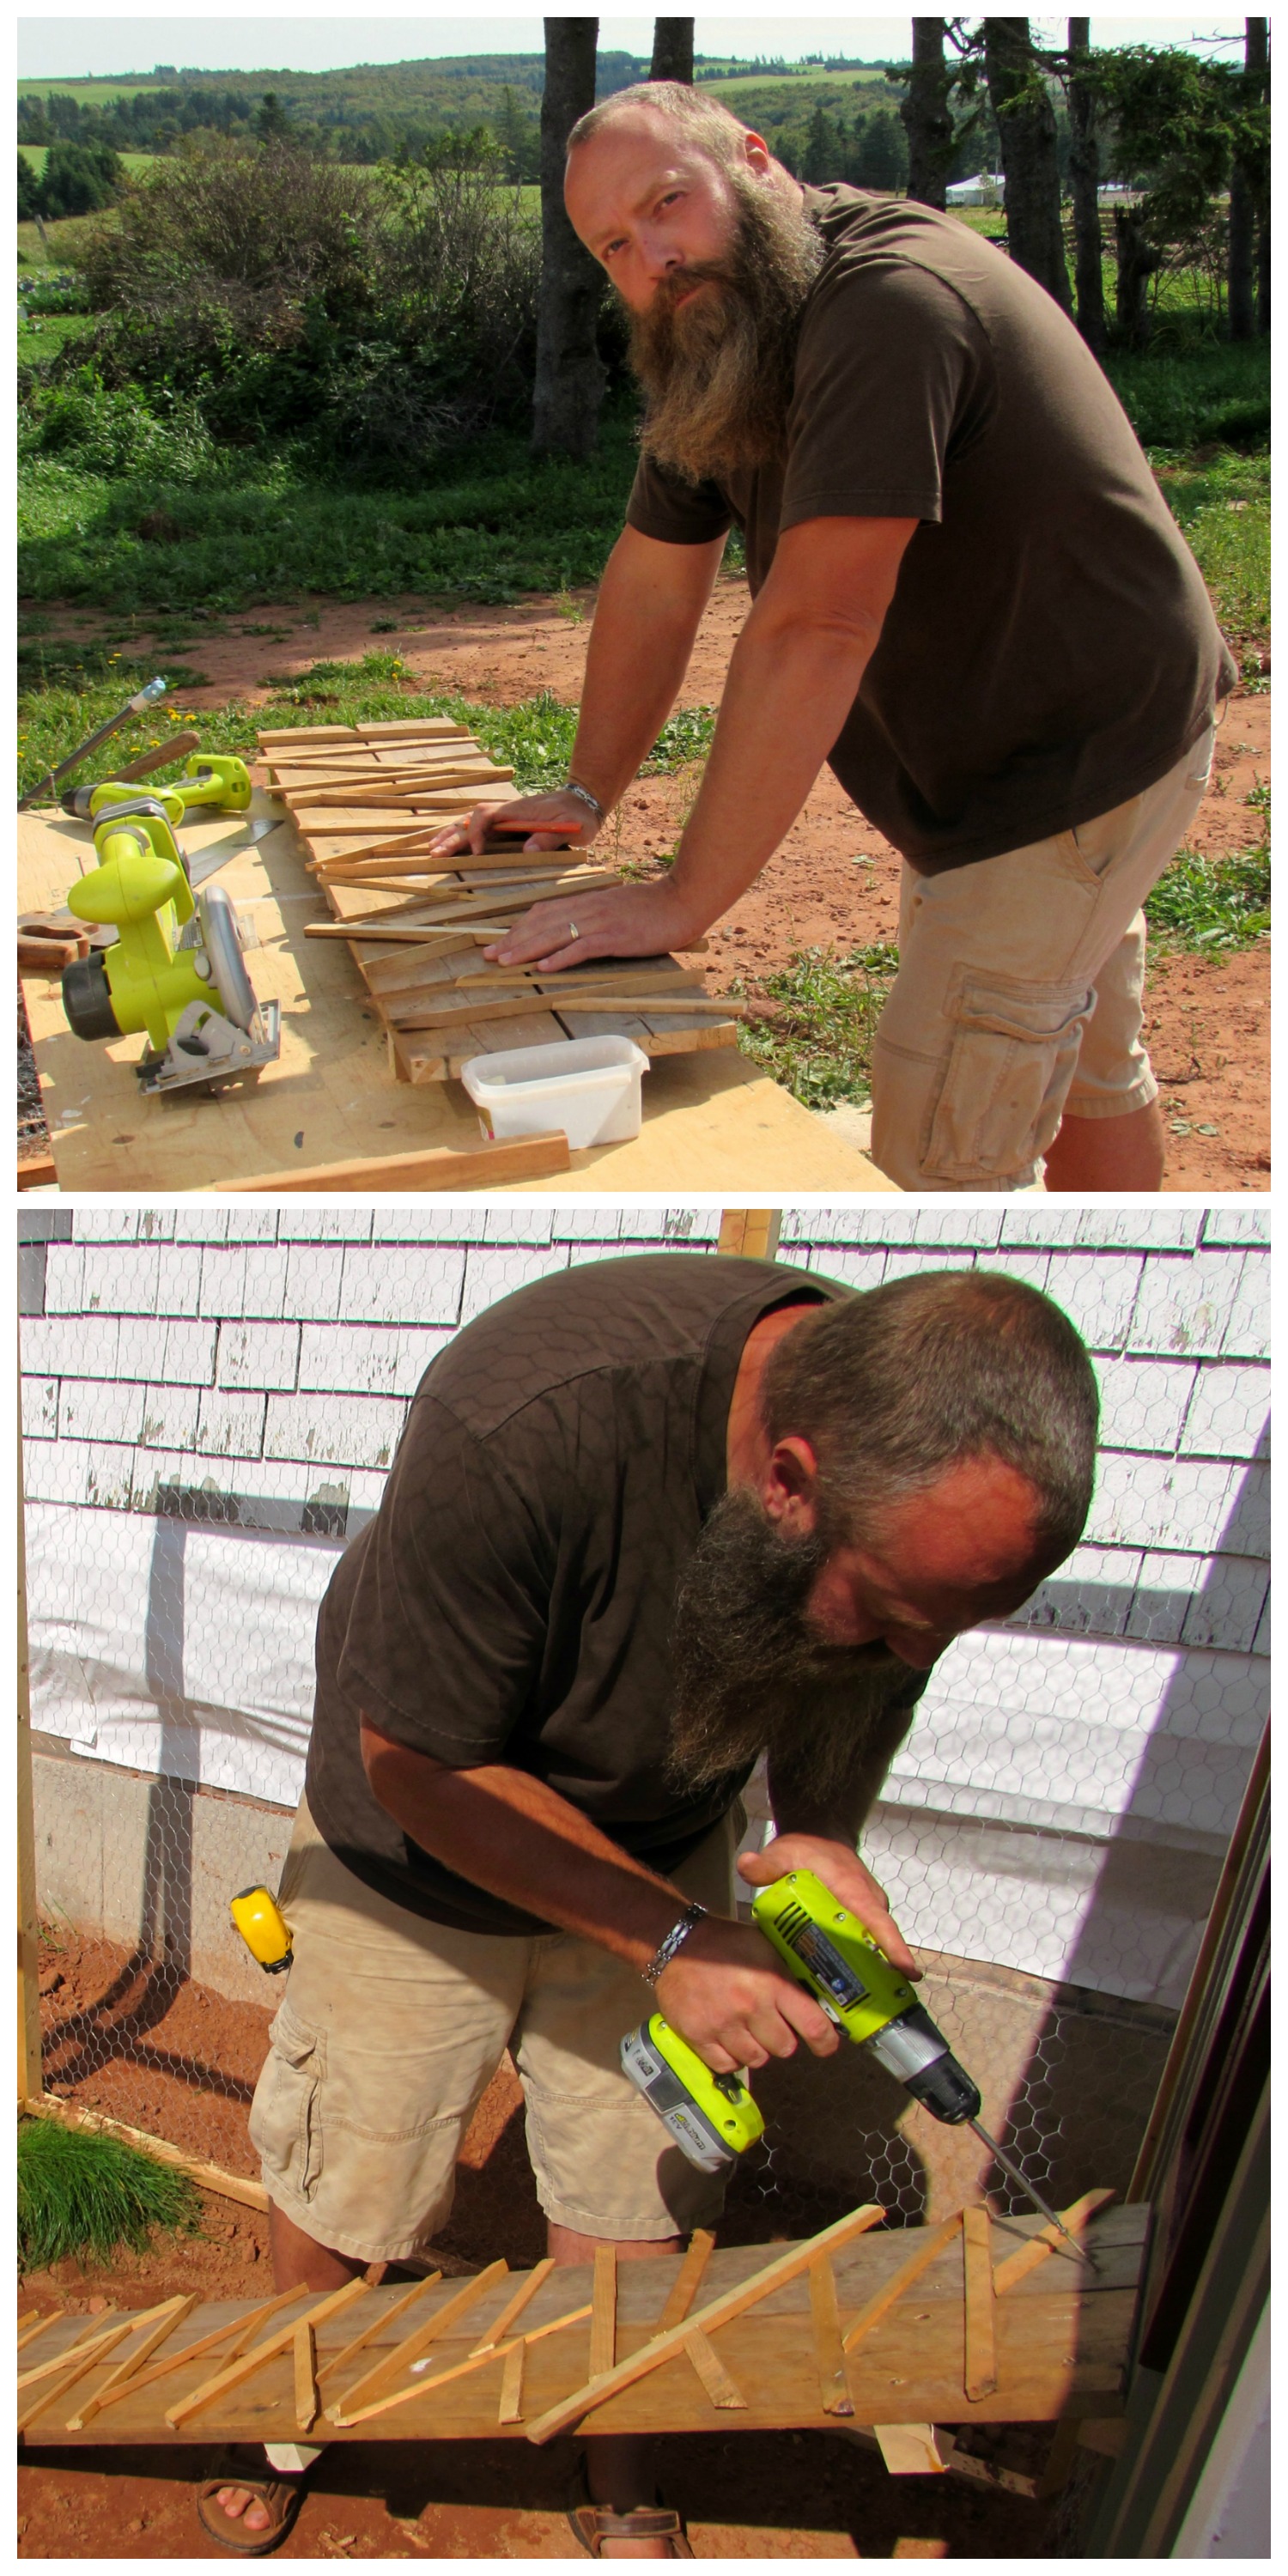
Once the deck and floor was built, we scavenged some 2″x4″s and framed the walls and roof. Rather then sheathing the coop with plywood and applying some sort of siding, we elected to use the pine boards taken from the old addition ceiling and made board and batten siding applied directly to the frame – no plywood.
We debated the exterior finish for the coop. Would we leave it natural? stain the wood? paint? Given our location and climate, leaving it unfinished wouldn’t be an option. It wouldn’t take long for the exposed pine and spruce to deteriorate and although it’s a temporary home for the girls, I want it to last. We’ve been trying to decide what colors to paint our house next year and thought we’d test our choices on the coop. But then again, paint’s not cheap either. That’s when I remembered that somewhere in the house is a box with some of the paint we brought with us from Ontario. The taupe was from our garage door and trim, the red from our front door.
The window was one of several we found in the barn from who-knows-where, but it was perfect for our needs. I just had to build the frame for it. We also built the door for the coop with the pine boards. From there, we finished the framing and and sheathed the roof with a sheet of OSB sheathing we used inside for the baffle vents in our attic. When we cleaned out the barn shortly after moving to PEI, we found part of a bundle of shingles the previous owner used for some roof repairs.

We bought three lengths of shingle/fascia flashing, a quart of white paint and the door and window hardware.
With the coop done, we built the run with a few more pieces of salvaged lumber and the chicken wire we bought at the local farm co-op. The mesh extends below the bottom of the run and laid into a trench just outside the frame. It was buried with whatever stone we could find handy and then backfilled with soil. The idea is to keep anything outside the coop that wants in, out. (That sentence makes sense, right?)
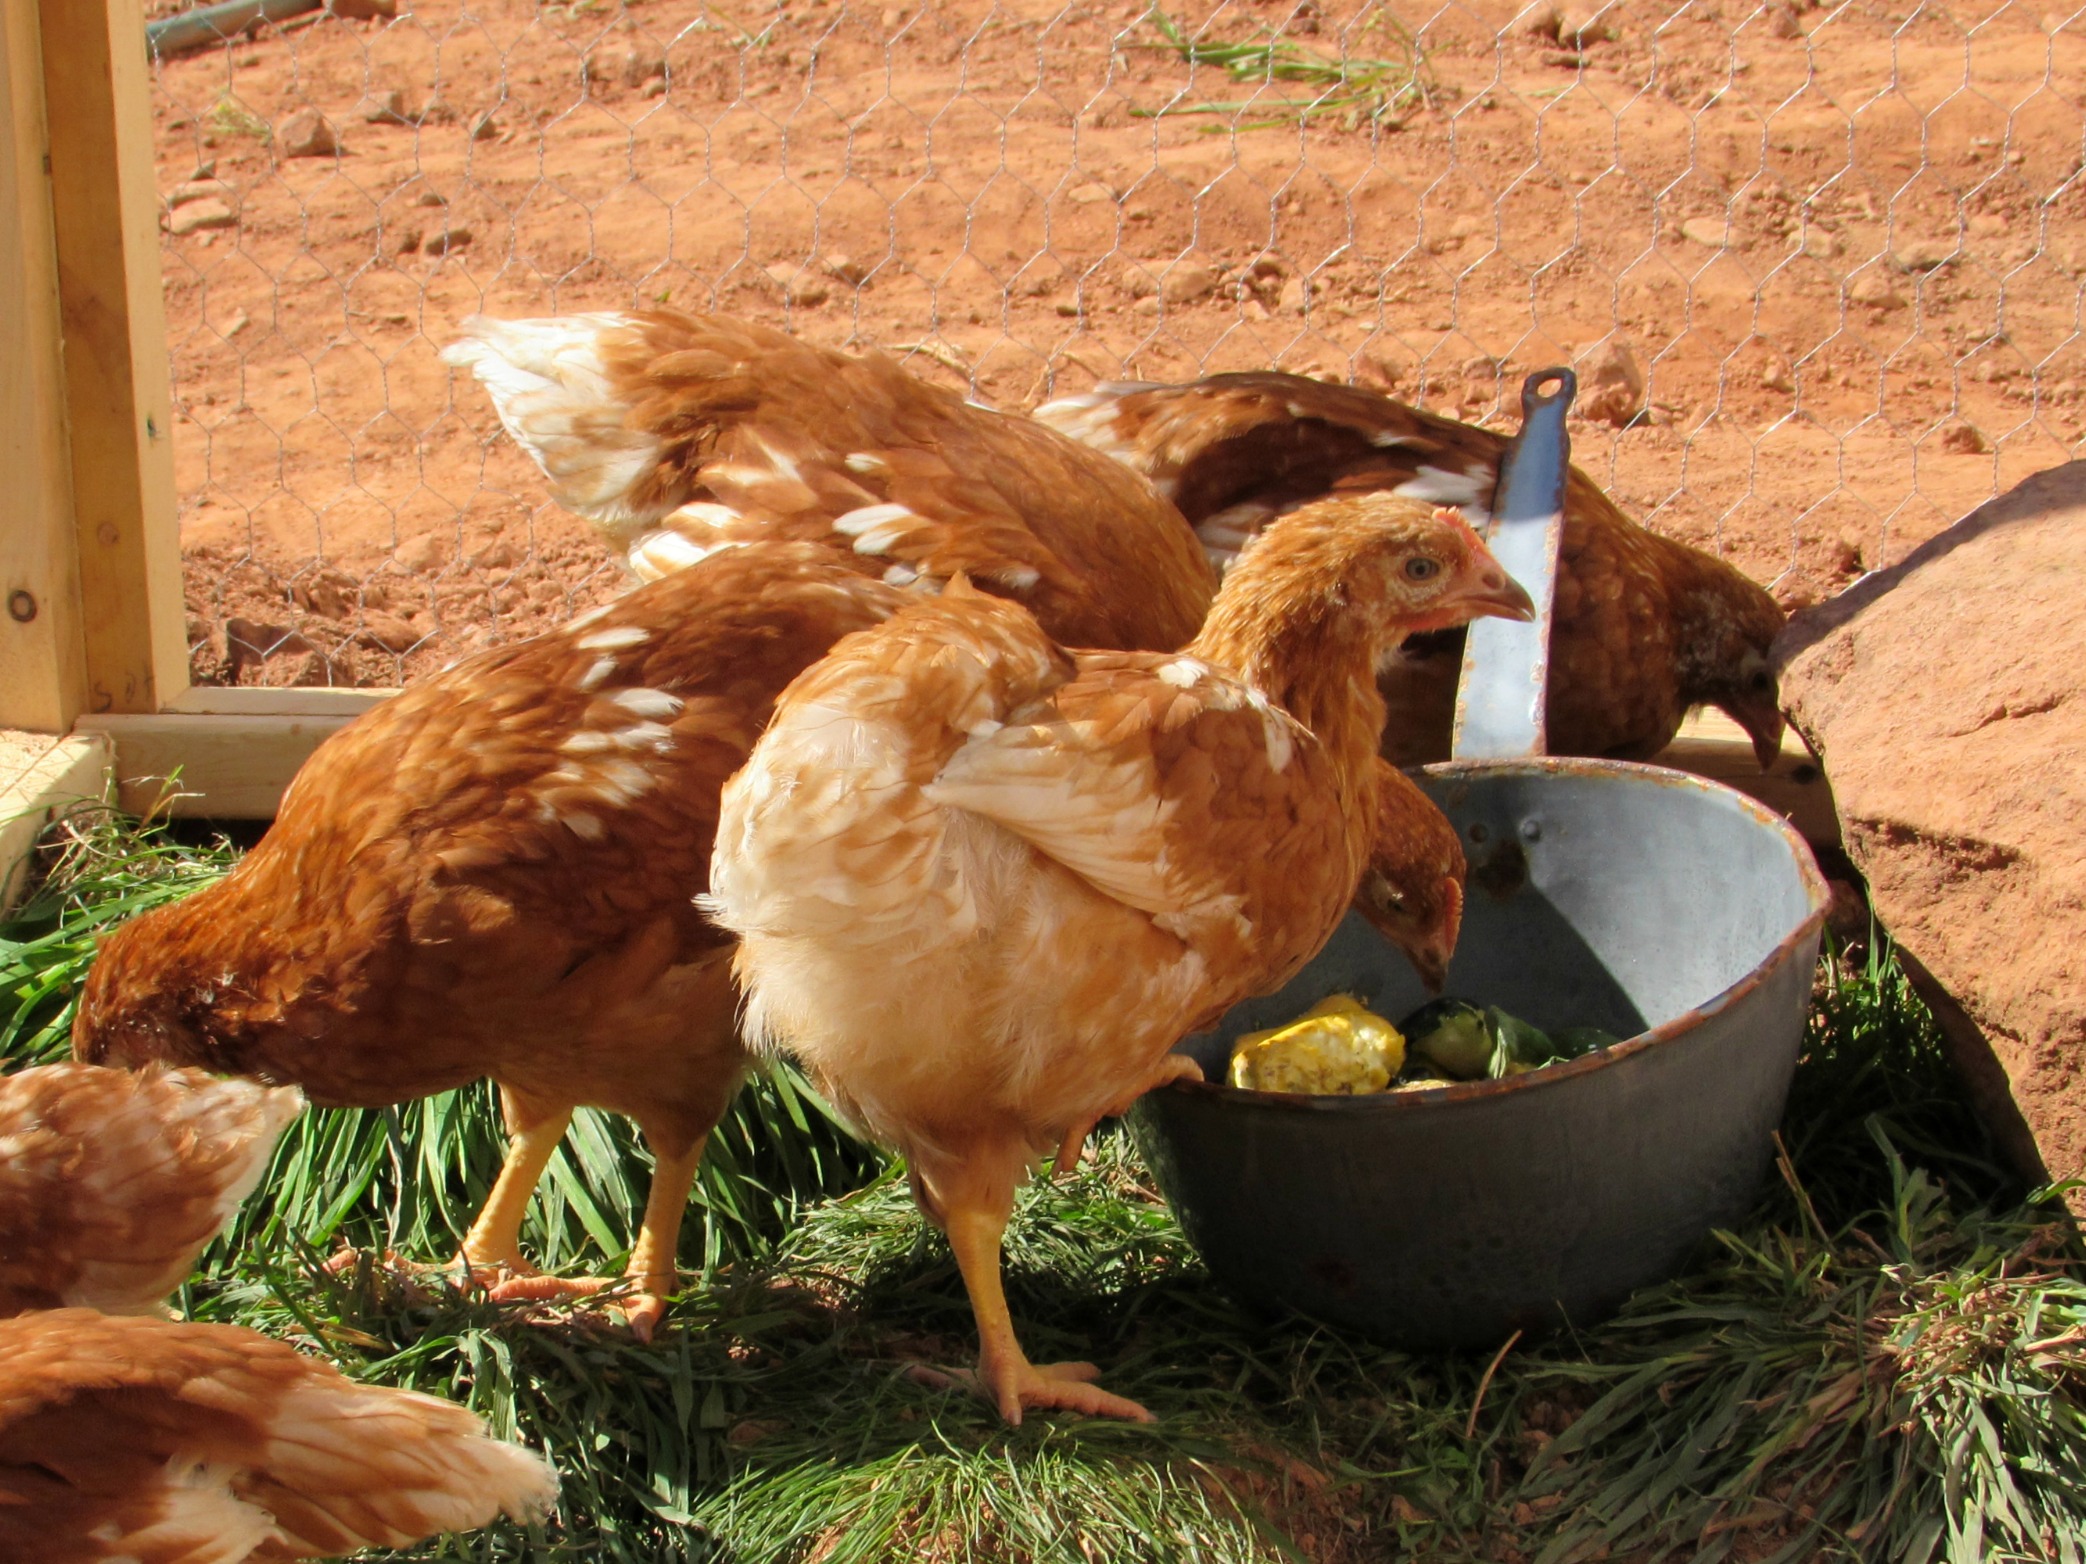
Vanessa then dug up a few patches of grass and replanted it into the run. They’ll eat some of the grass and want to dig and scratch as well.

And there you go. The only thing left was to introduce the girls into their new home.
Then we realized they didn’t have a ramp to get from the coop into the run and back.

So with the last of the scraps I had around, we quickly assembled the ramp and left the birds to explore.
So far, they seem to love the new environment. The chicks may have been cute but to be honest, I’m happy to get them out of our house and frankly, I think they’re just as happy to get out of their cramped brooder.

So I think we met our objective: for just over a hundred bucks we’ve built a great reclaimed-wood chicken coop. Even the two enamel pots we use to bring the kitchen scraps to the girls were found underneath the old rear-yard deck we demolished.
The one thing we’ll have to do before winter sets in is to insulate the coop. I framed it to allow for a quick installation of 1-1/2″ styrofoam insulation to the walls, ceiling and floor which we’ll do when we can afford it. But we’ve learned that chickens are tough birds and will handle our cold winters with relative ease.
Next year, when we build Chicken Coop 2.0, we’ll likely move this one to the back and use it for the meat chickens we plan on having – or perhaps a small coop we use when introducing new birds to our flock. Either way, it turned out better than we hoped for and we’ll find a good use for it!
Now we just wait for eggs.
It was bound to happen sooner or later.
We’ve had our first letdown on our old island farm. And it came in the form of a disease called “late blight”.
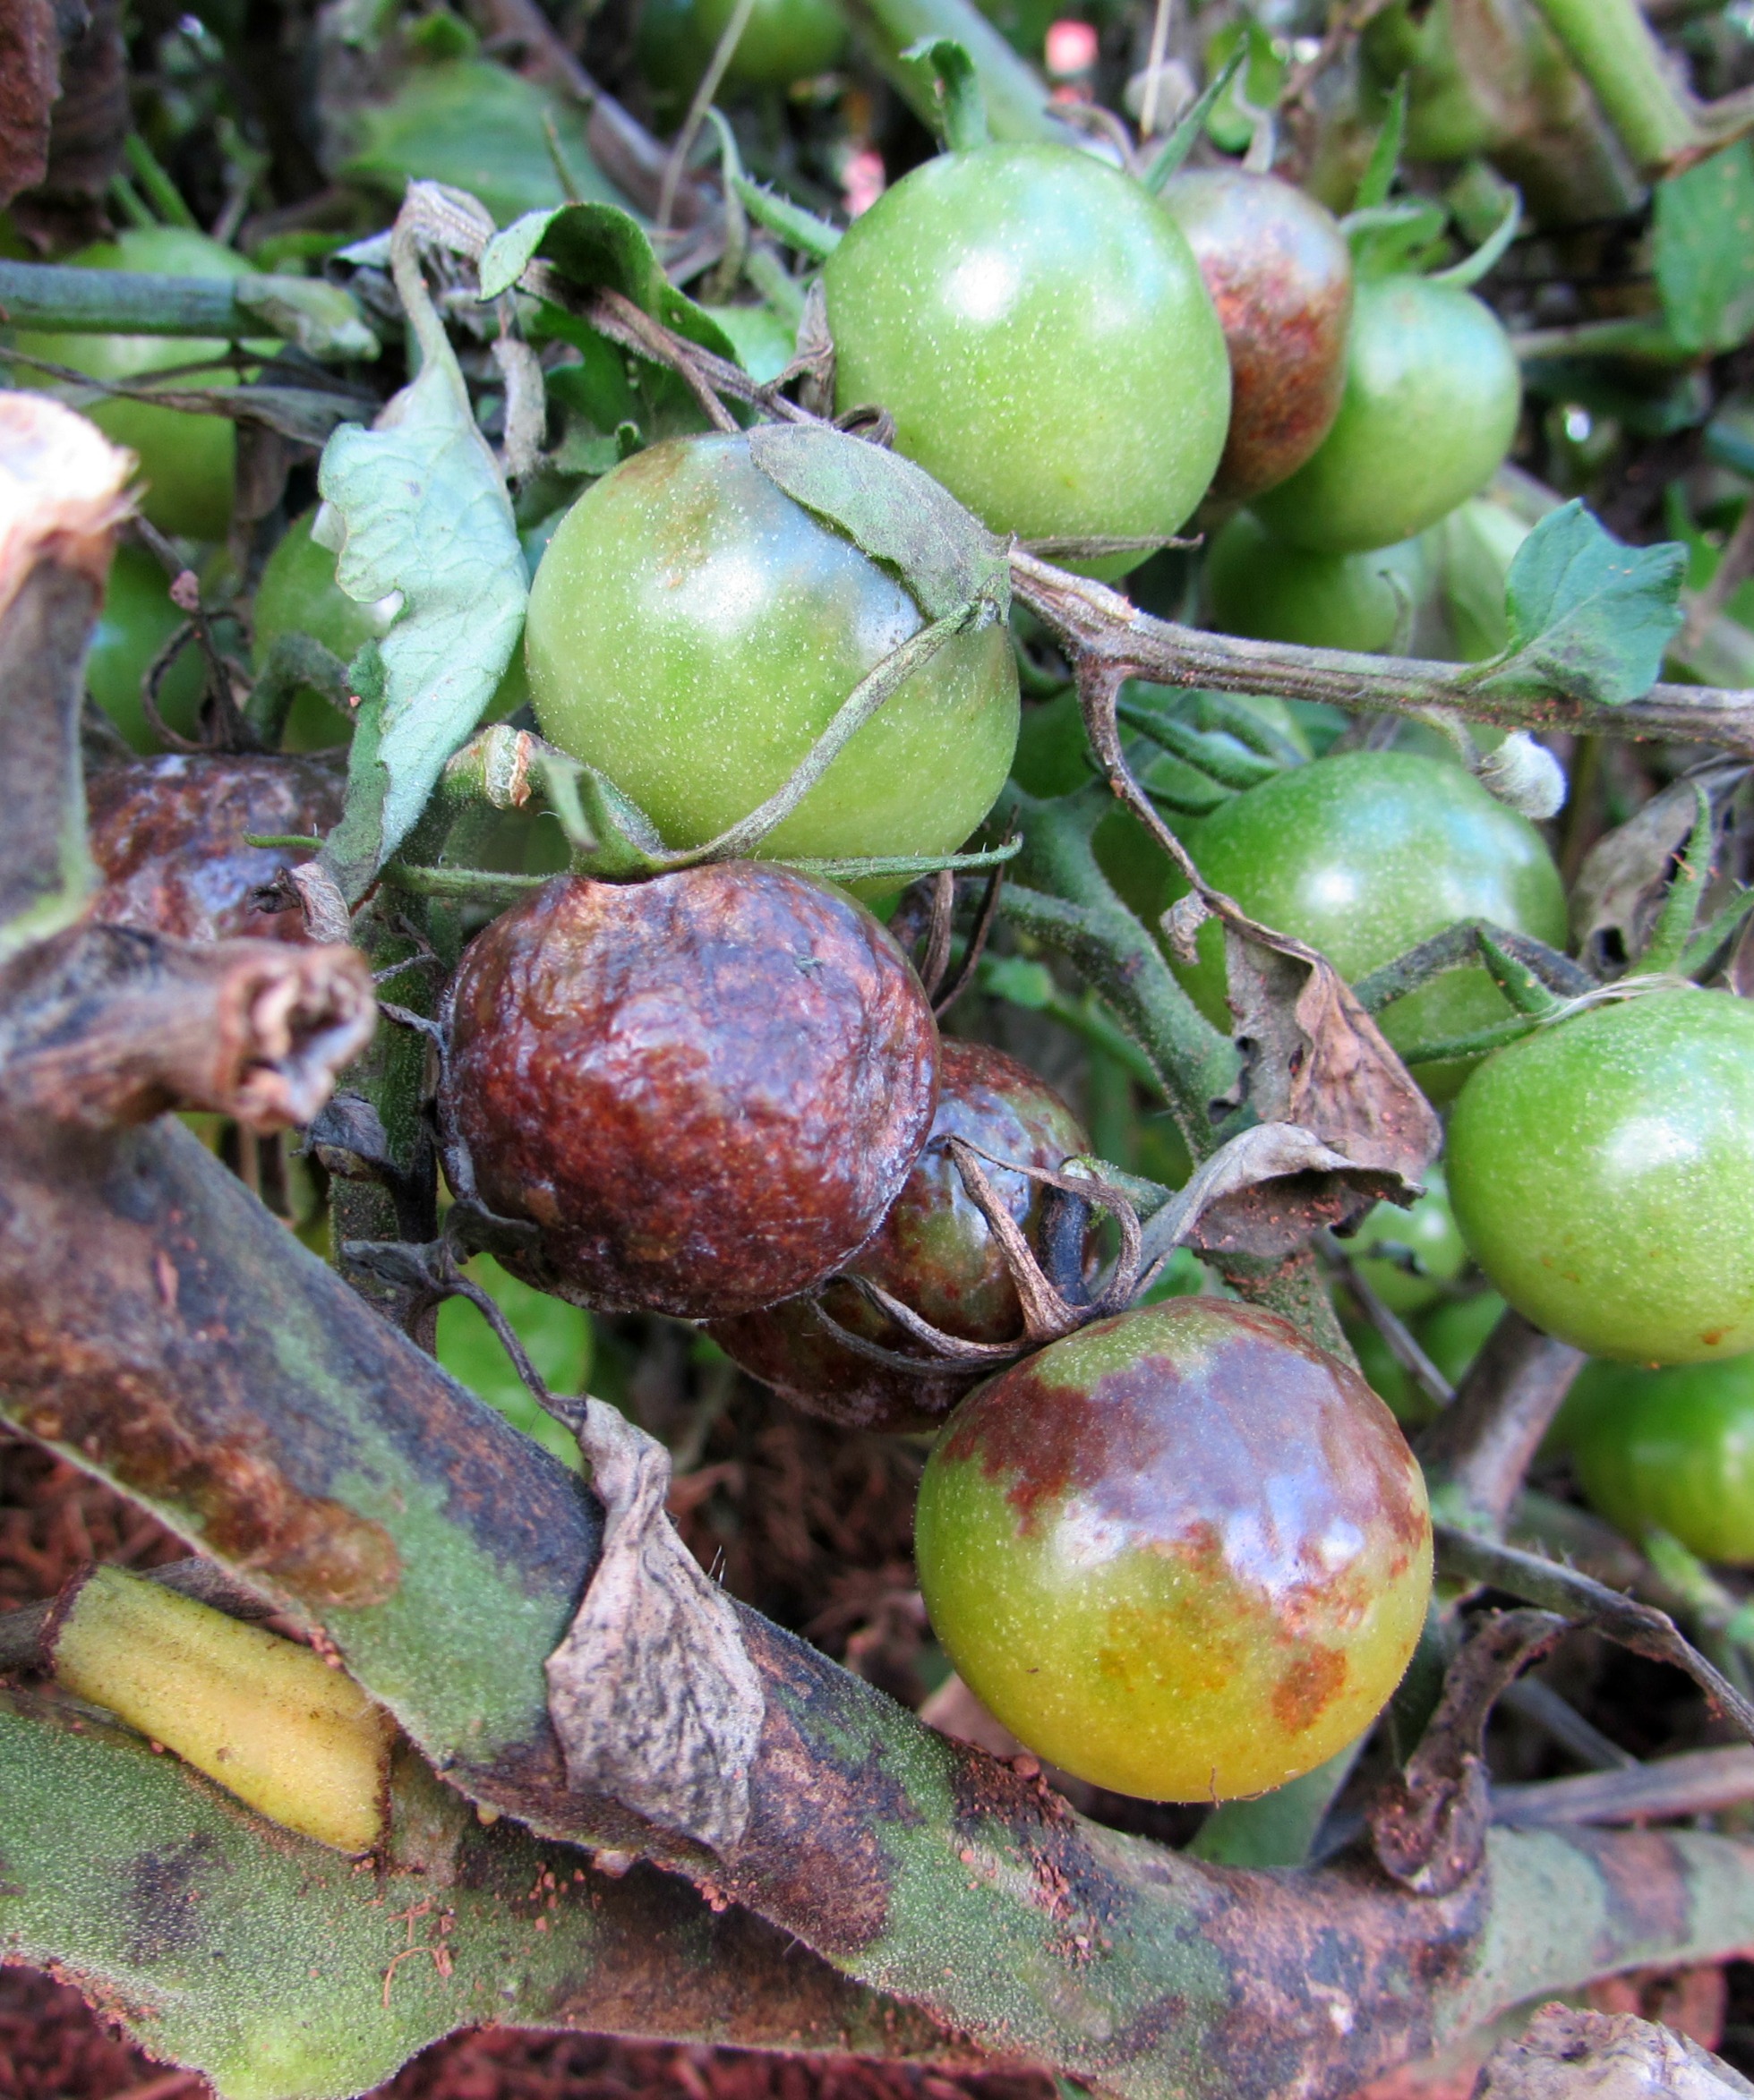
Sadly, once infected, the affected plants (in our case, tomatoes) are essentially doomed and destroying these plants is the only hope of preventing it from spreading to other plants.

This disease is famous as the cause of the Irish potato famine in the 1800’s. Phytophthora infestans is not a fungus or a bacterium or a virus. It belongs to a group of organisms called “protists”, although they are still commonly referred to as “fungi”.

On tomato, the first symptom on plants is often a brown/black lesion on the stem. Leaves develop large brown/black blotches, often starting at leaf margins. In humid weather and in early mornings, a fuzzy mould can often be seen on the underside of the brown/black blotches or on the stem lesions.

On tomato fruit, infection causes a brown/black, leathery rot. It may also become soft and mushy if invaded by secondary organisms.
In cool, wet or humid weather the pathogen produces structures called “sporangia”. These sporangia can travel up to 20 kilometers in wind or wind-blown rain. Rain-spread sporangia can cause infection even in a garden where tomatoes or potatoes have not been grown before.
Potatoes are also very susceptible to late blight – hence the cause for concern when it is detected here in Prince Edward Island. Fortunately, our potatoes seem to have come away unscathed. We’ve been enjoying new potatoes daily for a couple of weeks and we’re ready for our big harvest for cold-storage this weekend.
We first heard of a blight-outbreak in our area on the local news. It was just a few days later when we started seeing the signs of infection on our own tomatoes. And once it started, everything went downhill quickly.
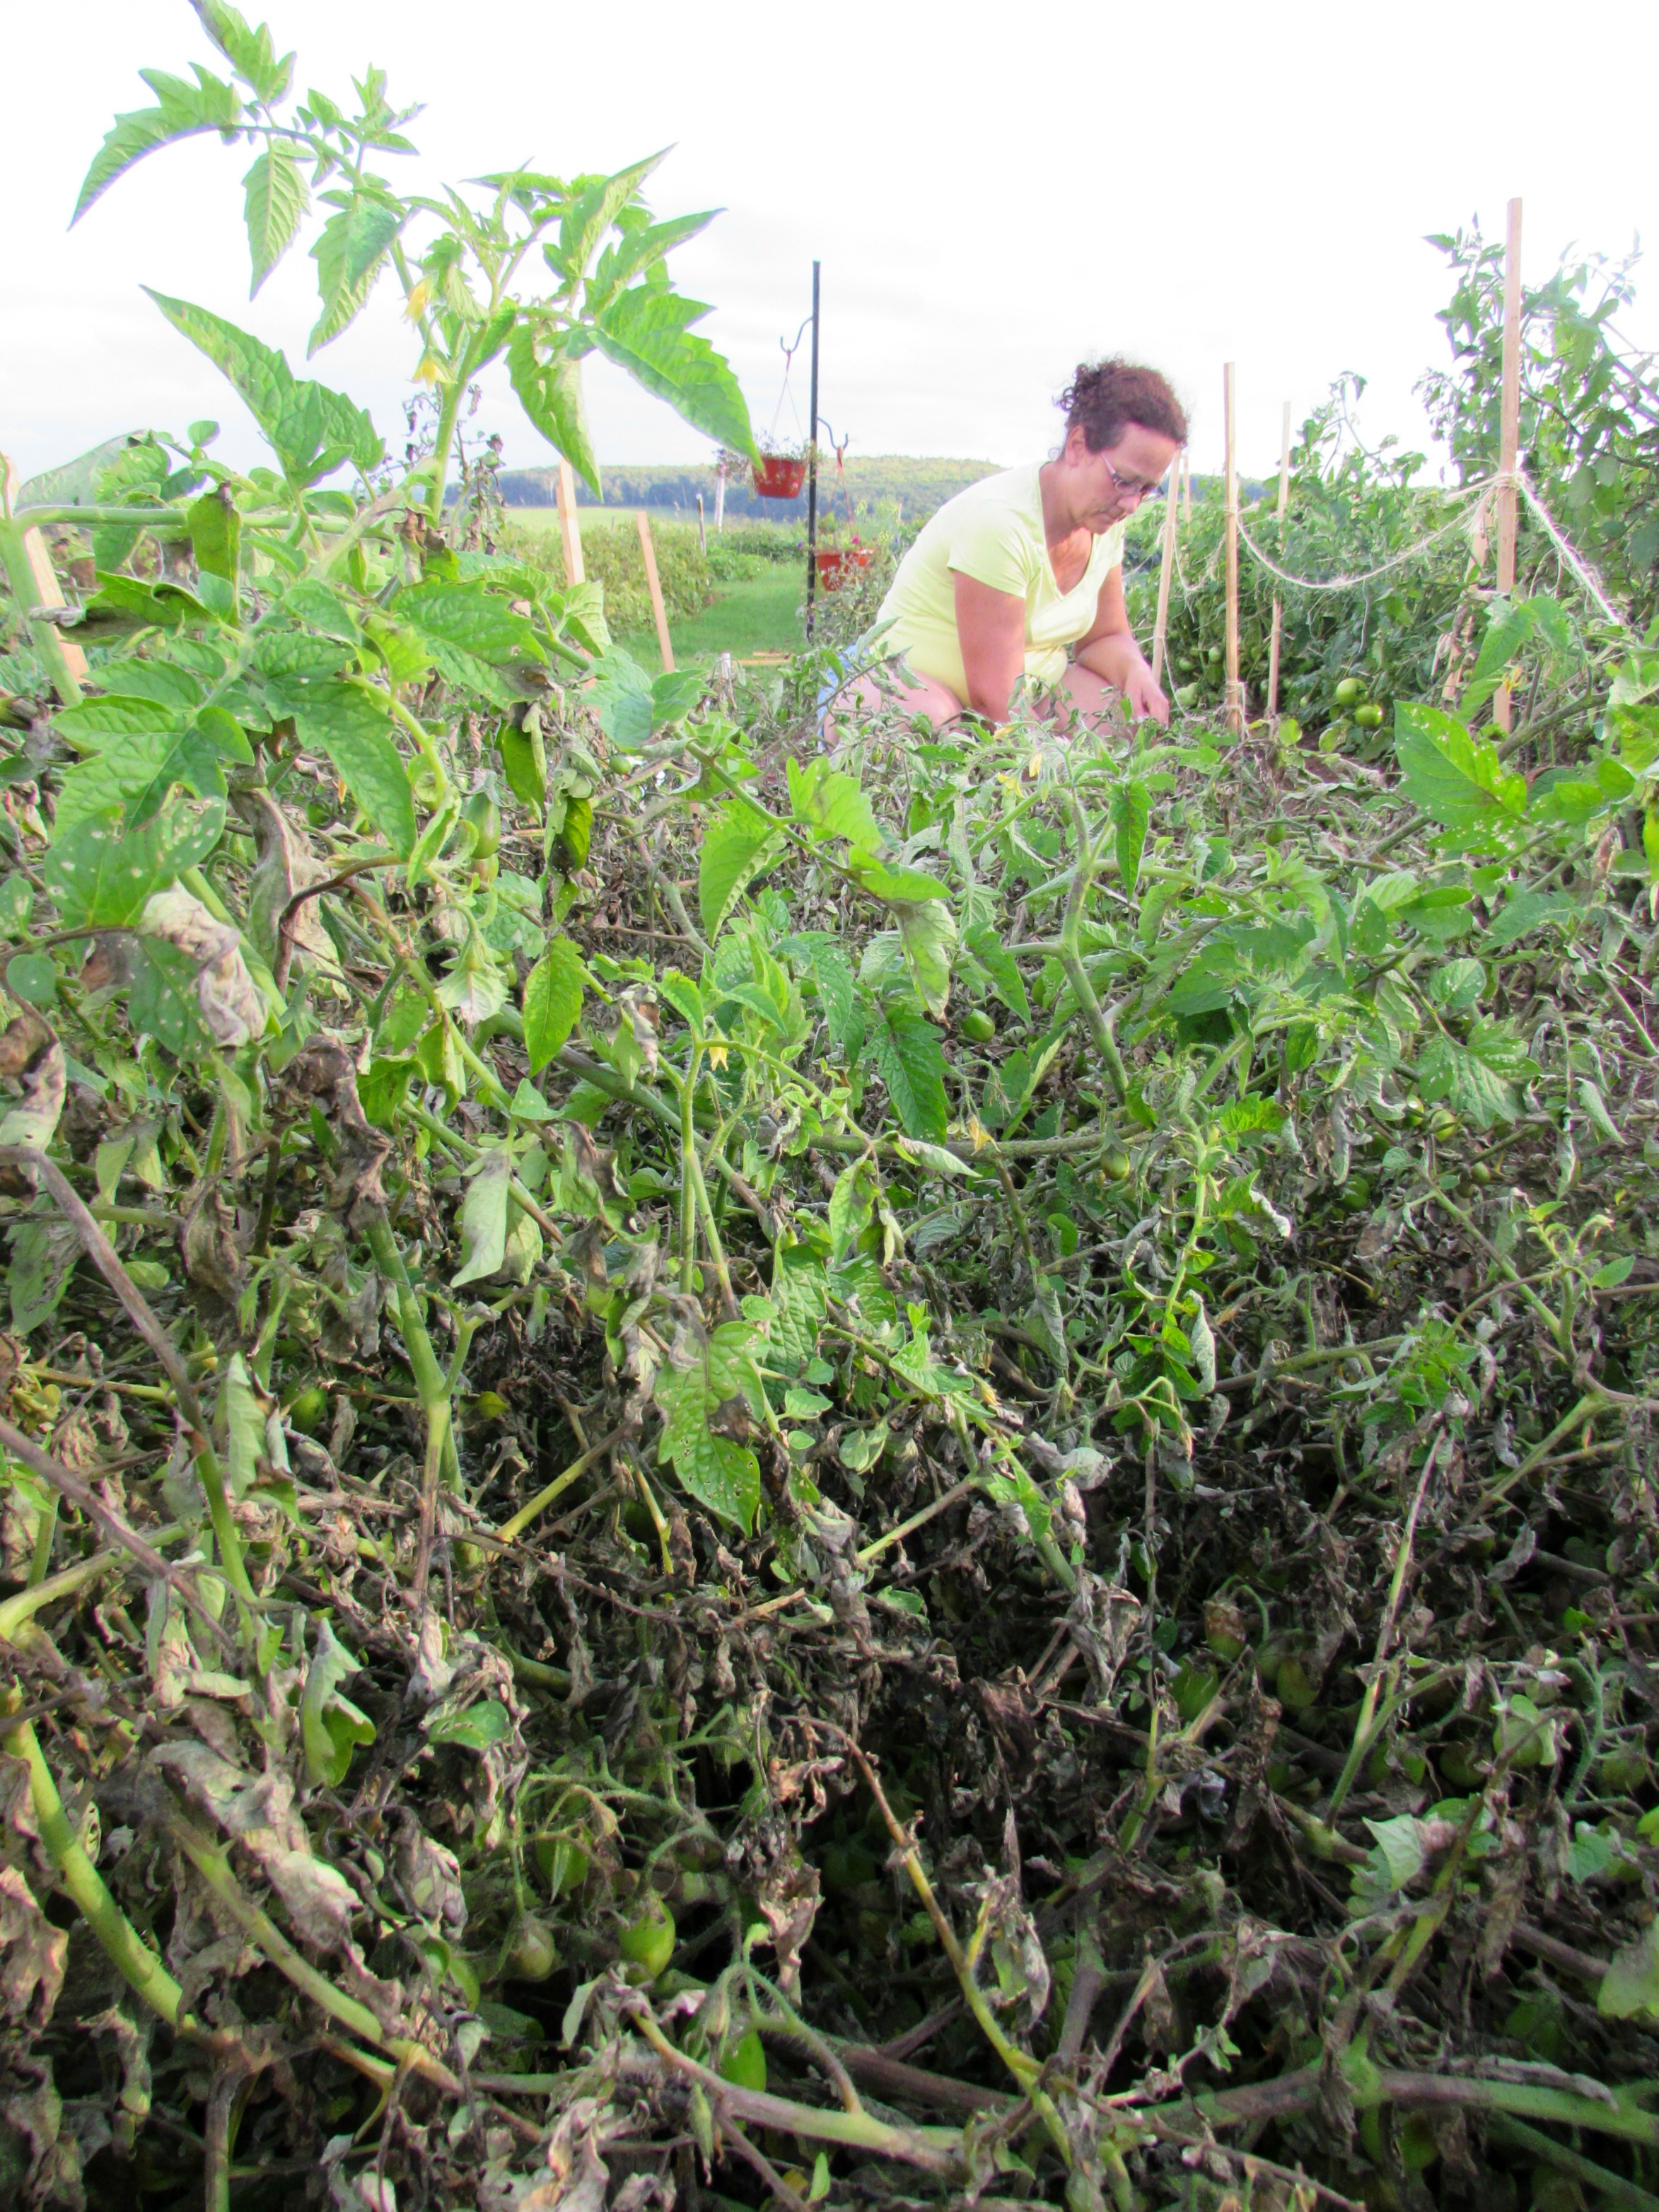
With the onset of the disease, we moved to remove the plants and bag them for disposal. It’s strongly recommended that you NOT compost the affected plants as the organisms may not die in the composting process. Burying, burning or sending the plants to the landfill is the best way to rid your garden of the active problem.
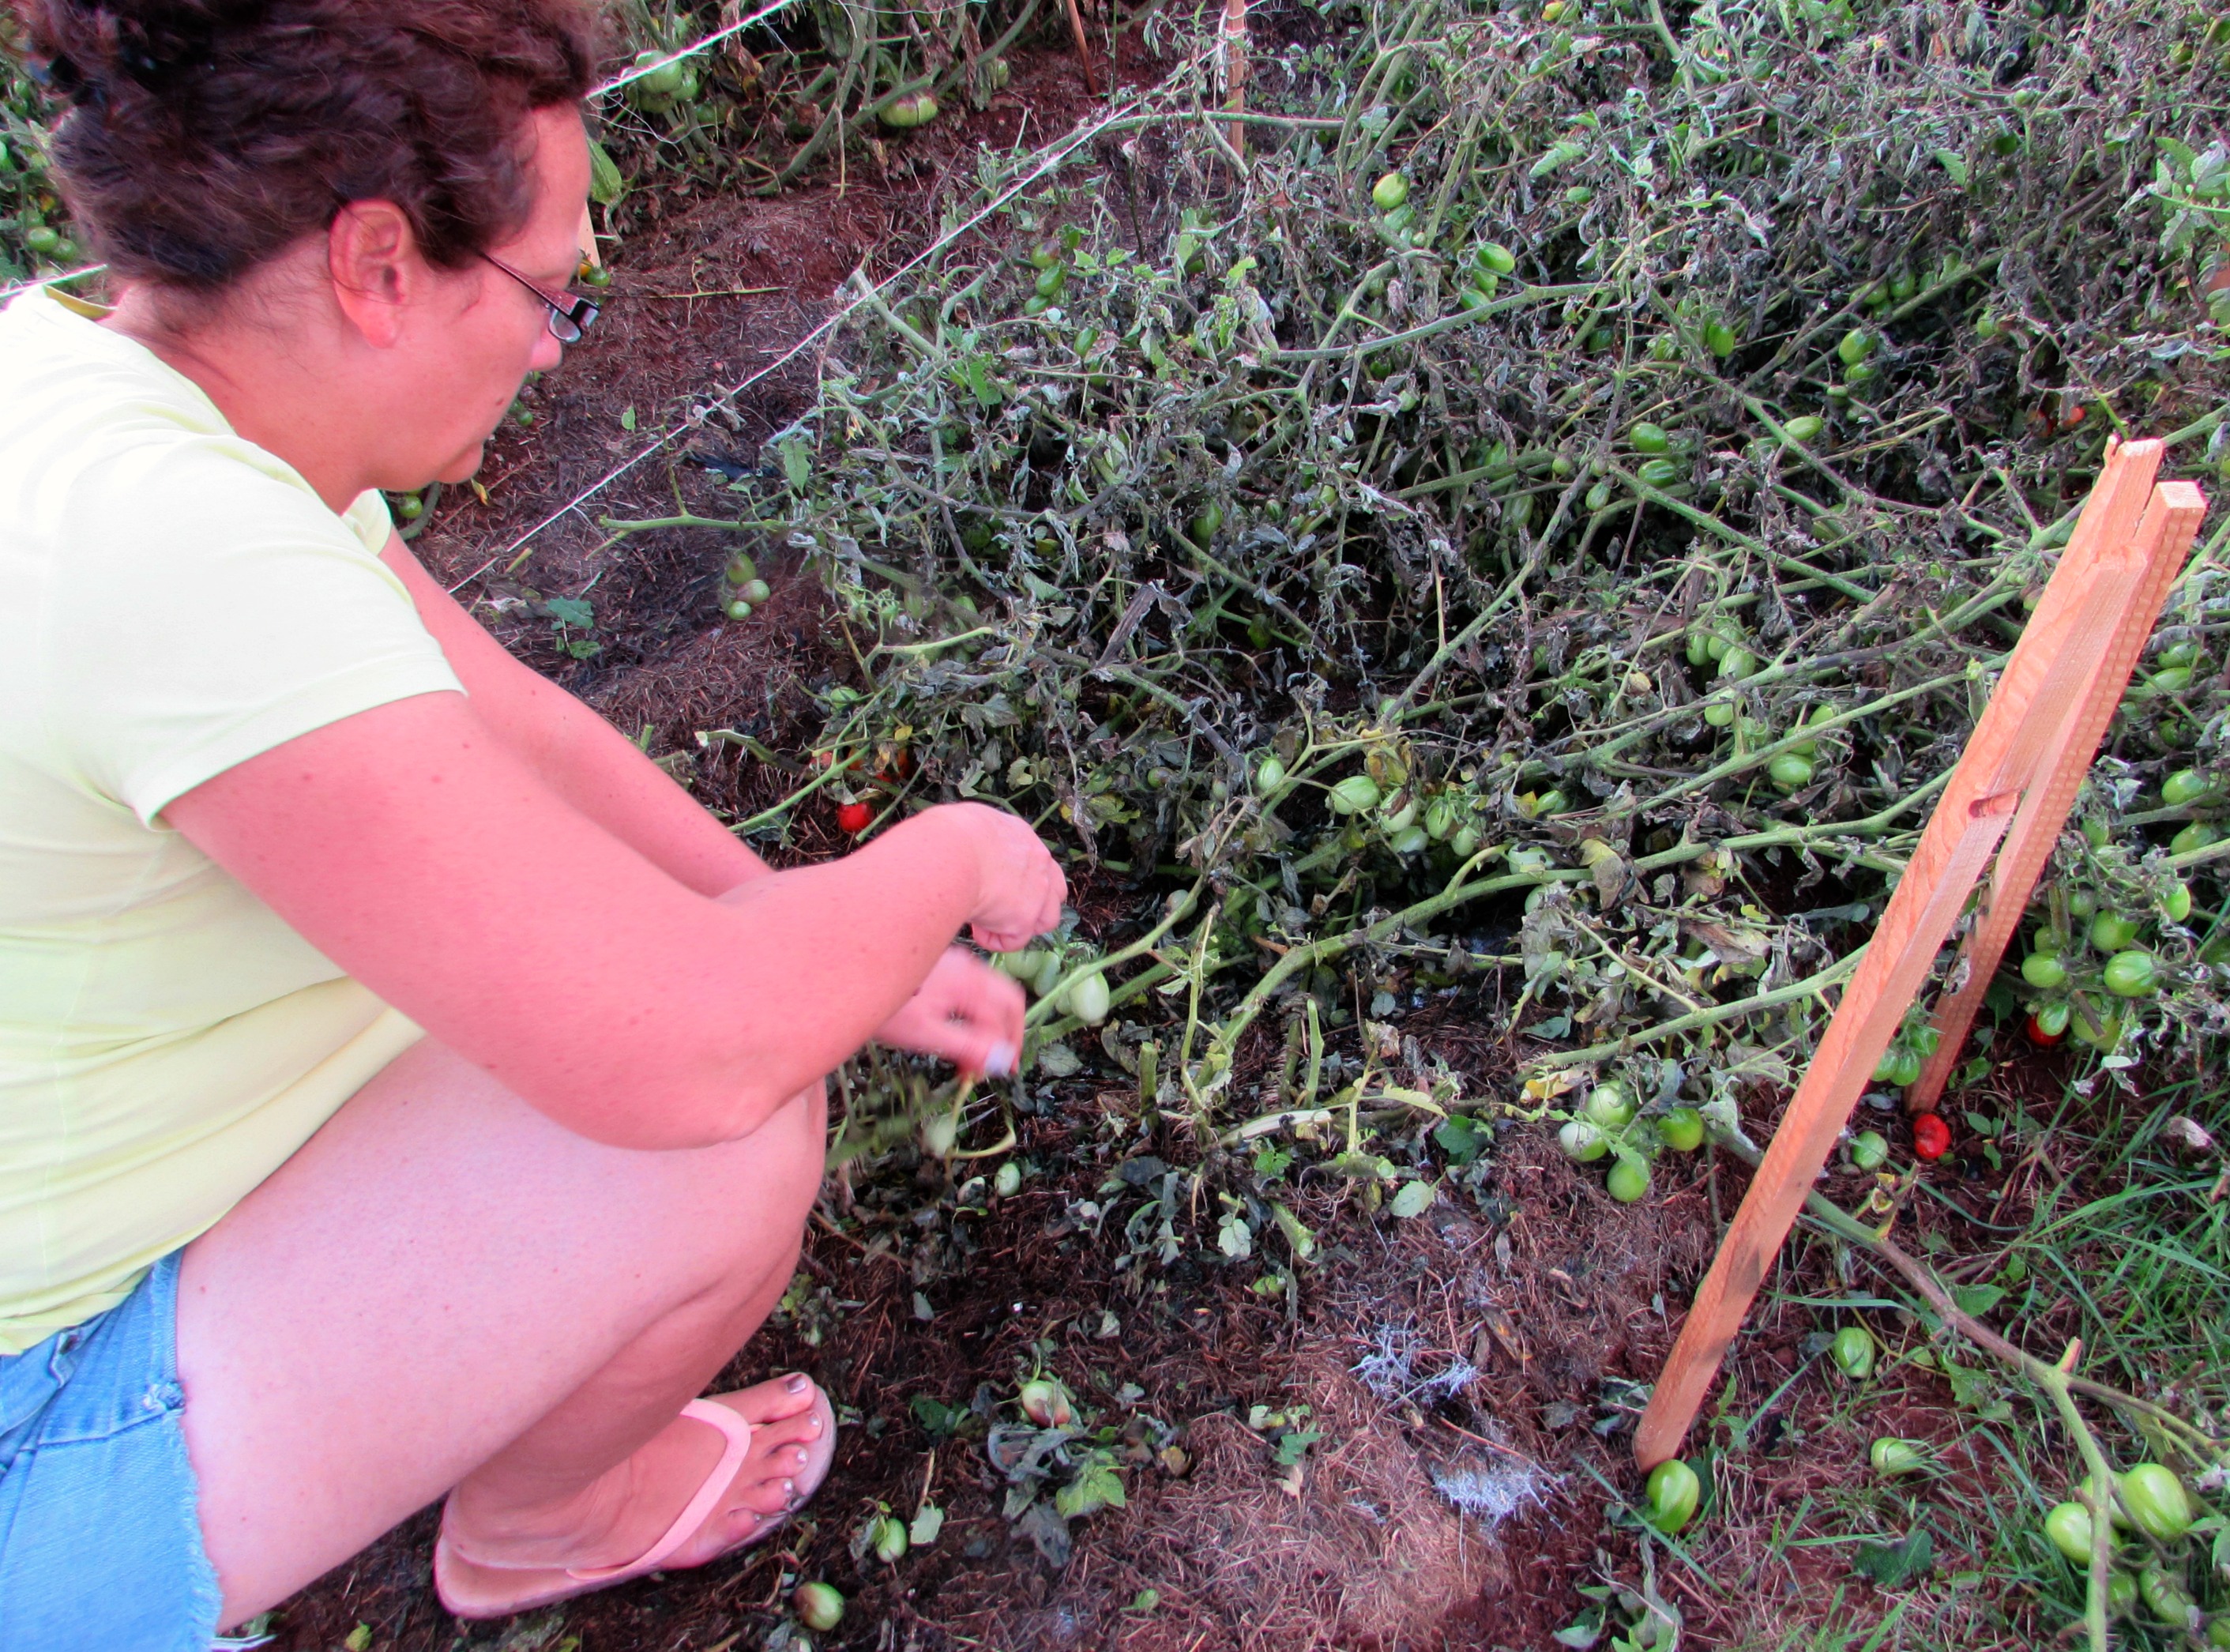
Although the plants were dying, we could still use the green tomatoes if we acted quickly. Often with late blight, even green tomatoes brought in the house to ripen may still rot anyway. In wet weather, green fruit may have been infected already, or be carrying spores on the surface. As the fruit ripens, rot develops.

Some gardeners report that washing green fruit in soap and water after picking, or dipping green fruit in a 10% bleach solution (1 part household bleach to 9 parts water) followed by a soap and water wash, reduces fruit rot during ripening. We didn’t take any special measures to allow the tomatoes to ripen – so we did lose quite a lot to rot, but we still enjoyed a few fresh tomato sandwiches in the meantime.

So with the glut of green tomatoes, we spent a couple of days making a few different preserves – Salsa Verde, Green Tomato and Pineapple Chutney and Piccalilli. I’ll be sharing some of these ideas in future posts, but today, it’s all about Green Tomato Chow.
On Prince Edward Island, these firm, under-ripe green tomatoes are transformed into a tangy-sweet condiment that is often served alongside salt cod cakes. I’ve had Green Tomato Chow (or Chow Chow, or Yum Yum, depending on your upbringing) on a couple of occasions since moving to the island. Most recently with crab cakes from the Blue Mussel Cafe in North Rustico. Think of it as a relish, to be served alongside seafood, pork, sausages or even hamburgers.
At any rate, it’s a great way to use up some of your end-of-season green tomatoes – whether by choice or by….blight.
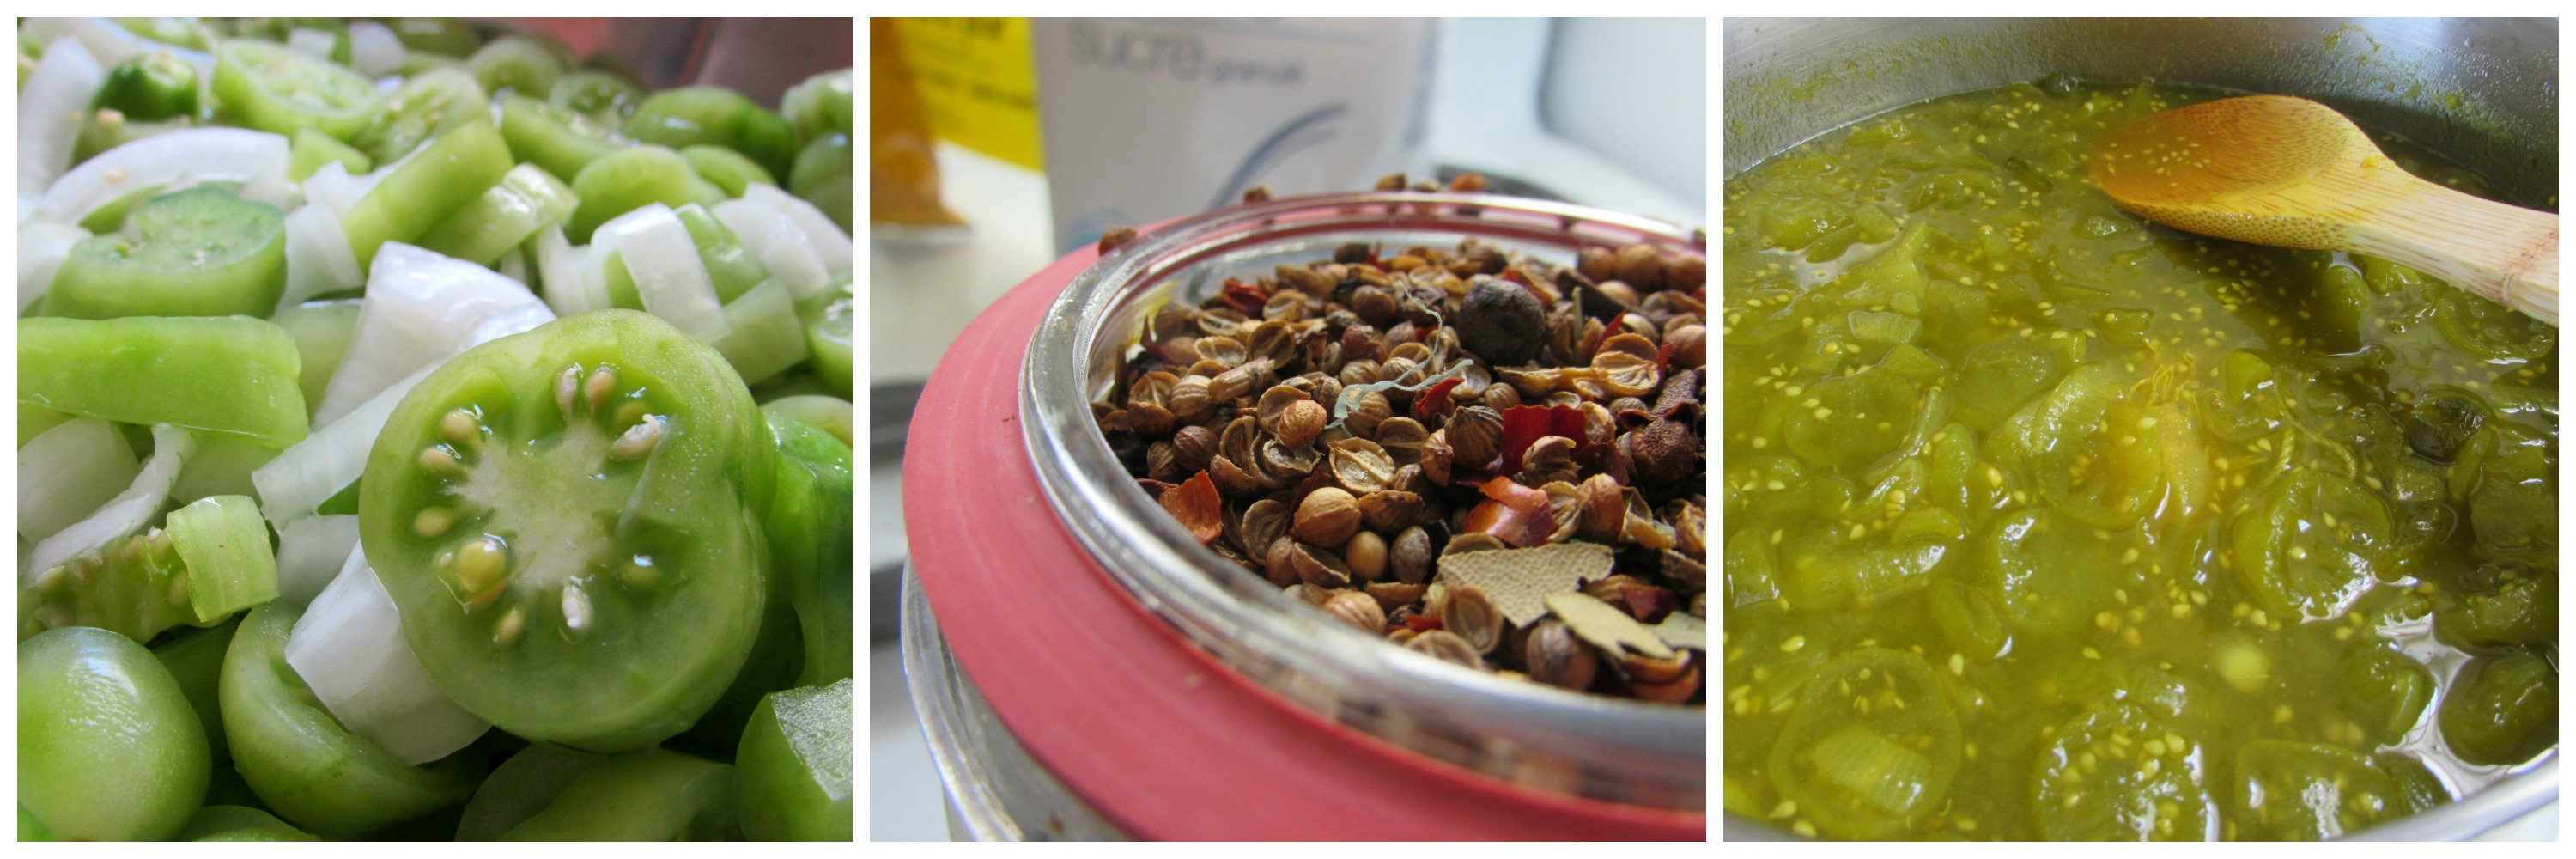
GREEN TOMATO CHOW
Layer tomatoes and onion with salt in large pot. Cover and let stand on counter overnight. Drain. Add the following ingredients to the tomato mixture in pot.
Heat and stir until sugar dissolves. Bring to a boil then reduce to simmer for two hours, stirring occasionally. More turmeric can be added for color and more sugar can be added for taste.
For canning, pour into hot sterilized jars leaving 1/4″ headspace. Seal and process for 10 minutes in hot water bath. Makes about 4 pints.
So not all was lost. Although our first season growing a variety of tomatoes was a bit of a bust, we have learned a lot. We lost about 90% of the tomatoes we planted. One variety we chose is labelled as blight-resistant, and these “Mountain Merit” tomatoes are chugging along nicely in their beds. So it seems we’ll still be enjoying some red tomatoes after all.
This Chow recipe was inspired by “Company’s Coming – Preserves” by Jean Pare.
